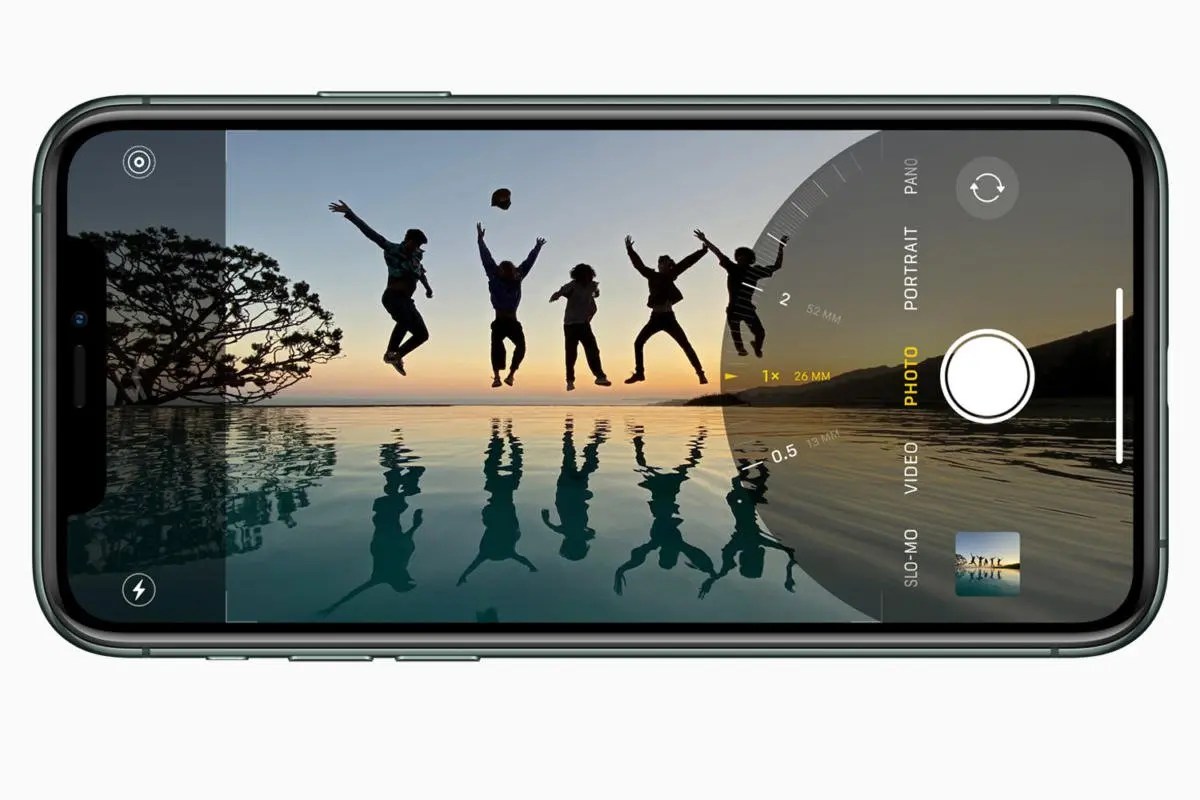
How To Shoot Perfectly Exposed HDR Photos On Your iPhone
In this article, we explain what the HDR iPhone Camera means and how to shoot perfectly exposed HDR Photos on your iPhone. Click to read more.
Author:Daniel BarrettMay 30, 2022152.7K Shares2M Views
What is the HDR meaning in your iPhoneCamera app? When should you use the HDR iPhone camera feature? And how does HDR help you take better photos in tricky light conditions? In this tutorial, we answer all your iPhone HDR questions. And you’ll discover how to use HDR to shoot perfectly exposed photos with your iPhone.
What Does HDR Mean?
HDR stands for High Dynamic Range. It works to create perfectly lit photos with more color and detail in both the bright and dark areas.
Before we get to the technical aspects, let’s find out what high dynamic range is. Don’t let the fancy term confuse you. It’s a technique for capturing the lightest and the darkest tones of your subject.
Every camera has a different level of dynamic range. This is its ability to capture shadows and highlights. Some devices are better at catching highlights and shadows than others. But no matter how high-techyour equipment may be, it’s bound to struggle when the lighting is tricky.
That’s where HDR photography comes in. It lets you shoot with different exposures. You can capture a broad spectrum of lighting to get rich highlights and dark shadows.
What Is HDR On iPhone Camera?
So, how exactly does the HDR iPhone camera feature work? When you use HDR, the camera captures several different exposures at different brightnesses. The camera then blends the best parts of these exposures to create a single well-lit image.
As a result, the dynamic range of the photo increases. This means you’ll see more color and detail in both the shadows and the highlights.
While this process might sound complex, the good newsis that the iPhone does it all for you. All you need to do is switch on HDR and take a photo. The camera will shoot and combine the three exposures to create your HDR image.
HDR vs. Non-HDR
It can be difficult to tell apart HDR photos from non-HDR ones if you don’t know what to look for. But generally, HDR images have more vivid colors.
To help you visualize the difference between HDR and non-HDR, it would be best to compare them side by side.
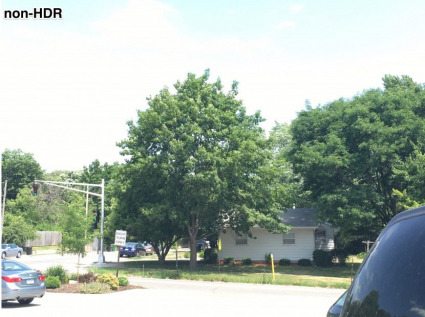
The image below is a non-HDR image. As you notice, the highlights are too bright, and the shadows are too dark. Even when you try to edit this, you won’t bring out the details in the image.

Now let’s look at the image taken with HDR. It’s the same picture. Except this time you see more detail in the highlights as well as the shadows.
The difference between HDR vs. non-HDR is subtle in most situations. But HDR helps you achieve the best exposure. And you keep the details even when the lighting is challenging.
But what about if you want to have both HDR and non-HDR photos? Then turn on Keep Normal Photo in Settings under Camera. The function is useful to have, especially if your HDR version doesn’t look appealing.
Also read:10 Best Funny Photo Editing iPhone Apps
When To Use iPhone HDR
HDR is best used in high-contrast scenes. Here are some examples of situations where you should use HDR:
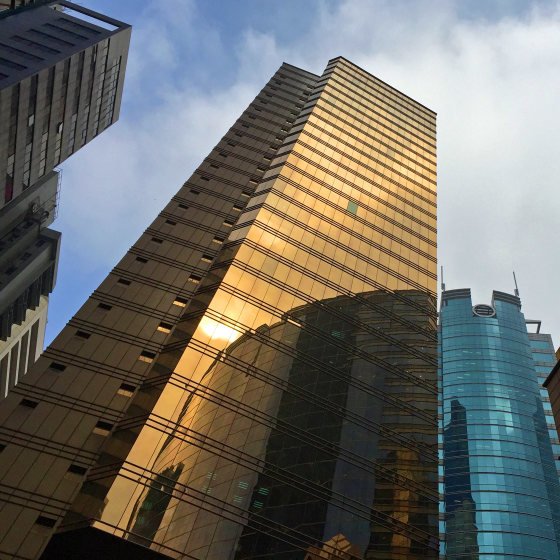
Landscapes
The sky and the land have a lot of contrast between them. HDR is capable of capturing the light of the sky and the dark of the land in one shot that doesn’t make either the land too dark or the sky overexposed.
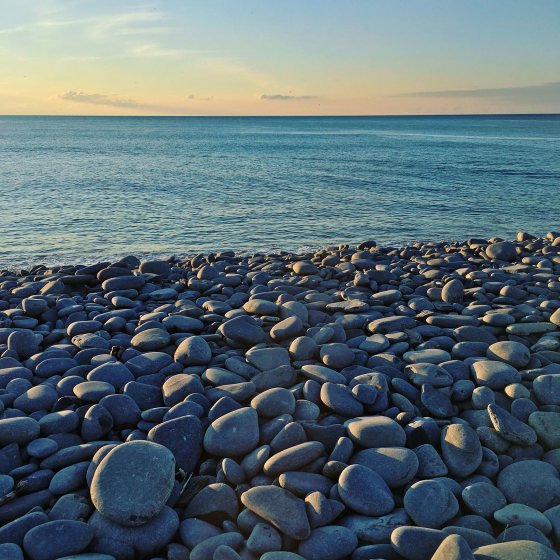
Objects in Direct Sunlight
Sunlight casts shadows creating a wider range of contrast in a photo. Using HDR brings balance to all the elements, both light and shadow.
Scenes with Backlighting
The same principle as above applies to the reverse situation. If you have a scene that’s bright in the background, HDR will lighten the foreground without making it look overexposed and washed out.
HDR adds details to the shadows and the highlights, but sometimes you don’t want that. High contrast images, with really deep darks and shining brights, can be striking and beautiful.
When Not To Use iPhone HDR
Silhouettes
When you want that stark outline to really stand out, turn your HDR off.
Dark as a backdrop
If you’ve got a dark room behind a brightly lit subject, you may not want to see details back there. With HDR off, nobody ever needs to know about the mess the shadows are hiding.
As a general rule, use HDR if you’re struggling to get a good, balanced exposure. If the shadows appear too dark or the highlights are too bright, switch on HDR in the Camera app.
How To Take An HDR Photo With Your iPhone Camera
Now that you understand what HDR is, and when to use it, let’s look at how to shoot HDR photos in the native Camera app.
Before you open the Camera app, you need to check your HDR settings in the Settings app.
- Go to Settings > Camera. Then ensure Smart HDR (Auto HDR on older iPhones) is switched off. If Smart HDR is on, you won’t have the HDR option in the Camera app.
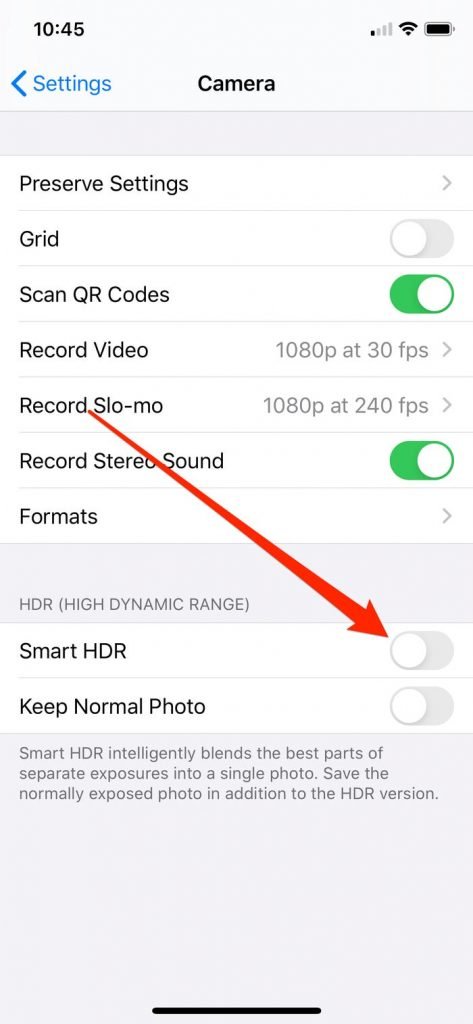
- Also, ensure Keep Normal Photo is switched on. This tells your iPhone to save a non-HDR version of the photo too.
- Close the Settings app, then open the Camera app.
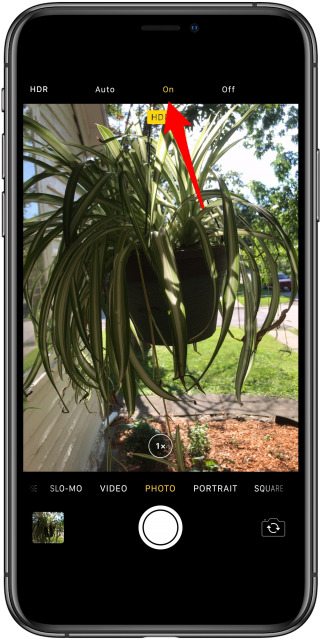
- Ensure the HDR icon at the top of the screen is switched on (the icon appears without a line through it when it’s on).
- On some older iPhones, you can set HDR to Auto, On or Off. If you have these options, choose On.
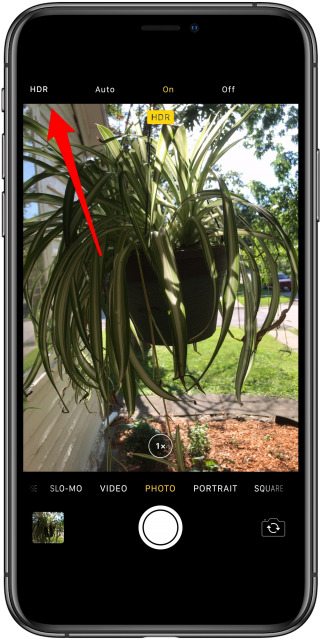
When you switch on HDR, your iPhone automatically captures HDR photos whenever you press the shutter button.
Note:It takes slightly longer to capture an HDR photo than a regular one. This is because the camera has to capture three images at different exposures and combine them into a single photo.
Because of the extra time required to take an HDR photo, it’s more likely that you’ll move the iPhone slightly during the capture. Any movement would result in a blurred photo caused by camera shake.
For this reason, it’s important to hold your iPhone very still, or mount your phone on a tripod while taking HDR pictures.
How to Edit HDR iPhone Photos
HDR doesn’t always give us the results that we want. So if you’re not satisfied with the photo, you can do minor retouching to make it look better.
You can use your native iPhone editing app to make some changes to your photos. The main elements that make HDR images distinct are exposure and contrast. So those are the two settings that you’d want to adjust.
All you have to do is tap the sliders until you achieve the look that you’re after.
If you want more control over your photos, you can use third-party editing apps, instead. Adobe Lightroom and VSCO are two of the best photos app you have for your phone. They offer a whole lot more than letting you change the exposure and contrast.
Using Lightroom or VSCO is almost the same as using your iPhone editor. Like your native app, they let you use sliders to adjust settings. But they also have a lot of extra features that the iPhone editor doesn’t have.
They allow you to change different elements such as Highlight, Shadow and Fade for more vivid results. Apart from that, they also have filters which alter the colors in your image to add mood.
Remember not to go overboard with the editing. If you alter your image too much, you might end up with a noisy, pixelated picture. You don’t want that to happen, especially since you’re using JPEG format which isn’t meant for heavy retouching.
Which iPhones Have HDR Mode?
HDR on the iPhone has been around since the iPhone 4 and iOS 4.1. So it’s highly unlikely you’d have an iPhone without HDR:
- iPhone 4
- iPhone 5 and 5s
- iPhone 6 and 6 Plus
- iPhone 6s and 6s Plus
- iPhone SE
- iPhone 7and 7 Plus
- iPhone 8and 8 Plus
- iPhone X, XR, XS and XS Max
- iPhone 11, 11 Pro and Pro Max
- iPhone SE (second generation)
- iPhone 12
As far as software goes, if you’re running iOS 7, iOS 8, iOS 9, or iOS 10, iOS 11, iOS 12, iOS 13, and later, then I’m sure you’ll have no problem finding HDR mode in the camera app on iPhone.
HDR Camera App: 3rd-Party Apps for Taking HDR Photos
HDR mode on the iPhone has improved since its introduction, but many photographers still say it isn’t the best. For the average photo taker, HDR mode in the iPhone camera app is likely sufficient. However, if you want to step your HDR game up, there are plenty of alternative third-party apps you can use. Two of the top-rated apps for HDR are Pro HDR X ($1.99) and HDR for Free. If you love iPhone photography, it’s worth the small investment.
Conclusion
Now that you know HDR’s meaning and its capabilities, don’t be afraid to use it when you encounter tricky lighting. The subtle changes it creates in photos may not be easy to notice at first glance. But when you look at the fine details of your HDR iPhone photos, you’ll see how much you really need it.
Editor’s picks:

Daniel Barrett
Author
Daniel Barrett is a tech writer focusing on IoT, gadgets, software, and cryptocurrencies. With a keen interest in emerging technologies, Daniel offers expert analysis and commentary on industry trends. Follow him for authoritative insights into the latest tech innovations.
Latest Articles
Popular Articles