How to Fix iPhone 11 or 12 Stuck on Preparing to Transfer
This guide explains why your iPhone 11 or iPhone 12 is stuck on preparing to transfer, and how to fix the issue.
Author:Daniel BarrettAug 24, 202219.1K Shares454.8K Views
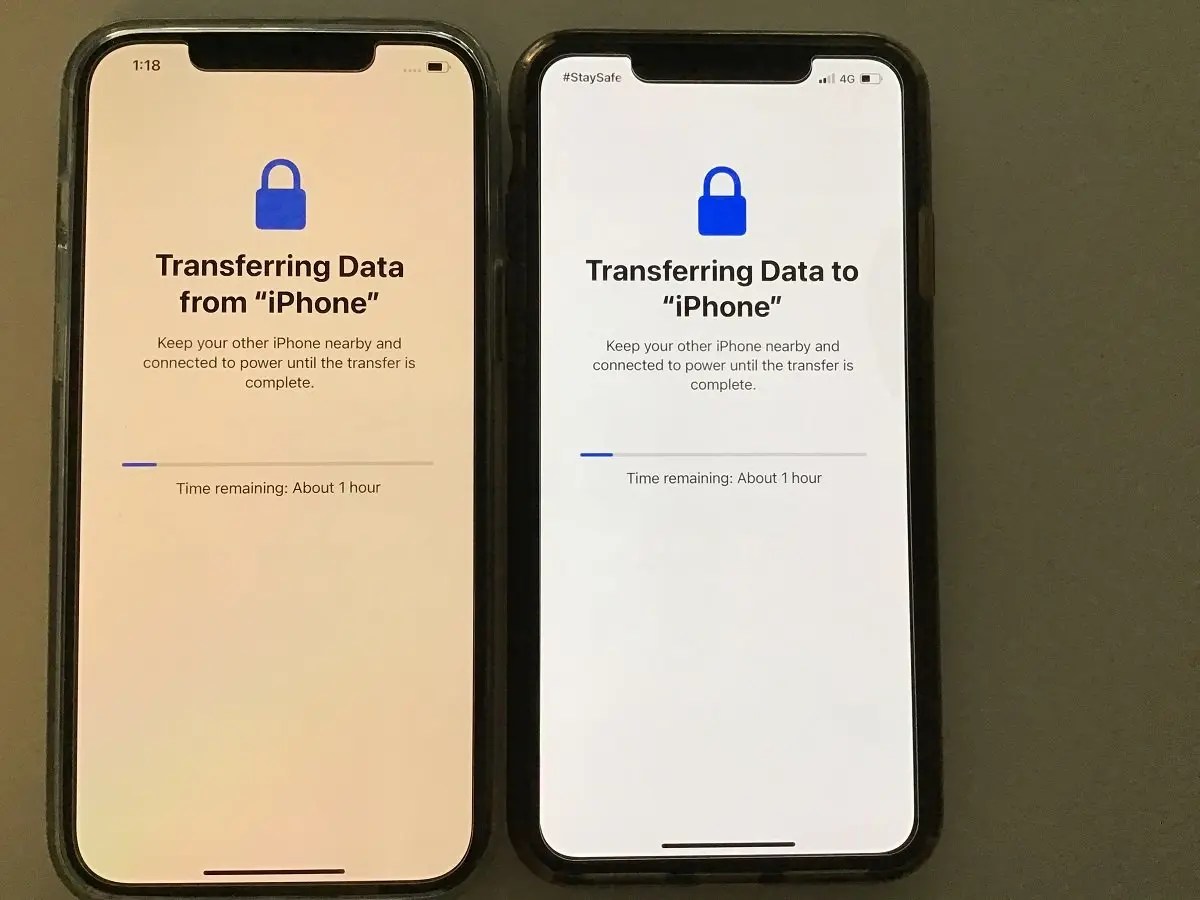
For the users who have switched to a new iPhone11 or the latest iPhone 12, the first thing that concerns them is how to transfer data from old iOS to the new phone.
Fortunately, Apple introduced a new feature – Quick Start that helps users to set up their new iDevice quickly using content from their old device. However, several users reported that when they tried to transfer the data from their old iPhone to the new one, their iPhone get stuck on preparing to transfer one too many times. While making the transition, you also have experienced problems setting up iPhone 11 or 12, or the device will not activate after the data transfer. This guide explains why your iPhone 11 or iPhone 12 is stuck on preparing to transfer, and how to fix the issue.
Common Fixes to iPhone 11 or iPhone 12 Quick Start Stuck on Preparing to Transfer
There are certain things you need to ensure to avoid iPhone 11 Quick Start stuck on preparing to transfer problem, which include:
Make Sure Both iPhones Run iOS 13.1 or Newer
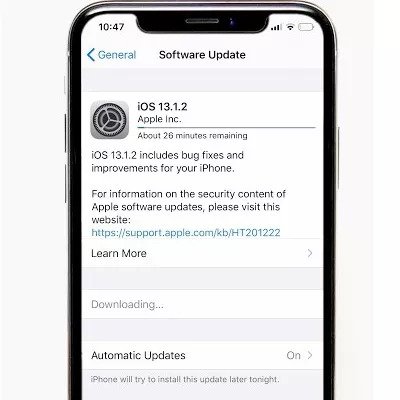
When facing setting up a new iPhone stuck on preparing to transfer issue, the first thing you need to do is ensure that both devices – the previous one and the new one are running iOS 13.1 or later. Quick Start provides the feature of using iPhone migration only if both iDevices are using iOS 13.1 or newer. Below is how you can ensure both of your iPhones run the required iOS version.
- On both iPhones, open the Settings app
- Open General >Software Update.
- If updates are available, then download & install right away.
Both iPhones Are Connected to The Same Wi-Fi Network
Transferring content from a previous iOS device to the new one using Quick Start requires both devices connected to the same Wi-Fi connection. Besides that, make sure to use a strong internet connection as you need to ensure that the connection never disconnects during the transfer process.
So, on both iPhones, go to Settings > Wi-Fi and ensure that both devices are connected to the same and reliable Wi-Fi network.
Keep Devices Near Each Other
Transferring data wirelessly using Quick Start requires you to keep your previous iOS device near your new iPhone throughout the transfer process. Otherwise, you could probably encounter iPhone stuck on preparing to transfer problem.
Reset Network Settings
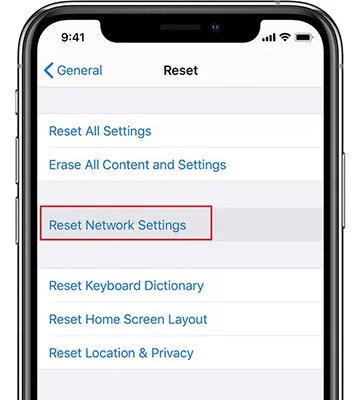
Even if ensuring all the above things don’t help you fix the problem, it’s time to reset network settings. The problem could be due to some unknown network issues. In such scenarios, simply resetting network settings comes quite in handy.
- On both iPhones, open the Settings app
- Open General > Reset
- Tap Reset Network Settings
Once resetting the network settings, connect both your devices to the same Wi-Fi connection. And try transferring content from your previous iOS device to the new iPhone using Quick Start and see if the problem goes now.
Quick Way to Fix iPhone 11 Or iPhone 12 Stuck on “Preparing to transfer”
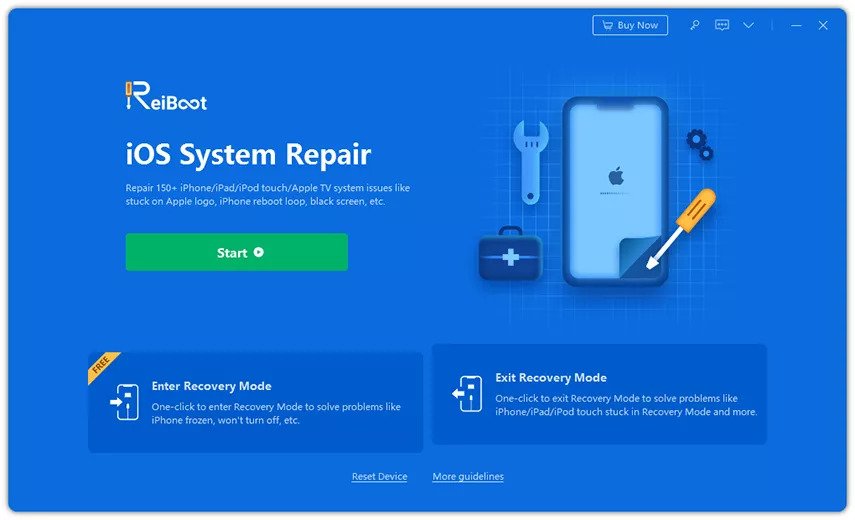
As to iPhone 12 stuck on preparing to transfer, try to make use of ReiBoot Pro. This is an effective tool that can fix stuck issues on your iPhone. You can use this tool to fix the problem of iPhone screen stuck on “Preparing to transfer” by following the steps mentioned below.
After downloading the tool, launch it and connect your iPhone to the system and click on “Repair Operating System”.
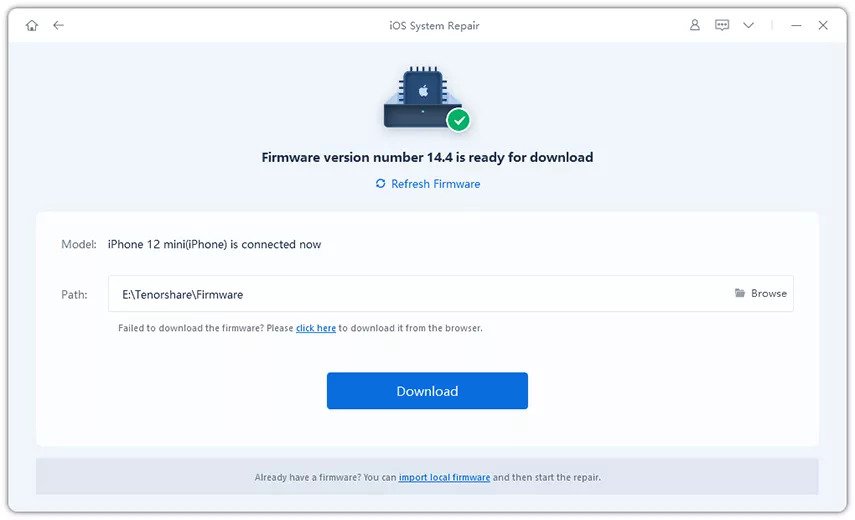
On the next screen, click on “Fix Now”. Download the latest firmware by clicking on “Download”.
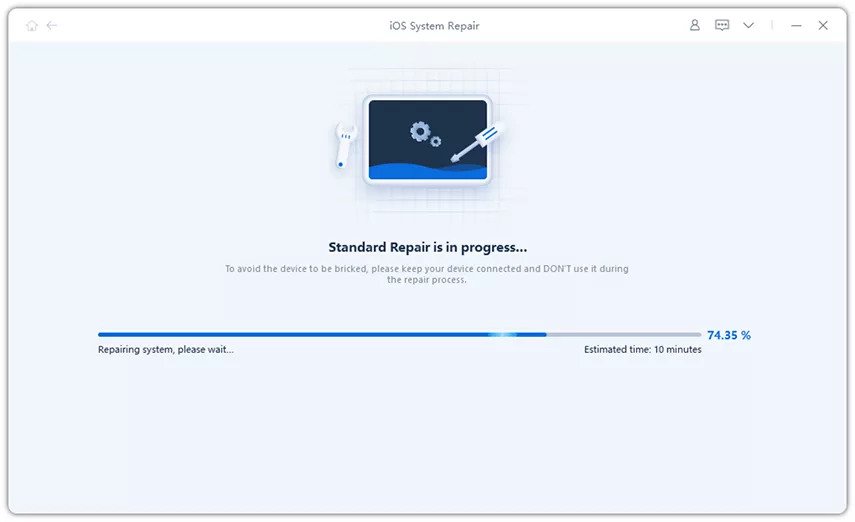
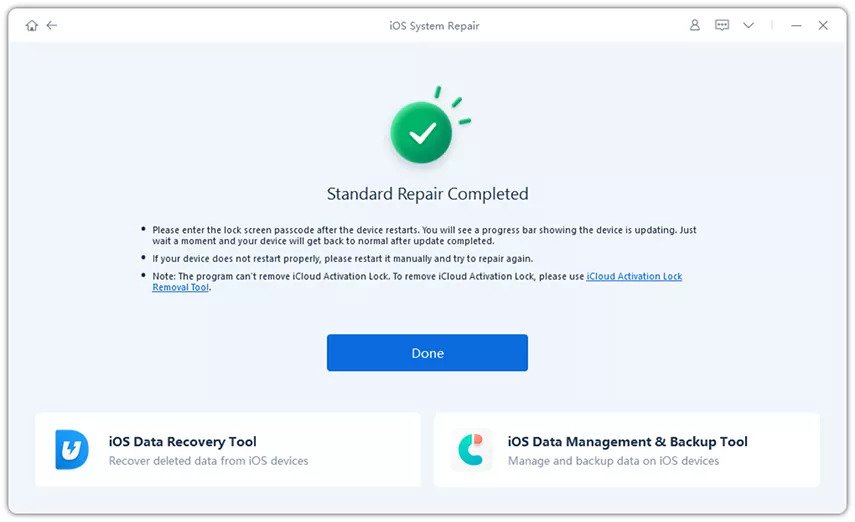
Once done, click on “Repair Now” and you can check the progress of the repair on your screen.
This way you can fix the issues causing your screen to get stuck on “Preparing to transfer” using Tenorshare ReiBoot.
Alternative Ways to Transfer Old iPhone to New iPhone
If nothing above helps you to fix iPhone Quick Start stuck on preparing to transfer issue, then no worries! You can always turn to Quick Start alternative way to transfer content from the old iPhone to the new iPhone.
Method 1: Transfer Old iPhone to New iPhone using iTunes
If you would like to transfer data from a previous iOS device to the new iPhone 11, then you can do it using iTunes. Follow the steps below:
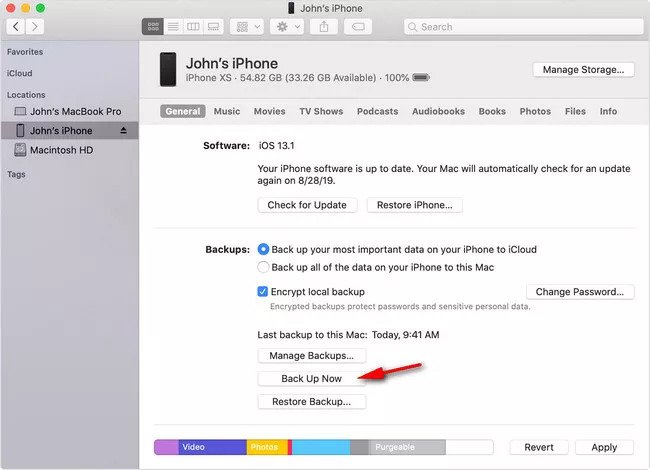
- Backup your old iOS device with iTunes
- Open iTunes
- Connect your old device to the PCor Mac
- Click on “Device icon” > “Summary” This Computer under Backups Section”>” Back Up Now”.
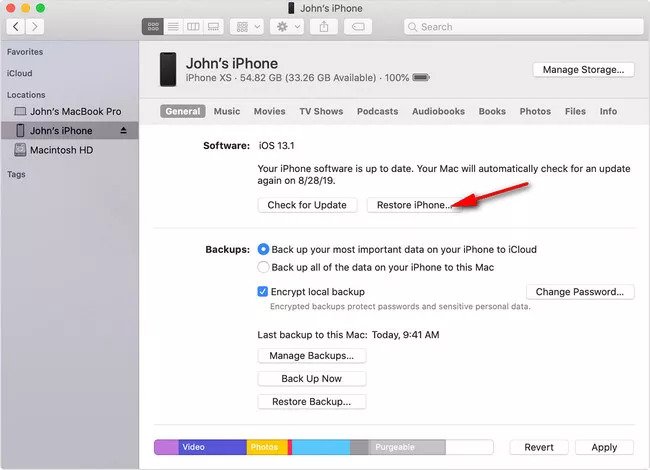
- Connect your new iPhone to the same computer you have used for backing up your old iOS device.
- Open iTunes and click the device icon.
- Choose “Restore Backup” and then, select a recent backup file.
You may need to enter a password in case of encrypted backup. Wait for the process to complete and after then, complete the remaining setup steps on your new iPhone 11 or iPhone 12.
Method 2: Transfer Old iPhone to New iPhone using iCloud
For the users who would like to transfer data from the old iPhone to the new iPhone without a computer, iCloud is the recommended way. But, the method requires you to use a strong Wi-Fi connection. Nevertheless, below is the process of how to do so.
- First of all, create a backup of your old iOS device if you haven’t created one.
- On iPhones running iOS 10or newer – Go to “Settings”>” Apple ID’s profile”>” iCloud”>” iCloud Backup”>” Back Up Now”.
- On iPhones running iOS 9 or older – Go to “Settings”>” iCloud”>” Backup”>” Enable iCloud Backup”>” Back Up Now”.
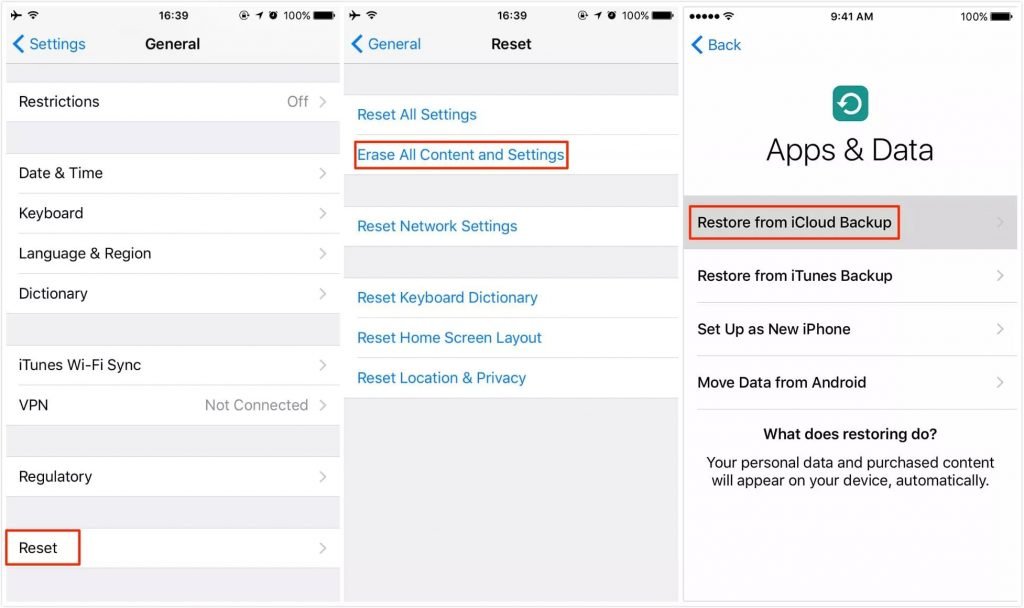
- If you have already set up your new iPhone, then go to “Settings”>” General”>” Reset”>Erase All Content and Settings”>” Erase iPhone”. Now, set up your new iPhone again.
- When you reach the App & Data screen, choose “Restore from iCloud” and select the recent backup file you created.
Conclusion
This guide can be useful when you are switching over from an old iPhone to an iPhone 12/12 Pro. while making the data transfer from the old iPhone to the new iPhone, if in case your iPhone 12 Pro transfer is stuck, the best way to fix it is by using Tenorshare ReiBoot. If you want to transfer the data between iPhones without any hassle, it is recommended that you use Tenorshare iCareFone
Editor’s picks:
Jump to
Common Fixes to iPhone 11 or iPhone 12 Quick Start Stuck on Preparing to Transfer
Make Sure Both iPhones Run iOS 13.1 or Newer
Both iPhones Are Connected to The Same Wi-Fi Network
Keep Devices Near Each Other
Reset Network Settings
Quick Way to Fix iPhone 11 Or iPhone 12 Stuck on “Preparing to transfer”
Alternative Ways to Transfer Old iPhone to New iPhone
Method 1: Transfer Old iPhone to New iPhone using iTunes
Method 2: Transfer Old iPhone to New iPhone using iCloud
Conclusion

Daniel Barrett
Author
Daniel Barrett is a tech writer focusing on IoT, gadgets, software, and cryptocurrencies. With a keen interest in emerging technologies, Daniel offers expert analysis and commentary on industry trends. Follow him for authoritative insights into the latest tech innovations.
Latest Articles
Popular Articles
