How to Fix ‘Cellular Update Failed’ Error on iPhone
In this article, I’ll explain why an iPhone cellular update failed and show you how to fix the problem good!. Click to read full article.
Author:Daniel BarrettMay 30, 202241.8K Shares1.3M Views
You can’t make or receive calls or use cellular data on your iPhone. You received a notification about a cellular update, but you’re not sure what it means. In this article, I’ll explain why an iPhone cellular update failed and show you how to fix the problem good!
Some iPhone users have discovered that their cellular data and cellular connectivity has failed recently, with iPhone no longer working to send or receive calls or access the internet, particularly after installing the iOS 12.1.2 update, iOS 12.1.3, or iOS 12.1.4 updates.
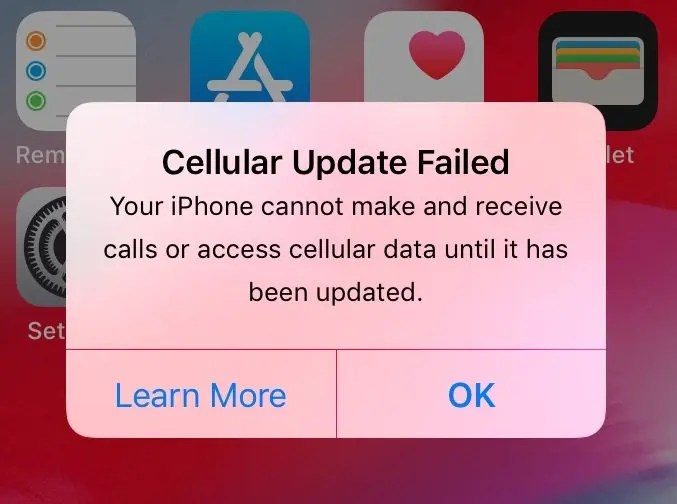
The inability for iPhone to have cell network connections is usually accompanied by a “No Service” message in the upper left corner of the iPhone screen where the carrier or reception signal is typically shown, and often an alert message appears on the iPhone screen saying “Cellular Update Failed – Your iPhone cannot make and receive calls or access cellular data until it has been updated.”
Do You Have An iPhone 7?
A small number of iPhone 7models have a hardwaredefect that makes the Cellular Update Failed notification appear. It also makes your iPhone display No Service in the upper-left hand corner of the screen, even if cellular service is available.
Apple is aware of this problem, and they’re offering a free device repair if your iPhone 7 qualifies. Check out Apple’s website to see if your iPhone 7 qualifies for a free repair.
A Temporary Fix For Some iPhones
Some people have reported that turning off Wi-Fi calling and Voice LTE fixed the problem on their iPhone. This definitely isn’t a perfect solution, and you’ll want to go back and turn Wi-Fi Calling and Voice LTE back on after updating your iPhone to a more recent version of iOS.
It’s also important to point out that not every wireless carrier supports Wi-Fi calling or Voice LTE. If you don’t see these options on your iPhone, move onto the next step.
Open Settings and tap Cellular -> Wi-Fi Calling. Turn off the switch next to Wi-Fi Calling on This iPhone to turn off Wi-Fi Calling.
Next, go back to Settings -> Cellular and tap Cellular Data Options. Tap Enable LTE -> Data Only to turn off Voice LTE. You’ll know Voice LTE is off when the blue checkmark appears next to Data Only.
Also read:How To Fix An iPhone That Won’t Charge
Cellular Update Failed – Turn Airplane Mode Off And Back On
Your iPhone won’t connect to cellular networks if Airplane Mode is turned on. Sometimes toggling Airplane Mode on and off again can fix minor cellular connectivity issues.
Open Settings and tap the switch next to Airplane Mode to turn it on. Tap the switch again to turn it off. You’ll know Airplane Mode is off when when the switch is white.
Cellular Update Failed – Adjust Cellular Settings on iPhone
The other current workarounds to temporarily resolve this cellular data issue on iPhone involve disabling wi-fi calling and adjusting LTE data settings to be data only, rather than voice and data. For some users this may be unacceptable as a permanent solution, but again this is a workaround, so you can decide whether or not the trade-offs of temporary disabling wi-fi calling and LTE voice are worth having a cellular data connection at all.
- Open the “Settings” app on iPhone with the cellular data problem
- Go to “Cellular” settings
- Choose “Wi-Fi Calling” and turn the wi-fi calling feature OFF – this alone may resolve the issue for some users
- Disable wi-fi calling on iPhone
- Next go back to Cellular settings, this time choosing “Cellular Data Options”
- Tap on “Enable LTE” and select “Data Only” as the setting (the default setting is Voice & Data)
- Disable Voice LTE
- Exit out of Settings
Cellular Update Failed
For many iPhone users, their cellular service will restore and start working again, though this comes at the expense of temporarily losing wi-fi calling and voice LTE. Some iPhone users may find that only choosing one of the above settings changes is sufficient to remedy their cellular problems too.
You should not have to reboot the iPhone for these settings changes to take effect, but doing so certainly won’t hurt anything. A hard reboot isn’t necessary, so simply turning the iPhone off and on should do the trick.
Cellular Update Failed – Turn Cellular Data Off And Back On
Another quick way to fix minor cellular connectivity issues is to turn Cellular Data off and back on. This doesn’t always work, but it doesn’t hurt to try.
Open Settings and tap Cellular. Then, tap the switch next to Cellular Data at the top of the screen to turn it off. Tap the switch again to turn Cellular Data back on.
Check & Install Cellular Carrier Updates
Some iPhone users may still get a “Cellular Update Failed” error message on their iPhone, in which case they should try to check for a carrier settings update to iPhone from the cellular service provider, and install one if available. These are updates from your mobile service provider that are separate from general iOS software updates from Apple. Here is how you can check and install a carrier update, if one is available:
Join the iPhone to a wi-fi network if it is not currently connected to oneOpen the “Settings” app on the iPhone then go to “General”Choose “About” and scroll down to the ‘Carrier’ section, then wait a few moments, if a carrier update appears tap on “Update” to install it on the iPhoneNot everyone will have a carrier update available, but it’s worth checking to see if you do. Apparently some users have their iPhone cellular connectivity issues resolved simply by installing such a carrier update, so it is absolutely worth checking.
Eject And Reinsert Your SIM Card
Since it’s not uncommon for your iPhone to say No SIM when you receive the Cellular Update Failed notification, it’s a good idea to eject your SIM card and put it back in.
Grab your SIM card ejector tool or, since you probably don’t have one of those, straighten out a paper clip. Stick the ejector tool or your paper clip into the hole in the SIM card tray to pop it open. Push the SIM card tray back into your iPhone to reseat the SIM card.
Reset Your iPhone’s Network Settings
Resetting the network settings erases all of the Cellular, Wi-Fi, Bluetooth, VPN settings on your iPhone. By erasing all of the network settings at once, you can sometimes fix a troublesome software issue.
Open Settings and tap General -> Reset -> Reset Network Settings. Tap Reset Network Settings to confirm your decision.
Put Your iPhone In DFU Mode
The DFU restore is the deepest iPhone restore. Every single line of code is erased and reloaded, reseting your iPhone to factory defaults.
Make sure you save a backup of your iPhone before putting it in DFU mode! Everything gets wiped from your iPhone during the DFU restore process. Saving a backup will make sure you don’t lose any any of your photos, videos, and other saved files.
Contact Apple Or Your Wireless Carrier
You’ll want to contact Apple or your wireless carrier if your iPhone still says Cellular Update Failed after you put in DFU mode. There may be something wrong with your iPhone’s cellular modem.
Set up an appointment at your local Apple Store to see if an Apple techcan help you fix the problem. However, don’t be surprised if Apple tells you to get in touch with your wireless carrier. There could be a complex issue with your account that can only be resolved by a customer service representative of your wireless carrier.
Here are the customer service phone numbers of the five biggest wireless carriers in the United States:
- AT&T: 1-(800)-331-0500
- Sprint: 1-(888)-211-4727
- T-Mobile: 1-(877)-746-0909
- US Cellular: 1-(888)-944-9400
- Verizon: 1-(800)-922-0204
Jump to
Do You Have An iPhone 7?
A Temporary Fix For Some iPhones
Cellular Update Failed – Turn Airplane Mode Off And Back On
Cellular Update Failed – Adjust Cellular Settings on iPhone
Cellular Update Failed – Turn Cellular Data Off And Back On
Check & Install Cellular Carrier Updates
Eject And Reinsert Your SIM Card
Reset Your iPhone’s Network Settings
Put Your iPhone In DFU Mode
Contact Apple Or Your Wireless Carrier

Daniel Barrett
Author
Daniel Barrett is a tech writer focusing on IoT, gadgets, software, and cryptocurrencies. With a keen interest in emerging technologies, Daniel offers expert analysis and commentary on industry trends. Follow him for authoritative insights into the latest tech innovations.
Latest Articles
Popular Articles