How to Fix the “Internet May Not Be Available” Error on Android
In this walkthrough, we will be explaining how to fix “Internet May Not Be Available” error on Android. Click the link to read full guide.
Author:Daniel BarrettAug 04, 2022520 Shares519.6K Views
Are you having trouble connecting to the internet? Are you getting the “Internet May Not Be Available” error on your Androidphone? If you are, then stick around to learn how to resolve this issue.
The “Internet May Not be Available” error on Android is shown whenever the user connects to the internet and this is usually caused due to an error with the network configurations which the mobile is using to connect to the internet. It might also be caused due to incorrect DNS Settings.
This article explains how to fix the “Internet May Not Be Available” error on Android.
Possible Reasons for the Error
As stated earlier, there can be several reasons for the ‘Internet may not be available’ error, so here are a few of them mentioned below:
- DNS Setting:Several DNS servers are available to connect to the website but when the website blocks any DNS settings then you can come across such an error.
- DHCP connection: Sometimes, Android phone changes automatically to recognize particular settings and connect to the internet, so this can be the reason for such errors.
- Android update– Android phones might have some pending updates that must be installed before the Wi-Fi connection is recognized again.
Don’t miss: How to fix Google Pixel 2 that won’t charge
Troubleshooting Ways To Fix “Internet May Not Be Available” On Android
When your Android phone gets stuck on the above error message then you need to follow some steps to get rid of it. Read the fixes below to help you fix the error message.
1. Restart Android Phone
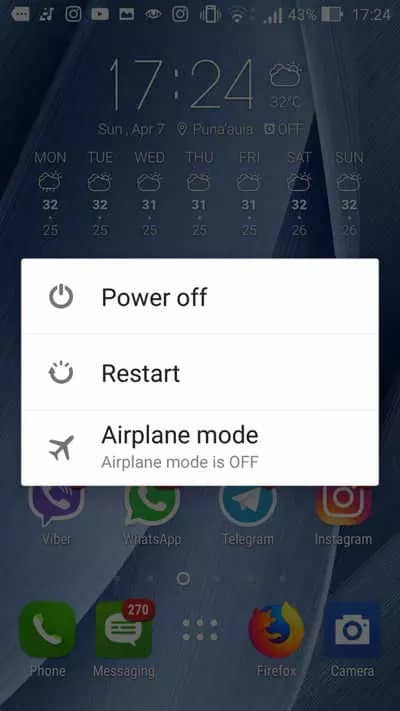
This is a quick and instinctive fix to any kind of errors or issues on Android phones or connectivity issues. If your phone has a removable battery then pull it otherwise you can simply press the Power off button for some time until you get the Restart option.
Click on it and your device will restart within a few seconds. Now check whether the error is fixed or not. If not, proceed to the next solution.
2. Change DHCP Mode

To modify the DHCP mode, go through the below-mentioned steps.
- First, you should open the panel of notifications and select the Settings option.
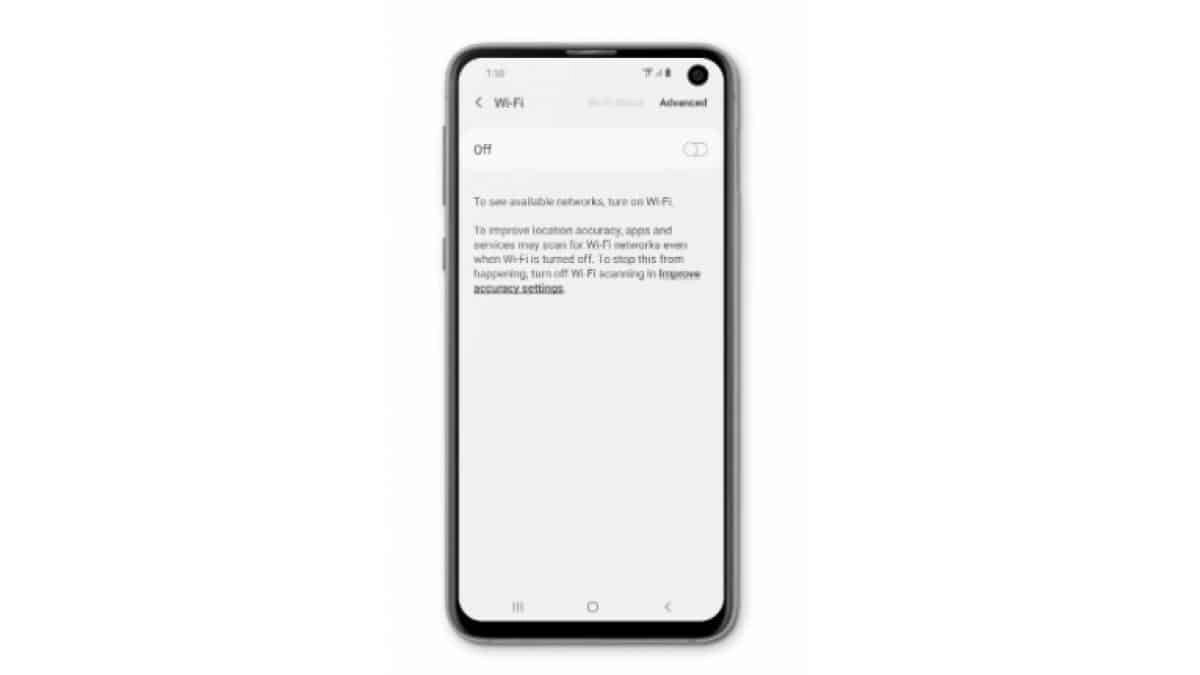
- Thereafter, go to ‘Wireless and Networks’ and select the Wi-Fi option.
- You have to long-press the Wi-Fi link, to which you are attempting to connect.
- Then, navigate to the ‘Modify Network’ option and select ‘Show Advanced Options.’
- You should select ‘IP Settings’ and choose the ‘Static’ button.
- Thereafter, go down and select ‘DNS 1’.
- You have to input the ‘8.8.8.8’ in the first address and select ‘DNS 2’.
- Later, enter ‘8.8.4.4’ into the second address.
- You should select the ‘Save’ button and attempt to link it to the Wi-Fi.
- Now, check to make sure the error is over.

3. Check for Updates
If you would like to check for updates, then abide by the given steps.
- First, launch the panel of notifications and select the Settings option.
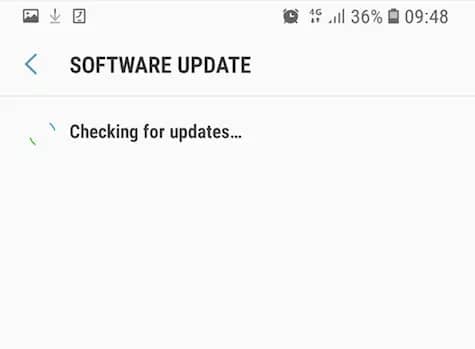
- Then you should move down and select the ‘System’ button and choose ‘Software Update.’
- Next, navigate to ‘Check for Updates,’ and you have to wait to finish the checking procedure on mobile.
- You have to select ‘Download and Install’ after it becomes applicable.
- Later, wait for the download and install the update.
- Now, look to view when the problem continues.
4. Restart Your Device In Safe Mode
If you have installed any third-party apps recently and you are getting such an error then it might be due to that app or service. So you should restart your Android phone in Safe Mode to solve the issue.
Follow the below steps:
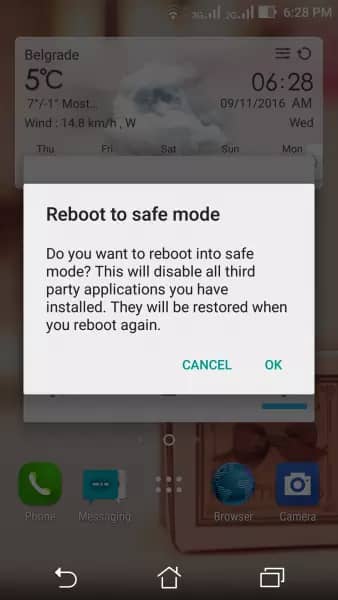
- First, press and hold the “Power” button > then “Power Off” when displayed
- Now choose the “Launch in Safe Mode” option
- Your device will restart and now check if the internet is connected in Safe Mode
If it’s connected then commence enabling your applications one by one and see which apps are showing the errorIf you find anyone among them it’s better to delete the app and fix the issue
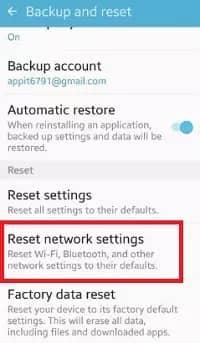
5. Reset Network Settings
Don’t miss: How To Factory Reset A Samsung Galaxy S8
One of the best ways to fix this error is to reset your network. This will delete all Wi-Fi networks along with their password, cellular settings, and VPN settings.
Follow the steps below to reset network settings on Android:
- First, open the Apps tray from the Home screen
- Now click on General Management > Reset settings
- Then click on Reset network settings
- If a PIN or password is needed then enter it
- Next, click on Reset Settings and when it’s done, a confirmation window will occur
6. Remove Cache Partition
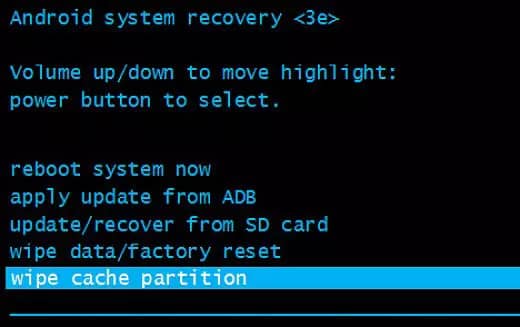
In case you intend to remove the cache partition, go through the below-mentioned steps.
- Firstly, long-press the ‘Power’ key and choose ‘Power Off’ to switch off the mobile.
- You should long press the ‘Volume down and Power’ key at once to switch on.
- You have to wait for a switch on and appear the logo.
- Thereafter, release the ‘Power’ key on the developer’s logo and the ‘Volume down’ key if the ‘Android Logo’ appears.
- With the help of the ‘Volume Down’ button to go down the list and show up ‘Wipe Cache.’
- Navigate to the Power button to choose an option and wait to remove the cache.
- After removing the cache, show up and select ‘Reboot’ and wait to restart the mobile.
- Now, look to view when the problem continues after the restart.
7. Open Safe Mode
In case you intend to open Safe Mode, then go through the below-mentioned steps.
- To get started, long-press the Power key on your device.
- You should long-press the Power Off button if it’s appeared.
- Choose ‘Launch in Safe Mode.’
- The mobile will be rebooted, so look when the Wi-Fi links in Safe Mode.
- When it does, proceed to download the apps individually and look at which one creates the error.
- Now, either remove the doubtful app or update it to solve the issue.
8. Reset All Settings
You can try to reset all settings on the Android phones to fix the error message. This method is similar to a factory reset but doesn’t delete any data or settings from the phone.
Here are the steps:
- First, open the Apps tray from the Home screen
- Now click on General Management > Reset settings
- Then click on Reset Settings
- Enter PIN or password if any
- And finally, click on Reset settings.
- You will get a confirmation message when it’s done.
Editor’s picks:

Daniel Barrett
Author
Daniel Barrett is a tech writer focusing on IoT, gadgets, software, and cryptocurrencies. With a keen interest in emerging technologies, Daniel offers expert analysis and commentary on industry trends. Follow him for authoritative insights into the latest tech innovations.
Latest Articles
Popular Articles