How To Uninstall Avast Antivirus On Windows 10
In this guide, we will be explaining how to uninstall Avast Antivirus on Windows 10. Click the link to read full guide...
Author:Daniel BarrettMay 29, 20224773 Shares397757 Views

Uninstall Avast Antivirus On Windows 10– The Avast Antivirus software helps fight malware, but sometimes it can get troublesome. Or you might want to change your choice of Antivirus. In this guide, we will be explaining how to uninstall Avast Antivirus on Windows 10.
Here is how to:
To uninstall the Avast Antivirus in Windows, you have to first disable the self-defense mechanism embedded in the program to prevent malicious wares from uprooting it unwantedly.
Disabling The Avast’s Self-Defense Mode
You need to first navigate through and find the “hidden” settings.
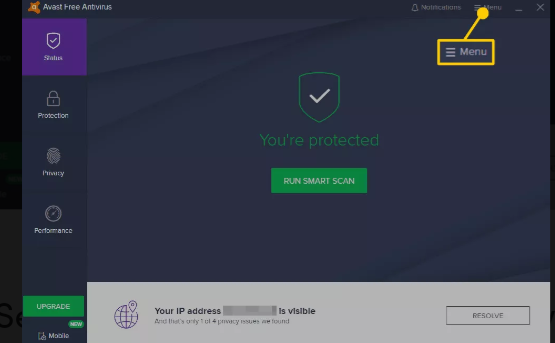
- Open the Avast user interface and click Menu at the top of the user interface.
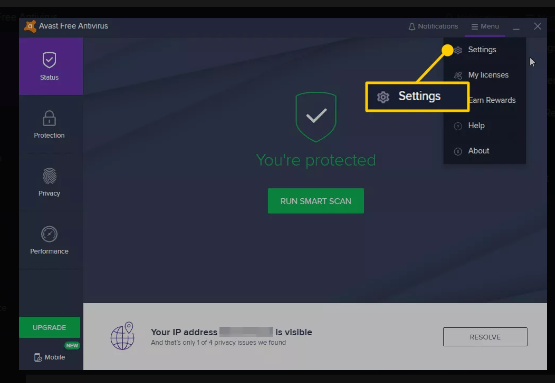
- Select Settings from the drop-down menu that appears.
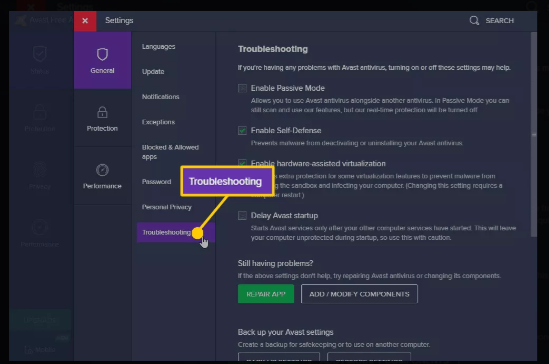
- A new Settings window opens. First, choose General from the left navigation pane and select Troubleshooting from the sub-menu.
Also read: How To Make Chrome Your Default Browser
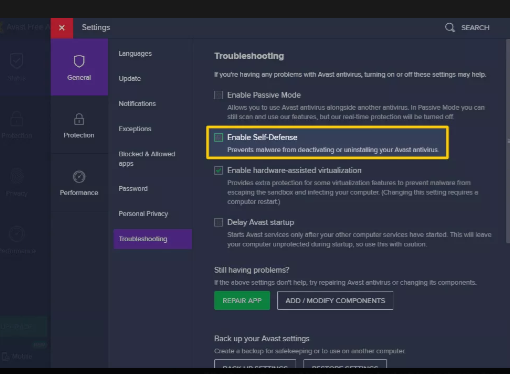
- Open the checkbox beside Enable Self-Defense to turn Self-Defense mode off.
- This opens a popup window asking you to confirm. Select OK to confirm the change.
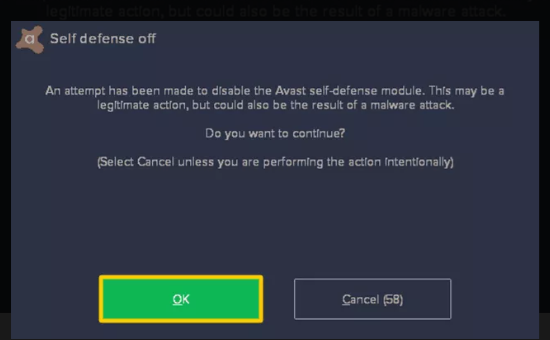
- At this point, Self-Defense mode is turned off, and you can close the Settings window and the Avast user interface.
Uninstalling Avast Antivirus Software
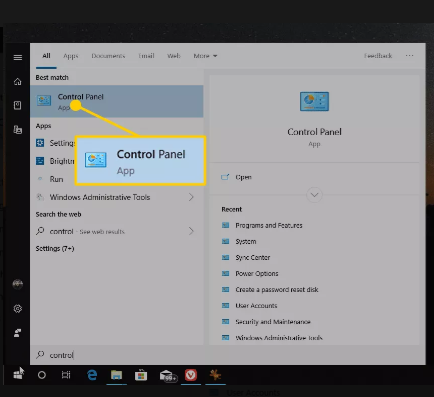
- Navigate to the Control Panel (Start – Settings – type Control Panel). Choose Programs, then go to Programs and features.
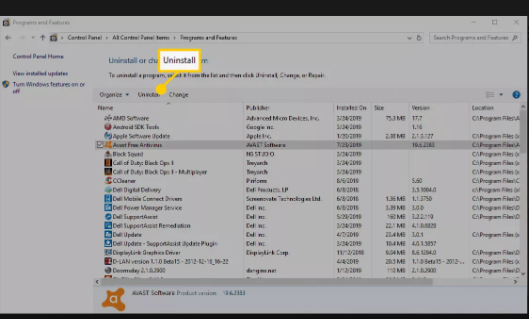
- In the Programs and Features window, find and select the Avast application. After that, the Uninstall option appears; you should choose it to begin the uninstall process.
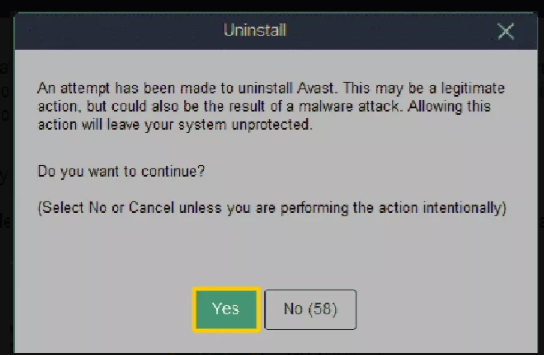
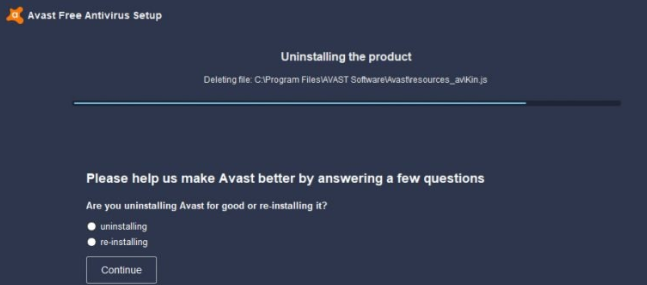
- The configuration screen will offer to confirm the action. Press it. The process begins and might take several minutes, as it should delete all of the Avast files distributed throughout the system.
Also read: How To Secure Your TikTok Account Login
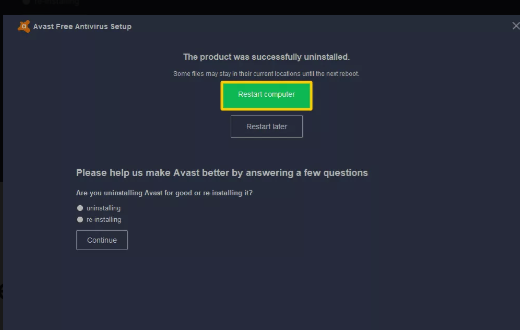
- As the process completes, Avast Setup will ask to restart the computer.
Uninstalling Avast Through Third-party Apps
You could use a few third-party apps to uninstall Avast Antivirus, like CCleaner and Obit.
Don’t miss: How To Change Your TikTok Username
Uninstalling Avast with CCleaner
- Download and Open CCleaner.
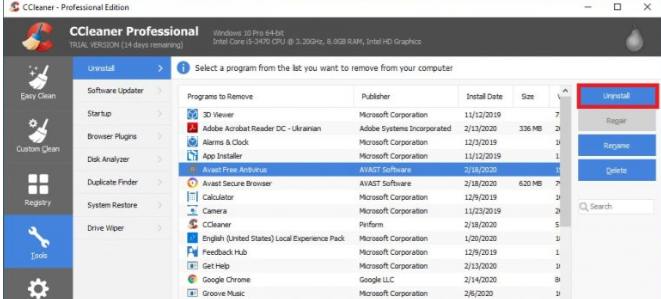
- Go to the tools section.
- Navigate through and select Avast Antivirus.
- Click the Uninstall button on the right.
- A popup appears asking to confirm the action.
- Click on uninstall
- After the process ends, restart your PC
- After restart, launch CCleaner and go to the registry section
- Click on “Scan for Issues”
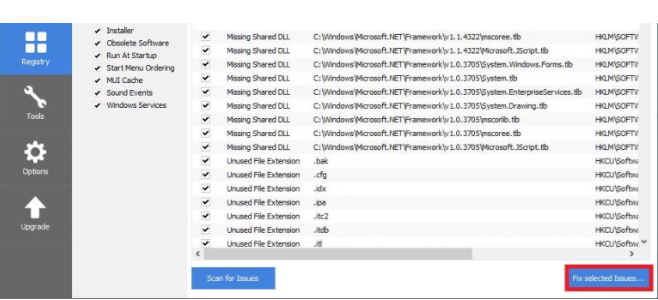
- Select “Fix selected Issues.”
- Close CCleaner.
Uninstalling Avast with IObit
IObit also eliminates registry entries and files with additional tools and a browser extension manager. In addition, it offers 35 different language user interfaces.
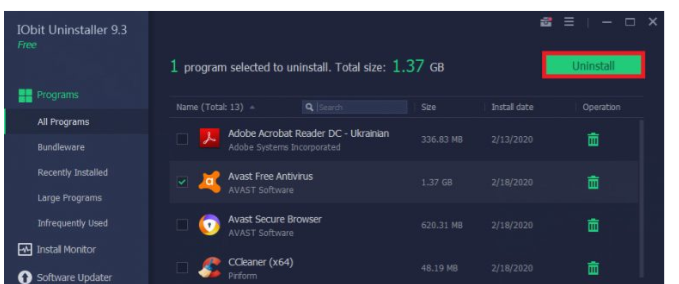
- Download the IObit Uninstaller and open it
- Go to All Programs
- Navigate through and find Avast Free Antivirus
- Click on it and select “Uninstall.”
- A popup window comes up; click on “yes” to confirm uninstall.
- The process gets done after a while
- Restart your PC
A popup message comes up asking if you want to uninstall entirely. Choosing “Yes” deletes all residual files permanently.
Editor’s picks:
- What Is Patreon: Everything You Need To Know
- How To Sign Out Of Gmail With One Tap
- What Is Google Pay: Everything You Need To Know
(Image Source: Lifewire)

Daniel Barrett
Author
Latest Articles
Popular Articles