How to Easily Sync a Wii Remote
This article explains how to easily Sync a Wii remote. Setting up your Nintendo Wii requires syncing a Wii remote with the console.
Author:Daniel BarrettAug 16, 2022106.4K Shares1.5M Views
Setting up your Nintendo Wii requires you to first know how to sync a Wii remotewith the console. If you also intend to use one of the various emulators to play Wii games on your PC, you should know how to connect your PC using Bluetooth to a Wii controller. This article explains how to easily Sync a Wii remote.
A lot of users who due to reasonable reasons got a different remote controller for their Nintendo Wii console would probably have certain issues while setting up the controller for use. The different controllers will not connect through Bluetooth leading to underutilization of your Wii.
Procedures For Syncing A Wii Remote
There are things you should be sure of before you attempt syncing your Wii remote. They include:
- No infrared light sources should be interfering with the sensor bar.
- Keep away all radio frequencies that can interfere with the remote and console.
- Wireless accessories should be turned off.
- Be sure that the sensor bar is at the center at the top or bottom of your gadget.
- The distance between your controller and TV should be between 3 to 10 feet.
Don’t miss: How To Easily Reset Your Amazon Fire Stick
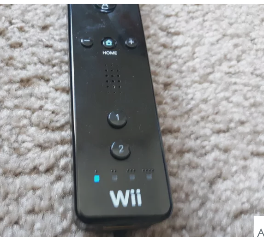
1. Remove The Battery Cover
The first step to take to sync a Wii remote is by taking the battery cover off. Turn on your Wii and hold up till the console is ready. Now, remove the battery from the new controller. Right after that, press the adjust button on the new controller until all the blue LEDs on the front light up and blink.
2. Find The Adjust Button
The next step to sync the Wii remote is to search for the adjust button under the SD card opening on the Wii console and then press it. When everything works, the blue LEDs on the controller will quit blinking when the controller connects with your console.
If the problem is with your PC or a laptop/notebook, you should attempt to use Reimage Plus which can filter the repositories and replace corrupt as well as missing files. This works most of the time, where the issue is started because of the corruption of the system.
3. Try New Batteries
The problem sometimes could be a mere dead battery. Simply buy new batteries. Next, turn the power off and remove the power cord of the console immediately. Leave the string unplugged for about 30-60 seconds and afterward plug it in once more.
Next, wait till the console completes the process of booting and is prepared. Then, attempt to synchronize your new controller again. Try the first solution and follow all the steps referenced.
There is a rumor going around related to how to sync the Wii remote that you have to hold the synchronize button for a brief timeframe. Don’t follow this step because it’s just a rumor.
If you follow all the steps referenced, you have to get your new controller to sync effectively with your Wii console. If none of the Methods have solved the issue for you, we suggest using Reimage Repair Tool which can check the repositories to replace the corrupt and missing files.
This works most of the time, where the issue is begun because of a corruption system. Reimage will likewise optimize your system for the greatest performance.
Syncing Additional Wii Remotes Temporarily
You could want to play on a friend’s device and just want to temporarily connect. Follow these steps:
- Press the Home button on the Wii controller assigned to player one.
- Choose Wii Remote Settings.
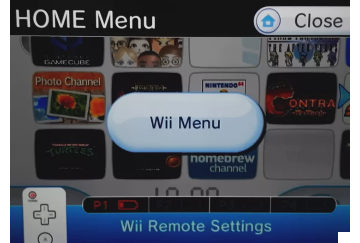
- Choose Reconnect.
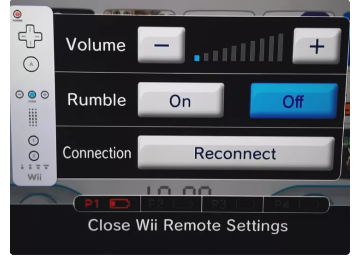
- On the controller you want to sync, press the 1+2 buttons simultaneously.
- To sync multiple Wii remotes, press 1+2 simultaneously on each controller in the order you want to pair them.
Any controllers synced using this method will automatically unpair when the console is turned off.
Tip: If you have trouble connecting additional Wii remotes while playing a game, close the software and try syncing the controller from the home screen.
Connecting A Wii Controller And A PC
If you want to use the Dolphin emulator to play Wii games, you’ll need to sync the Wii Remote with your PC.
Note:You will need a motion sensor bar for your PC to use the Wii controller with an emulator.
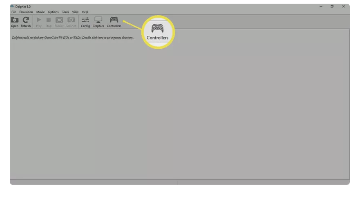
- Open the Emulator and select Controllers at the top.
- Press and hold 1+2 simultaneously on the Wii remote.
Don’t miss: How To Easily Reset Your Roku Remote
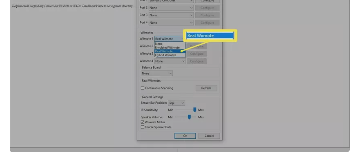
- Click on Real Wiimote from the Menu beside Wiimote 1
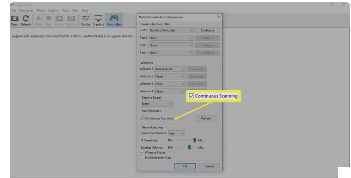
- Check the box beside Continuous Scanning, then select OK. The LED on the front of the controller should turn solid blue.
You should now be able to use the Wii remote provided you have a sensor bar connected to your PC.
Note:You must pair your Wii remote with your PC, again and again, every time you reboot your computer. To un-pair, the Wii remote, right-click the Bluetooth icon in the system tray and select Remove device.
In Case The Wii Remote is Already Synced, But Still not Working
If your Wii Remote is synced but not functioning, you can take the following steps:
- Switch the Wii console and then wait till the “Healthand Safety” screen shows up
- Do not press A
- Open the SD Card space spread located on the front of the Wii console and under the disc drive.
- Next, press and hold the red SYNC button for 15 seconds. This will erase all synced Wii Remotes from the console.
- Remove the battery cover and press the red ‘SYNC’ button.
- After that, press the SYNC button on the Wii console. Repeat this for all Wii Remotes you need to utilize.
When the above methods fail to work, you can remove the batteries of the Wii Remote. Leave them for a few minutes. Re-insert the batteries and sync the Wii Remote once more.
Editor’s picks:

Daniel Barrett
Author
Daniel Barrett is a tech writer focusing on IoT, gadgets, software, and cryptocurrencies. With a keen interest in emerging technologies, Daniel offers expert analysis and commentary on industry trends. Follow him for authoritative insights into the latest tech innovations.
Latest Articles
Popular Articles