How to Easily Change Your IP Address
In this guide, we will analyze and differentiate all kinds of IP addresses and how to use and change your IP address. Click to read more..
Author:Daniel BarrettJul 21, 202268.2K Shares1M Views

You absolutely can change your IP address and you don’t need to be a computer guru to do that. It is completely legal to change your IP address so long as you aren’t using it to break any laws. There are different kinds of IP addresses based on their purpose. This guide analyzes and differentiates all kinds of IP addresses and how to use and change your IP address.
Note:When you change your IP address, it temporarily disrupts all the internet-connected devices or features using them. No harm is done though, it would just seem like you put your phone on airplane mode.
What is an IP Address?
IP address is short for Internet Protocol address. It is a set of numbers that defines a device with a special computer or network of computers. They allow the exchange of information and also track the locations of users. This is why people seek to morph and camouflage their IP address.
Types of IP Addresses
There are different types of IP addresses for different kinds of purposes. Some have more advantages than others, while others suit comfortably to users.
1. Public IP Addresses
Each and every internet-connected device has a public IP address, distributed by the Internet Service Providers vis-à-vis the Internet Corporation for Assigned Names and Numbers. These public IP addresses are findable on the web, which is why we can find our printer simply by Googling its IP address.
2. Private / Local IP Addresses
Private or Local IP Addresses can’t be found on the web, unlike Public IP addresses. The routers assign these numbers to their devices on their addresses to enable communication between each other.
3. Dynamic IP Addresses
Dynamic IP Addresses change every time you connect and reconnect, usually with the aid of a VPN. It makes tracking harder as the address keeps changing and changing.
4. Static IP Addresses
As the name implies, these IP addresses don’t change. With VPNs, static IP addresses are usually shared with thousands of users in order to obscure their identities.
However, some websites block these shared IP addresses, which necessitates users getting dedicated IP addresses. Convenient right?
5. Dedicated IP Addresses
Dedicated IP Addresses are specially made for a single user rather than several. It’s usually more expensive than your regular VPN fees.
6. IPv4
Used by the majority (99%) of networks, IPv4 addresses are four one-bite numbers separated by dots like 555.555.1.1. It stores about 4.3 billion addresses and is backed up by IPv6.
7. IPv6
While they’re only used by less than 1 percent of networks, IPv6 has its advantages over IPv4, namely that it can create an unlimited number of addresses. It also permits larger payloads and is compatible with a greater number of mobile networks. Although they’re starting small, eventually, IPv6 will replace IPv4.
Finding Your IP Address
Finding your IP Address isn’t hard, just follow these steps depending on your device:
Where to Find Your IP Address on Mac
- Enter your Mac’s System Preferences.
- Click on Network.
- Select your Wi-Fi network.
- Select Advanced.
- Select TCP/IP.
- You’ll find “IPv4 Address”.
Where to Find Your IP Address on Windows
- Go to your Taskbar.
- Click on Wi-Fi Network.
- Select your network.
- Click Properties.
- Look under IPv4 Address.
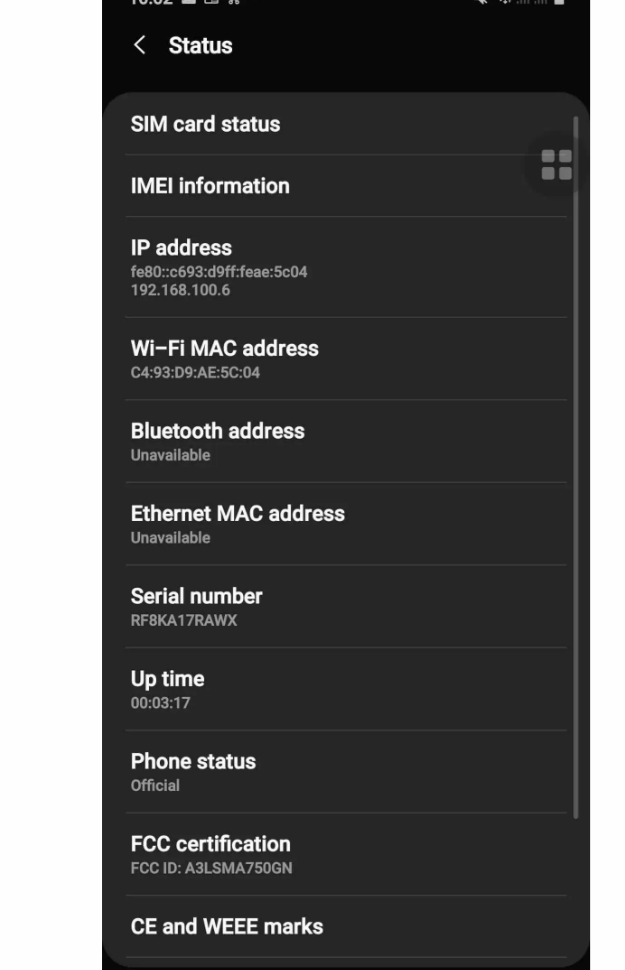
Where to Find Your IP Address on Android
- Navigate to your phone’s Settings.
- Click About.
- Click on Status.
- Look at the IP Address.
Where to Find Your IP Address on iOS
- Click Settings.
- Click Wi-Fi.
- Click on the “I” button next to Network.
- Look under IPv4 Address.
After finding your IP address and you want to change it, here are the steps to take. You can choose the one that is right for your kind of device.
1. Changing Your IP Address With A VPN Or Proxy Server
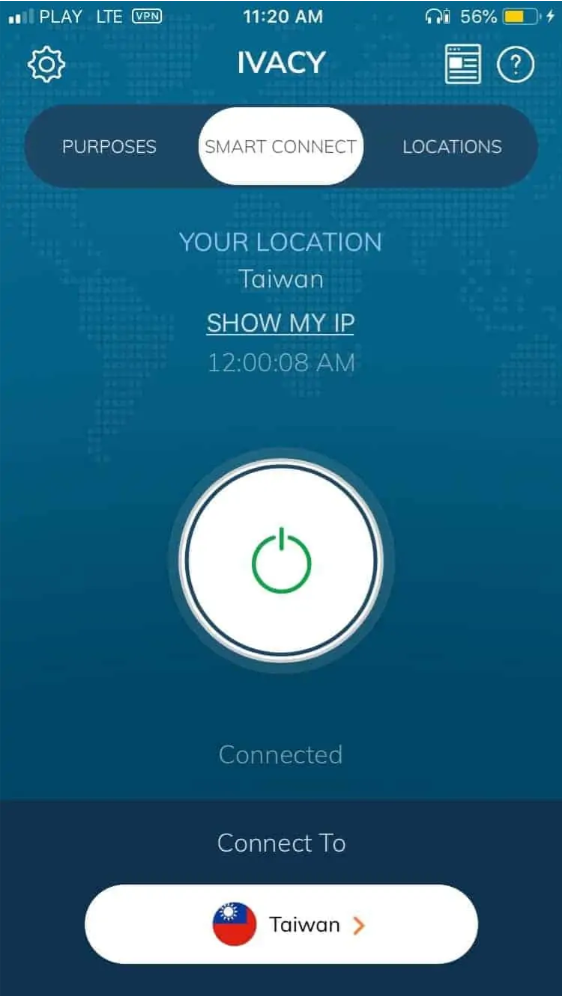
When you use any of the virtual private networks (VPN), the service will automatically make you appear as though you have a different IP address originating from whatever country you select.
Literally, just open your VPN app and connect to any city other than your current one — in less than 30 seconds, you’ve changed your IP so it appears to be from wherever you chose.
Step-by-step on How to Change Your IP Address With a VPN
- Download the VPN app.
- Create an account.
- Click Connect.
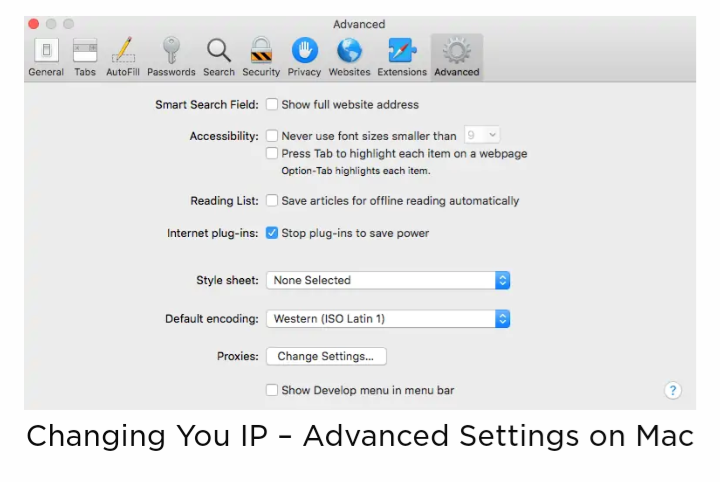
Step-by-step on How to Connect to Proxy Server on Mac
- Open Safari, Macs’ default browser.
- Click Preferences.
- Click Advanced.
- Select Change Settings.
- Update the Settings with the information that the network administrator provided in the System Preferences pop-up.
Connect to Proxy Server on Windows
- Go to your Administrative Templates.
- Select Windows Components.
- Click Data Collection and Preview Builds.
- Click Configure Authenticated Proxy Usage.
- Select Disable Authenticated Proxy Usage.
- Select Apply.
Connect to Proxy Server on Android
- Go to your AndroidSettings.
- Select Wi-Fi.
- Select your network’s name.
- Hit Modify Network.
- Click Advanced.
- Select Manual.
- Enter in your proxy port and hostname.
- Click Save.
Connect to Proxy Server on iOS
- Enter your phone or tablet’s Settings.
- Click Wi-Fi.
- Click on the “I” button next to the username.
- Click HTTP Proxy.
- Select Edit Proxy Settings.
- Turn on Authentication.
- Return to the previous window.
2. Manually Change Your IP Address
Here’s what to do if you’ve already got a new IP address that you know you want to use.
On macOS:
- Go to System Preferences
- Click Network
- Select Network Connection
- Select Configure IPv4.
- Choose Manually and type in whatever IP you’ve chosen.
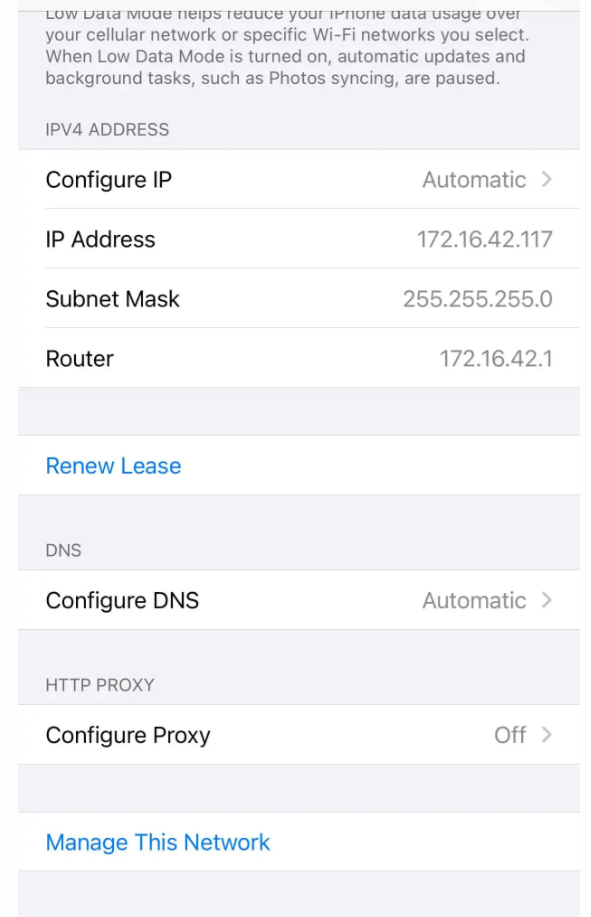
With iOS:
- Go to Settings
- Click Wi-Fi, then Network.
- Under the IPv4 address section, click Configure IP.
- Manually type in whatever IP address you’re trying to use.
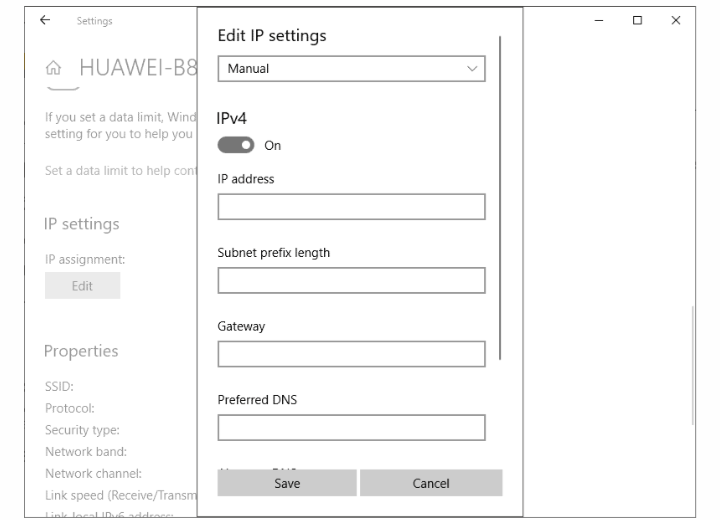
With Windows:
- Be certain you’re working from your Administrator account and click Start
- Next, go to Control Panel
- Click Network Connection
- Select your local area connection.
- Next, click Properties, then click TCP/IP
- From here, you can type your new IP address in manually.
On Android:
- Go to Settings, Click Connections then tap Wi-Fi.
- From here, tap on the network you’re currently connected to.
- Click the gear-shaped icon to the right of the network, Your IP address will be displayed here, but go to the bottom of the screen and tap Advanced, then tap IP Settings.
- Select Static. The next screen will let you manually type in whatever IP address you’ve chosen.
3. Unplug the Router
The easiest and quickest way to get a new IP address is to see what your IP address is via an IP-checking site, then walk over to your router and unplug it for at least five minutes.
It may take several minutes longer, depending on how long your ISP normally takes to renew IP addresses in general. Once you plug it back in, refresh the website to make sure your IP address has changed.
In essence, what is happening is that the router neglects to make an IP assigning for your device making it seem like it is a new device and giving it a fresh address. It isn’t 100% though because you might have to try a few times before it works.
4. Using Tor
Tor is a very useful browser due to its high-security level. It hides your IP address and also disrupts tracking and annoying ads.
The cookies get cleared as soon as you leave a website and so does your browsing history. Encryption of your IP address and web activity is done three solid times! You can download it from the Tor website and you are good to go.
Bottom Line
Having your IP address masked is a good idea to prevent all sorts of mishaps. So long as you don’t commit crimes with VPNs, it’s entirely legal. We hope this article has worked in enlightening you on IP address masking.
Editor’s picks:
Jump to
What is an IP Address?
Types of IP Addresses
1. Public IP Addresses
2. Private / Local IP Addresses
3. Dynamic IP Addresses
4. Static IP Addresses
5. Dedicated IP Addresses
6. IPv4
7. IPv6
Finding Your IP Address
Where to Find Your IP Address on Mac
Where to Find Your IP Address on Windows
Where to Find Your IP Address on Android
Where to Find Your IP Address on iOS
1. Changing Your IP Address With A VPN Or Proxy Server
Step-by-step on How to Change Your IP Address With a VPN
Step-by-step on How to Connect to Proxy Server on Mac
Connect to Proxy Server on Windows
Connect to Proxy Server on Android
Connect to Proxy Server on iOS
2. Manually Change Your IP Address
On macOS:
With iOS:
With Windows:
On Android:
3. Unplug the Router
4. Using Tor
Bottom Line

Daniel Barrett
Author
Daniel Barrett is a tech writer focusing on IoT, gadgets, software, and cryptocurrencies. With a keen interest in emerging technologies, Daniel offers expert analysis and commentary on industry trends. Follow him for authoritative insights into the latest tech innovations.
Latest Articles
Popular Articles