Destiny 2 Outbreak Perfected Quest Steps
This guide will walk you through Outbreak Perfected quest in Destiny 2. Click the link to read the full guide.
Author:Daniel BarrettSep 11, 20221.2K Shares124.6K Views

Destiny 2’s Outbreak Perfected is an Exotic quest available during Year 2. However, gamers have found a new quest in Destiny 2. In the Bad Neighbors Heroic Adventure, a secret door leads to a new Fallen Exotic item. You’ll be required to decipher riddles in this quest, and it takes some adventuring to find.
Thankfully, the quest is a lot more straightforward to complete. Though the first half of the quest can be completed solo, the second and final half is an intense, lengthy mission that requires a dedicated Fireteam and lots of practice. I hope you’re ready for a challenge!
How to Find the Fallen Transponder
FALLEN TRANSPONDER: To start the Outbreak Perfected quest in Destiny 2, you’re required to make your way to Titan’s The Rig fast travel point. Start the Bad Neighbors Heroic Adventure, and continue until you run into your first Shrieker — the giant purple eye turret floating above a doorway. Once you’ve killed the Shrieker, turn to your left immediately. You’ll find a door that says “unlocked” if you walk up to it.
Use the ‘Unlocked’ prompt to open it, to arrive at a room filled with computer monitors. You might have to complete the main set of story missions if you can’t. Near the front of these monitors, the prompt ‘Examine Fallen device’ is on the right side. This will require a Fallen Transponder quest for your Pursuits.
Note:The door is locked until you complete the Enemy of my Enemy questline on Titan. You unlock this quest after completing the Destiny 2 campaign.
What to do with the Fallen Transponder and their node locations

Investigating the Fallen Transponder in your Pursuits will reveal six nodes you to complete.
Also read:How To Get Izanagi’s Burden in Destiny 2
NODE 1: The Drain (EDZ)
Head to The Drain Lost Sector in the EDZ. Kill the Metal Captain and walk past the Lost Sector chest. Keep going until you find a giant cavern with Fallen flags. Jump into the cavern and look around until you find two boxes covered in purple sheets and a purple tarp over them. Investigate the small SIVA icon between the boxes to pick up Node 1.
NODE 2: Whispered Falls (EDZ)
Head to the Whispered Falls Lost Sector in the EDZ. At the start, you can drop down into a cavern. Turn right, wherein the corner, and there’s a green cave you can enter from two sides. In the middle, you’ll locate Node 2.
NODE 3: Atrium (EDZ)
Head to the Atrium Lost Sector in the EDZ. Walk down the stairs in the church and follow the path. Once you’ve cleared the first room, Fallen, walk through the corridor on your hard left. There is a small alcove. Walk-in and Node 3 is behind a pillar.
NODE 4: Widow’s Walk (EDZ)
Head to the Widow’s Walk Lost Sector in the EDZ. At the end chest, look up and right to see a destroyed building on the upper floor you can climb into. Jump up, and you’ll find Node 4.
NODE 5: The Carrion Pit (Nessus)
Head to The Carrion Pit Lost Sector on Nessus. Complete the Lost Sector, and kill the boss. Walk past the chest, and look to your right. Jump down as far right as you can, and then turn around. Jump back up behind a hidden wall, and you’ll find Node 5.
NODE 6: The Rift (Nessus)
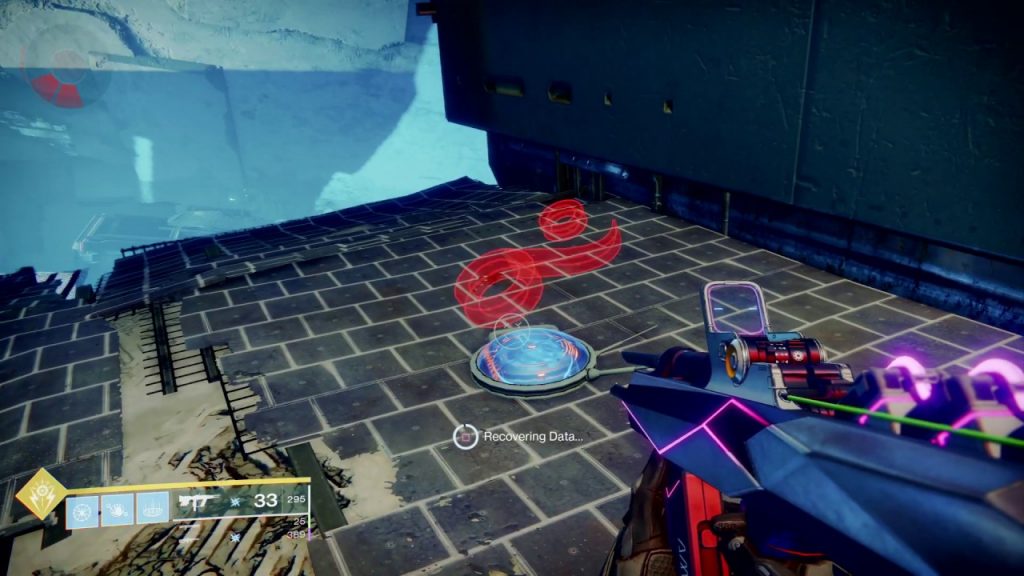
Head to The Rift Lost Sector on Nessus. Find the giant red light in the middle of the Lost Sector arena. To the left of the end chest is several containers. The end one, which is overhanging a little over the edge, can be climbed in from the back. Grab the final Node.
Once you’ve gotten all six Nodes, it’s time to head to The Farm – where you can meet your contact and start the Zero Hour mission.
When you land in the old social space, turn right. Attached to the big barn, you’ll see an open cellar. Walk down the stairs and follow the path until you find Mithrax, the Fallen captain. Gather a Fireteam of high-level players and talk to him.
How to complete the Zero Hour mission in Destiny 2
To start the Zero Hour mission, make your way to the Farm, and as soon as you load in, turn right, go along the side of the warehouse, and head underground, going left where you can. You’ll locate your contact at the end. Talking will start the mission.
Zero hours is a timed mission that sees you return to (spoiler ahead!). You’ll travel through parts of the destroyed Tower seen in Destiny 2’s first mission and many new locations.
This is a difficult part of the game, and we recommend you be in a Fireteam, which will require time to practice. For example, to learn enemy placements and strategies (there are a lot of annoying Shanks throughout!) but also the route – it’s not obvious at first glance, especially when it comes to several jumping sections – as well how to solve a coordinated puzzle and a tough final battle.
There’s no way to finish this quest by playing once or twice. So instead, we recommend watching the video walkthrough below to get your head around it.
Editor’s picks:
Jump to
How to Find the Fallen Transponder
What to do with the Fallen Transponder and their node locations
NODE 1: The Drain (EDZ)
NODE 2: Whispered Falls (EDZ)
NODE 3: Atrium (EDZ)
NODE 4: Widow’s Walk (EDZ)
NODE 5: The Carrion Pit (Nessus)
NODE 6: The Rift (Nessus)
How to complete the Zero Hour mission in Destiny 2

Daniel Barrett
Author
Daniel Barrett is a tech writer focusing on IoT, gadgets, software, and cryptocurrencies. With a keen interest in emerging technologies, Daniel offers expert analysis and commentary on industry trends. Follow him for authoritative insights into the latest tech innovations.
Latest Articles
Popular Articles