How to Insert a Text Box in Google Docs
This article takes you through some ways you can insert a text box in Google docs. Click the link to read full guide.
Author:Daniel BarrettJun 15, 2022369 Shares184.3K Views

The importance of a text box is to differentiate a set of text on a page. It gives your document a more professional look. Text boxes allow you to add text or images inside them and then move those boxes around, between, or within documents. This article takes you through some ways you can insert a text box in Google docs.
How to Insert a Text Box in Google Docs
There are two ways to add a text box in Google Docs.
- Using the drawing tool
- Using a single-cell table
Insert A Text Box In Google Docs Using The Drawing Tool
With the drawing tool, you can upload the sketch as an image to Google Drive and put init to your document. You can also add various shapes, line styles, callouts, and arrows. A dialog box will open on your document page. This is where you’ll create, edit, and format the shapes and text boxes using the drawing tool’s commands.
Don’t miss:How to do a Hanging Indent in Google Docs
To Insert a Text Box Using the Drawing Tool
- Open your document
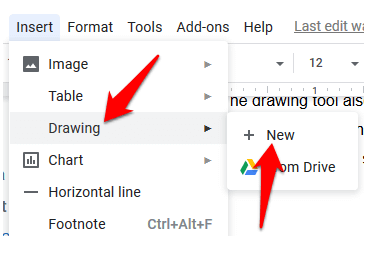
- Click Insert
- Drawing and then click New to create a text box.

- Click the Text box icon.
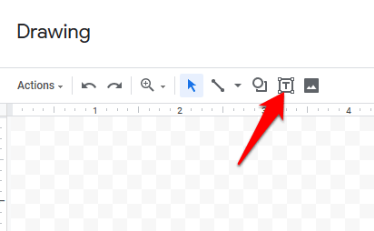
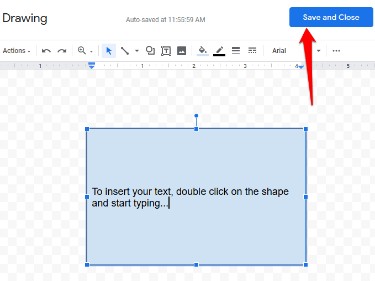
- Create the text box by clicking and dragging in the drawing area, and then release the mouse for the text box to appear.
- Add text and customize the text box to your preferences
- Click the blue Save & Close button.
How to Use Shapes to Create and Insert a Text Box in Google Docs
Google Docs allows you to add text in different shapes and customize them by adding background colors or changing the border line width.
- Click Insert
- Drawing
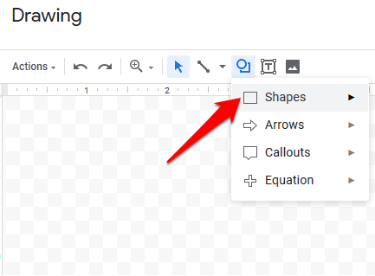
- Choose New and then click the Shapes command.
Also read: How to Convert Google Docs to Microsoft Word
- Choose your desired Shapes
- Click and drag your mouse in the drawing area to create the shape you selected, and then release the mouse.
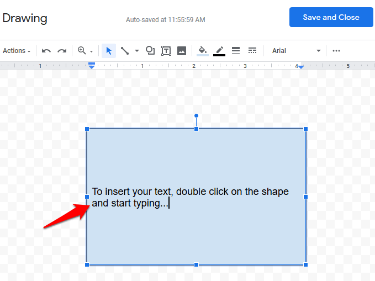
- Double-click anywhere within the shape to add text in the shape, and then enter your text.
- Click Save & Close to insert it into the document.
- You can resize the shape by clicking and dragging the resizing handle to the size you want.
- To edit the shape, select it and then click Edit from the options that appear.

For shapes that overlap one another, you can reposition shapes that overlap one another by Bringing them forward or Sending them backward and getting the desired ordering.
Don’t miss: Row vs Column: What’s the Difference?
How To Insert A Text Box In Google Docs Using A Single Cell Table
- To do this, click Insert
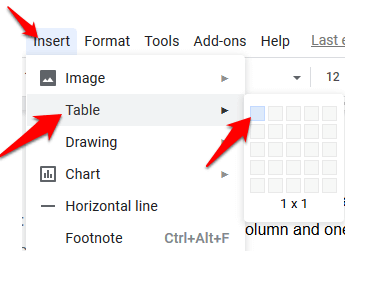
- Table and click on a single cell with one row and one column (1×1).
- When the single cell appears on the document, adjust the length and width of the text box to your preferences and then enter your text in the cell.

- You can adjust the font color, style, and size to your liking if you want to highlight the text or make the document look more professional.
To Insert An Image Into Your Text Box Or Shape
- Click on the text box or shape and select Edit to open the Drawing tool.
- Choose the Image icon on the menu.
- Click Select to insert the image.
- Select Edit from the menu below to go back to the drawing area.
- Click the Text box icon to select it, and then change the fill color to set the transparency for the text box.
- Click on the image again, select Image Options from the top menu, and choose Wrap text from the right pane.
- Layer the image and text box by dragging them to the desired position.
That’s it!
Editor’s picks:
Jump to
How to Insert a Text Box in Google Docs
Insert A Text Box In Google Docs Using The Drawing Tool
To Insert a Text Box Using the Drawing Tool
How to Use Shapes to Create and Insert a Text Box in Google Docs
How To Insert A Text Box In Google Docs Using A Single Cell Table
To Insert An Image Into Your Text Box Or Shape

Daniel Barrett
Author
Daniel Barrett is a tech writer focusing on IoT, gadgets, software, and cryptocurrencies. With a keen interest in emerging technologies, Daniel offers expert analysis and commentary on industry trends. Follow him for authoritative insights into the latest tech innovations.
Latest Articles
Popular Articles