8 Ways to Remove the ‘Activate Windows 10’ Watermark
In this article today, we would be explaining 8 ways to remove the Activate Windows 10 watermark. Click the link to read full guide.
Author:Daniel BarrettJan 16, 202391.8K Shares1.2M Views
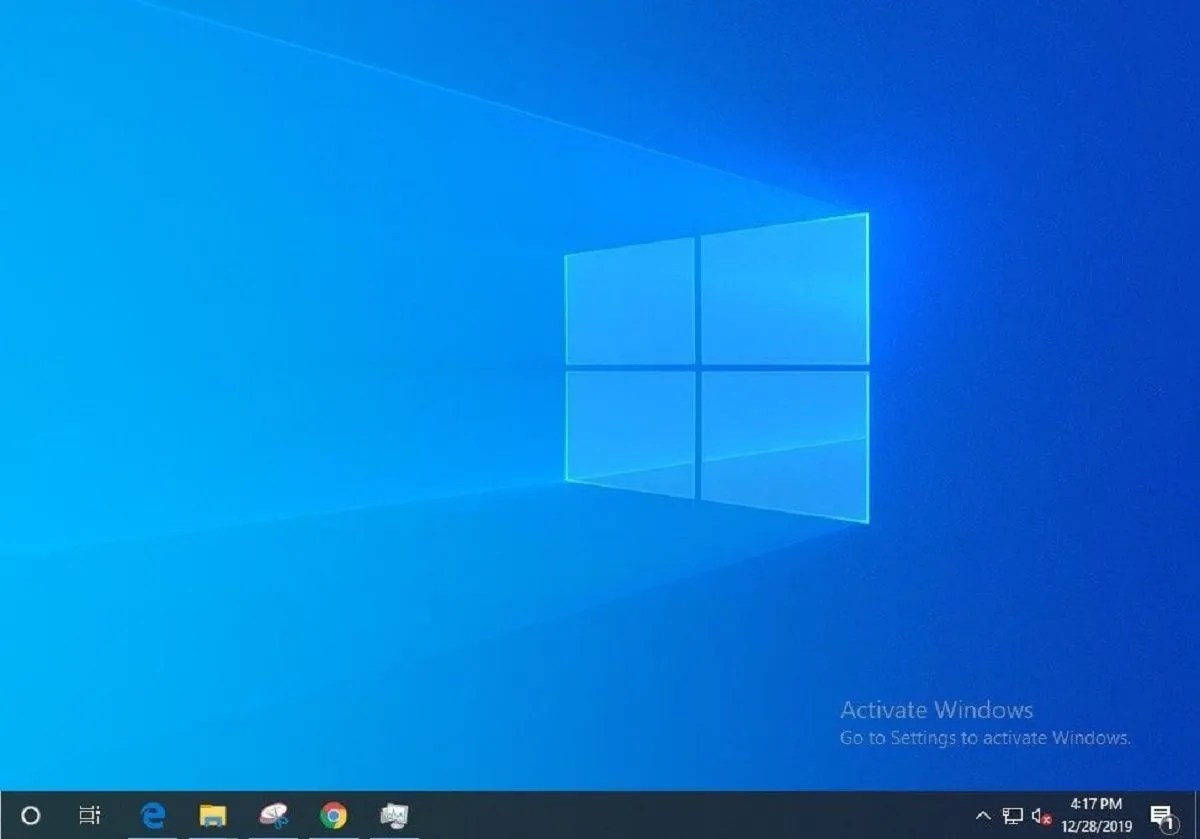
An annoying and edgy prompt on Windows 10 is the Activate Windows watermark in the corner of your PCscreen. The prompt can sometimes interfere with your work and games. This article explains all you need to know about the Windows Activation prompt and 8 ways to remove the Activate Windows 10 watermark.
What is Windows Activation?
Firstly, we’ll explain what Windows activation means.
When you download Windows 10 freely from Microsoft and install it on any computer at no cost, the operating systemremains inactivated. Activation tests your type of Windows with Microsoft’s servers to make sure that it is original. There are two major ways to activate Windows 10. You can either activate it with a product ke, or through a digital license.
You would be presented a product key once you purchase a Windows 10 license from Microsoft or any other retailer for that matter. If you purchased your PC ready-built, it may come with a product key. Conversely, those who upgraded to Windows 10 from a licensed copy of Windows 7 or Windows 8.1 have a digital license and don’t need a product key for activation.
Windows 10 allows you to link your digital license with your Microsoft account, which makes reactivating it in the future much easier (as we’ll see).
How a Non-Activated Windows 10 Functions
In all honesty, a non-activated copy of Windows 10 works almost the same as an activated one, with a few minor limitations.
There are two indications of the Activate Windows watermark, one is the presence on your screen by the bottom-right corner of your screen, and the other is a prompt in your settings that says your Windows is not yet activated. In addition, all of the items in the Personalization option of your settings becomes useless. This hinders you from changing the wallpaper, theme color, Start menu, and other similar settings.
If you aren’t bother by any of the above, then Windows 10 otherwise functions as normal. You’ll still receive system updates and don’t have to deal with any nagging popups.
After this explanation of Activation, we’ll proceed to the most prevalent reasons of the watermark appearing. Also, we’ll discuss how to remove the prompt.
Why the Activate Windows Watermark Comes Up
It is imperative to know the reason behind the prompt before removing it. It helps to understand the process better. There are a lot of reasons that prompts the Watermark, here are a few:
- The most common is when Windows has expired or isn’t activated yet.
- Windows License Invalid: You can use a key you are getting from online platforms and it simply does not work because it has been used by others. Microsoft uses online activation technology to block other users using the same product key.
- Unmatched Windows version: If you purchased key for Windows 10 Professional Edition and you installed Windows 10 Home Edition on your computer. Although the key is 100% valid, the watermark is still visible because of the unmatched Windows 10 variant.
Windows activation also adds certain added features, which you won’t be able to access if you haven’t activated Windows on your machine. By activating Windows, you will receive Windows updates, security features, Windows Defender, and so much more.
So now, we will proceed to how you can remove the prompt, read further to know more.
Method 1: Using Regedit to Remove the Activate Windows Watermark
Follow the steps below to do this:
- Launch Start and type in Regedit and hit enter (you will be prompted by UAC, click Yes)
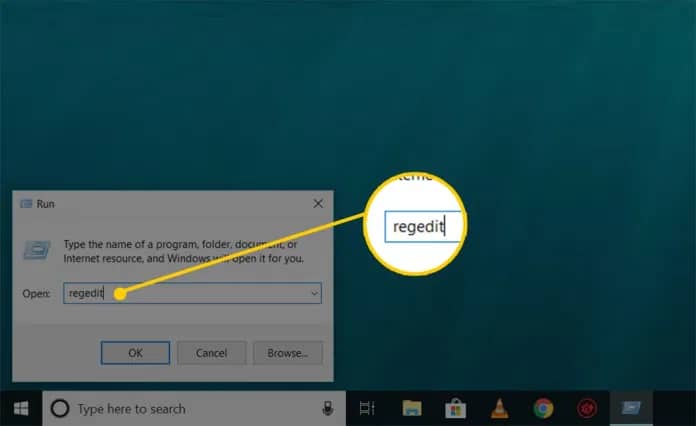
- Now, navigate to HKEY_CURRENT_USER > Control Panel > Desktop
- Next, in the Desktop folder, scroll down to find PaintDesktopVersion and double click on it to open
- Finally, be sure to select the Hexadecimal and change the Value to “0″. Then, Click OK to save changes
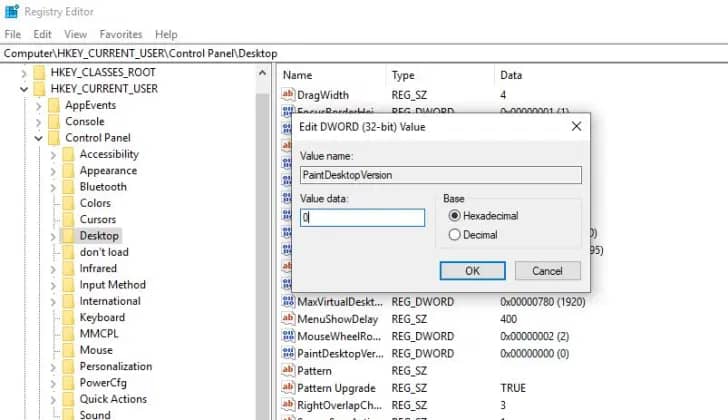
You close the registry editor and restart your computer. After you log back on to the desktop the watermark should now be removed
Method 2: Using Windows PowerShell Remove Activate Windows Watermark
This method is only temporary as Windows would only be a activated for just 90 days. You can however redo this method to regain another 90 days. To do this, follow the steps below:
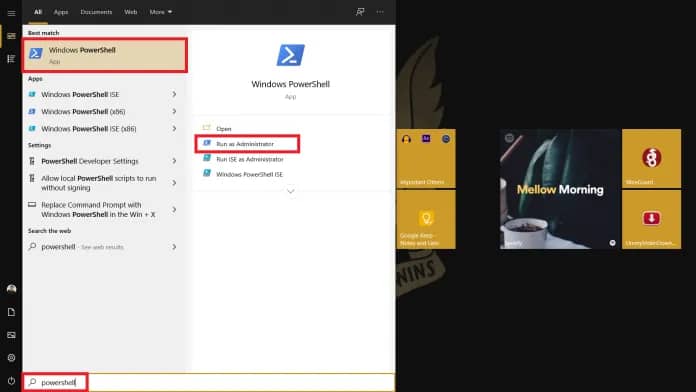
Go to Start, and type in PowerShell, right-click and select run as administrator. (You will be prompted by UAC, click Yes)
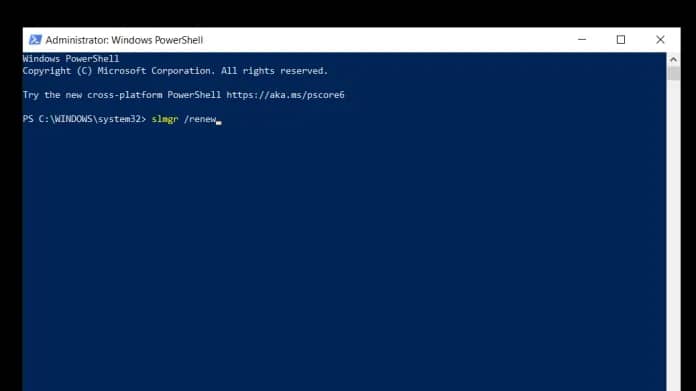
In the PowerShell window, type the below command and hit enter:
Don’t miss: How To Turn Off Google Assistant
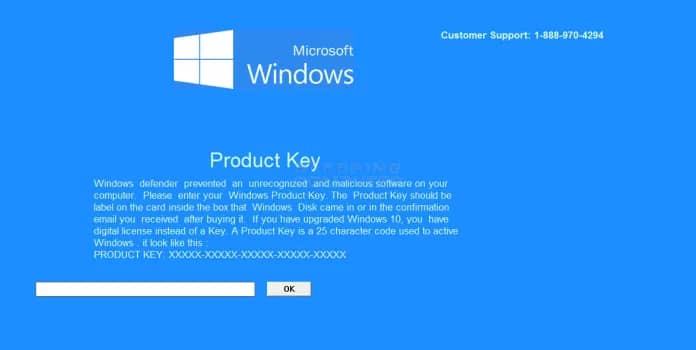
Method 3: Enter a Valid Product Key
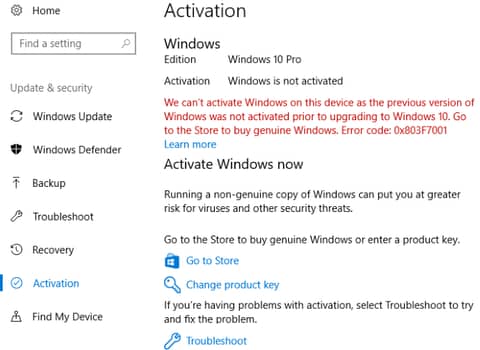
As noticeable in the image above, Windows 10 isn’t activated yet because the previous version of Windows wasn’t activated either. In this virtual machine, we upgraded an unlicensed copy of Windows 7 to Windows 10 and never entered a product key during the upgrade.
In this regard, Windows 10 remains inactivated and therefore displays the watermark. The same situation will prevail if you installed a fresh copy of Windows 10 on a PC and failed to enter a product key upon installation.
All you need to do to resolve this is to enter a genuine product key. Follow the steps below:
- Firstly, click on the Change product key,
- Then, enter your 25-digit product key to activate Windows.
- As long as you use a valid key that hasn’t exceeded the number of usages, Windows 10 should activate and remove the watermark.
Method 4: Run the Activation Troubleshooter
The activation issue could also occur when you make significant upgrades to your computer, such as replacing the motherboard. Windows 10 ties your digital license to your PC’s components, so when you make major changes, it no longer recognizes it as your computer.
To fix this, you can run the Windows activation troubleshooter. This will allow you to establish a connection between your Microsoft account and your computer and activate Windows again. Follow the steps below to do this:
- First, navigate to settings.
- Then, click on Update & Security.
- Next, select Activation again and click Troubleshoot.
- Then be patient for a while as the Troubleshooter boots.
- After that, select the option “I changed hardwareon this device recently”. This will prompt you to log into your Microsoft account.
If you haven’t linked your digital license to your Microsoft account prior to the hardware change, this won’t work. You can try contacting Microsoft support to get it sorted out, but there’s no guarantee of success.
Method 5: Disable Activate Windows Watermark by using Ease of Access
We can remove the activate Windows watermark by also using the Windows 10 Ease of Access option. Don’t get fretty, here’s how to;
First, click on the Start menu, search for Control Panel then open the app.

Next, navigate to the Ease of Access Centre.

From Ease of Access, select Remove Activate Windows Watermark
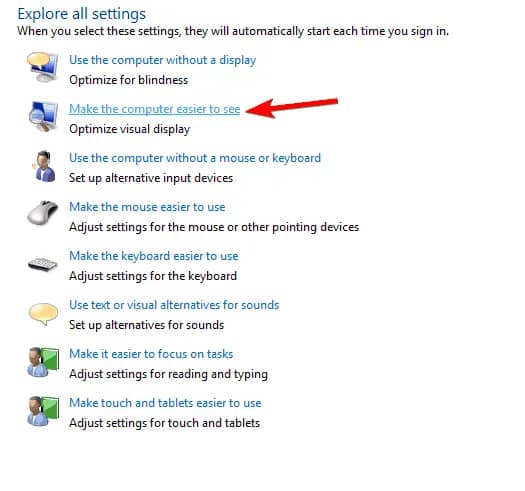
On the next screen, click on Make the computer easier to see
Now, scroll down to the bottom of this screen to tick the box Remove background images (where available)
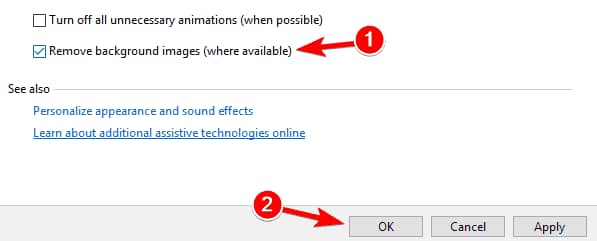
Then, click OK and Restart your machine
The ‘Activate Windows’ watermark should be gone.
Method 6: Disabling Windows 10 Tips to Get Rid of the ‘Activate Windows’ Watermark
This is another way to get rid of the ‘Activate Windows’ watermark specifically on Windows 10 is by disabling Windows 10 tips. Here’s how to do it;
- First, navigate to Start and click Settings (The button that looks like a gear)
- Next, go to System and click Notifications & Actions
- Lastly, scroll down and turn off Show me the Windows welcome experience after updates and Get tips, tricks and suggestions as you use windows
And that’s all, you’d be free now.
Method 7: Get Rid of the ‘Activate Windows’ Watermark using CMD
Sometimes, running test mode on your Windows causes the activate Windows watermark to appear. If your test mode is running, you can disable it easily using CMD. Below is how;
- First, summon CMD by clicking Start and typing in CMD, right-click and select run as administrator
- (you will be prompted by UAC, click Yes)
- In the cmd window enter the below command and hit enter:
If it all goes smoothly, then you should see the “The operation completed successfully” promptRestart your machine. And that’s all.
Method 8: Try the Universal Watermark Disabler
There are a few Watermark Disablers you could use to remove the prompt in question, but we would recommend the Winaero.
Winaero has a feature called Universal Watermark Disabler, which is a quick solution for a Windows 10 watermark remover. All you need to do is to:
- First download and the software
- Next, launch the software then choose install.
- After installation, your computer restarts so make sure you have made appropriate saves on your PC.
- When it boots up from restart, the watermark should have disappeared.
Editor’s picks:
Jump to
What is Windows Activation?
How a Non-Activated Windows 10 Functions
Why the Activate Windows Watermark Comes Up
Method 1: Using Regedit to Remove the Activate Windows Watermark
Method 2: Using Windows PowerShell Remove Activate Windows Watermark
Method 3: Enter a Valid Product Key
Method 4: Run the Activation Troubleshooter
Method 5: Disable Activate Windows Watermark by using Ease of Access
Method 6: Disabling Windows 10 Tips to Get Rid of the ‘Activate Windows’ Watermark
Method 7: Get Rid of the ‘Activate Windows’ Watermark using CMD
Method 8: Try the Universal Watermark Disabler

Daniel Barrett
Author
Daniel Barrett is a tech writer focusing on IoT, gadgets, software, and cryptocurrencies. With a keen interest in emerging technologies, Daniel offers expert analysis and commentary on industry trends. Follow him for authoritative insights into the latest tech innovations.
Latest Articles
Popular Articles