7 Ways To Fix the ‘No Internet Secured’ on Windows 10
This article explains seven ways to fix the 'No Internet Secured' on Windows 10. Click the link to read the full guide.
Author:Daniel BarrettAug 04, 202243.3K Shares637.2K Views
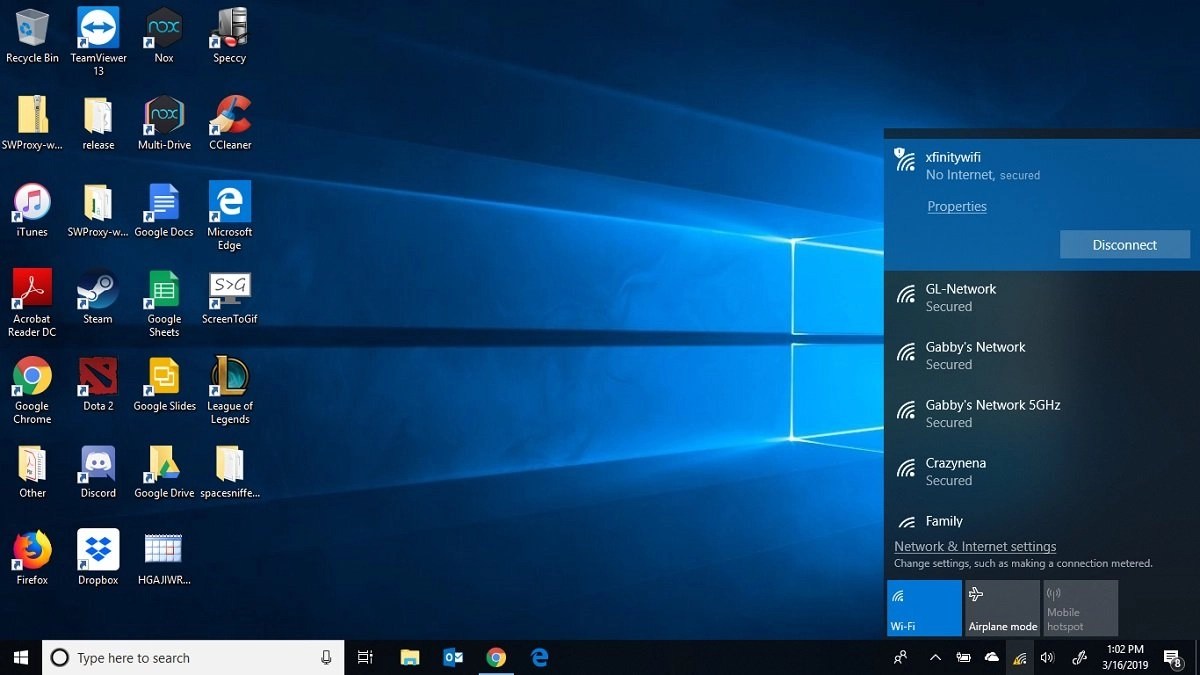
Troubleshooting wireless network issues isn’t a big deal. But sometimes, you might encounter the “No Internet, secured” error. This is an error that appears as a pop-up message from the system tray. It indicates that there is an issue with the wireless connection. This article explains seven ways to fix the ‘No Internet Secured’ on Windows 10.
It’s quite annoying, but this error is relatively easy to handle. It shouldn’t take long to get back online—if you know what you’re doing.
What Causes the ‘No Internet Secured’?
The most predominant reason behind, the “No Internet Secured” connection error is an alteration in your Internet Protocol (IP) configuration settings. These can be accidentally changed or incorrectly set with something as simple as downloading and installing the latest operating systemupdates. So, with this explained, let’s rectify the issue by using the following troubleshooting methods:
Rectifying The “No Internet, Secured” Error
Due to variations in network adaptors and computer setups, there are several methods to employ in fixing this error. Therefore, not all of the following fixes would work for you, so you should try them accordingly until you find the one that works.
This list will give you an idea of what’s required to fix the “No Internet, secured” error:
1. Disable Your VPN
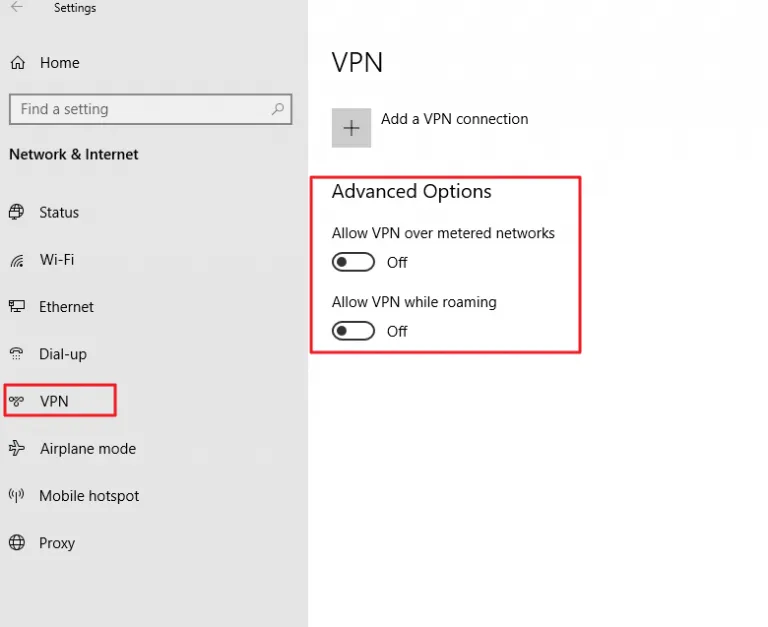
Your PChas connected to the local Wi-Fi network, only to be shocked by the “No Internet, secured” error? Not to worry. If you’re using a VPN, the VPN client’s built-in security features can cause this problem. Specifically, it can be the kill-switch that is constructed to disconnect you from the internet when the VPN server goes down.
To test if this is the situation, disable your VPN (using the disconnect function) or even vacate it totally. Then take a minute to reconnect to the internet and try a regularly updated website—perhaps a newssite.
If everything connects, then the problem was with the VPN server. Update your VPN client if possible, then connect to a new VPN server. If everything connects properly, you’ve rectified the error!
Also read: How To Easily Fix Windows Update Stuck At 27
2. Reset Your Internet Connection.
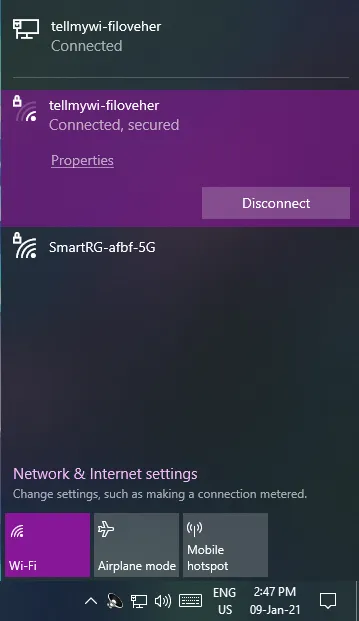
This is one of the easiest fixes that are not too complex. To do this,
- Navigate your mouse cursor to the bottom right-hand corner, click on your system tray and on the internet icon.
- Disconnect from the Wi-Fi.
- Open the internet network again and forget the connection.
- Click on the internet symbol again and turn on airplane mode.
- Restart your computer and turn airplane mode off.
- Re-Connect to your Wi-Fi network again.
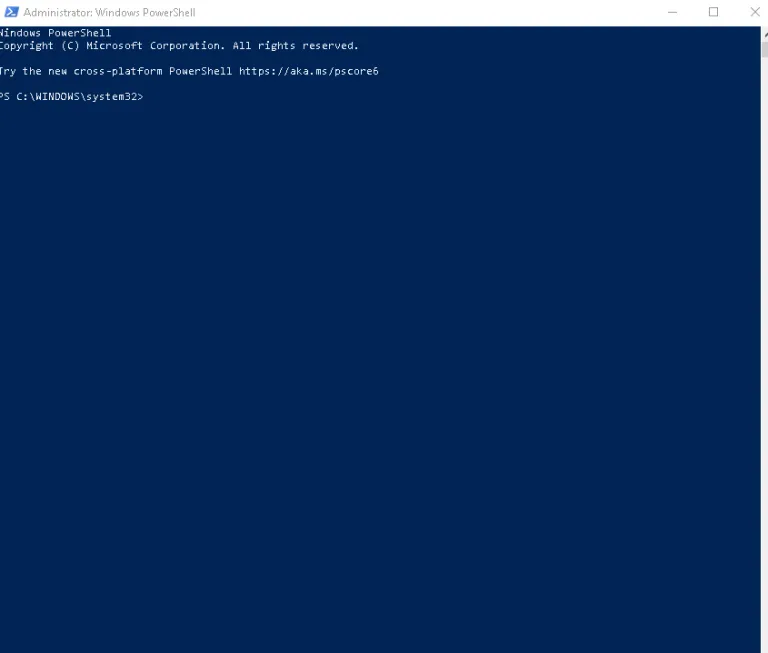
3. Refresh The Windows 10 IP Configuration
There are some available commands to help you with troubleshooting. To use this command;
- Navigate your mouse cursor to Start and right-click on it
- Next, click on Windows Powershell
Then enter the following commands in order:
- ipconfig /release
- ipconfig /renew
This will compel your computer to demand a new IP address from your local router. In many cases, this will resolve the error.
4. Update Your Network Adapter to Fix the ‘No Internet Secured’
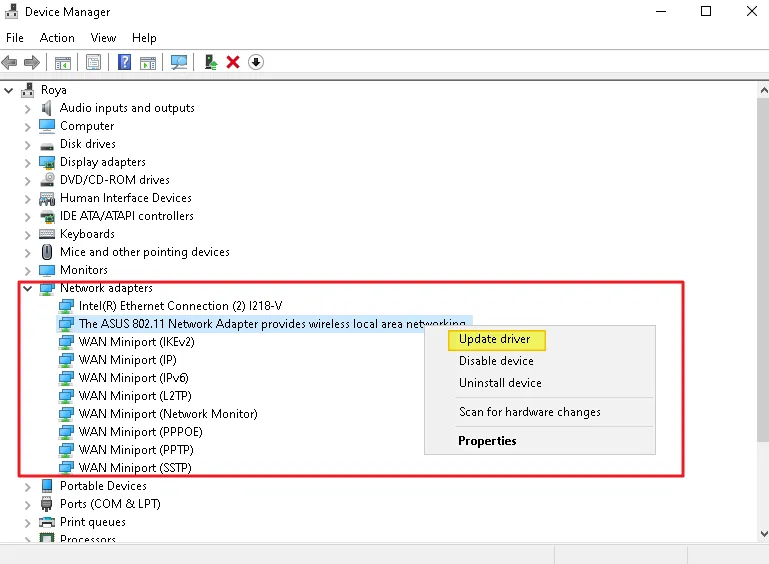
An outdated Network Adapter could cause the issue too. Confirm this by:
- Search for device manager on your computer’s search bar.
- Navigate through the list until you find network adapters.
- Click the arrow on network adapters to broaden the list.
- Locate your wireless network adapter in the list and right-click it.
- Choose the update the driver option.
- Reboot when it is done and see if you can connect to the Wi-Fi.
If you can’t, repeat the above steps and disable it instead.Reboot and re-enable.
5. Reset Winsock to Fix the ‘No Internet Secured’
Winsock is a command-line interface that helps with troubleshooting errors. Instead of a feature of your local airfield, Winsock is the Windows Sockets API. This is a specification for your PC’s communication with network services, specifically the widely used TCP/IP.
To reset Winsock, use:
netsh winsock reset catalog
Be patient for a while for the command to take effect. If it doesn’t reconnect automatically, do so manually.
Don’t miss: Kernel Data Inpage Error: How To Fix BSOD
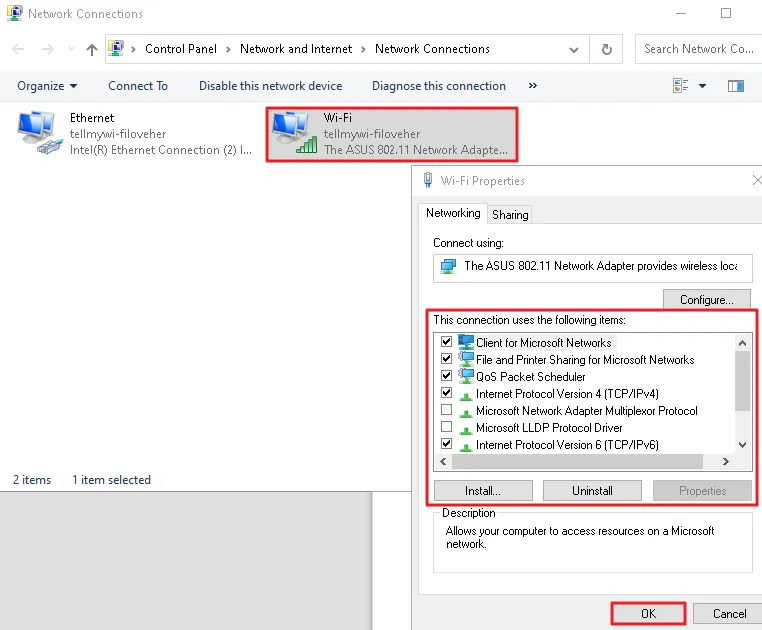
6. Check Your PC’s Connection Properties
If none of the fixes above have worked, then you should consider checking your PC’s network adaptor. Do this by:
- Go to the Settings menu by clicking the Wi-Fi connection icon in the system tray, then Network & Internet Settings.
- Next, click Change adaptor options.
- Right-click on the connection concerned, and click Properties.
- Confirm that the following are checked:
- Click OK to confirm. If you made any changes, restart Windows when prompted.
7. Disable Wi-Fi Sharing Software.
Wifi sharing software can also cause the issue. Rectify this by:
- Go to search and type in “Run” and open the dialogue box.
- Simultaneously, press the Windows and R keys.
- Type in ncpa.cpl & hit enter for the network connections window.
- Right-click on the Wi-Fi connection and select properties from the list.
- Uncheck any non-Microsoft software (third-party you have installed) that is using Wi-Fi sharing.
- Make sure to hit “okay” before closing the window.
- Restart your computer and see if the issue is resolved.
Editor’s picks:
Jump to
What Causes the ‘No Internet Secured’?
Rectifying The “No Internet, Secured” Error
1. Disable Your VPN
2. Reset Your Internet Connection.
3. Refresh The Windows 10 IP Configuration
4. Update Your Network Adapter to Fix the ‘No Internet Secured’
5. Reset Winsock to Fix the ‘No Internet Secured’
6. Check Your PC’s Connection Properties
7. Disable Wi-Fi Sharing Software.

Daniel Barrett
Author
Daniel Barrett is a tech writer focusing on IoT, gadgets, software, and cryptocurrencies. With a keen interest in emerging technologies, Daniel offers expert analysis and commentary on industry trends. Follow him for authoritative insights into the latest tech innovations.
Latest Articles
Popular Articles