What is USB Debugging Mode for Android and How to Enable it?
This guide explains what USB Debugging Mode is on Android and how to enable it. Click the link to read the full guide.
Author:Daniel BarrettJun 08, 2022974 Shares324.7K Views
If you’ve ever tried to do anything advanced on your Androidphone, you’ve likely heard or read the term “USB Debugging.” This is a commonly-used option tucked away neatly under Android’s Developer Options menu. However, it’s still something that many users enable without giving it a second thought–and without knowing what it does. This guide explains what USB Debugging Mode is on Android and how to enable it.
For example, if you’ve ever had to use ADB (the Android Debugging Bridge) to do things like flash a Factory Image on a Nexus device or root a device, you’ve already used USB Debugging, whether you realized it or not.
One of the most prominent Android developer features is USB Debugging. You may have seen this term floating around and wondered whether you should enable it. Let’s look at what Android USB Debugging mode is for and whether you need it.
What Is USB Debugging Mode?
USB Debugging allows an Android device to communicate with a computer running the Android SDK to use advanced operations. When you develop Android apps, you have to install the Android Software Developer Kit (SDK) on your computer. An SDK gives developers the tools to create apps for a specific platform.
Usually, you install it alongside Android Studio, a development environment for Android apps. It includes a suite of vital tools for any developer, such as a debugger for fixing problems and a visual editor.
Libraries are another key component of the SDK. These allow developers to perform standard functions without having to re-code them. For example, Android has a built-in printing function, so you don’t have to come up with a new way to print when writing an app. Instead, you simply call the built-in method in the library when it’s time to do so.
Don’t miss: How To Use The YouTube Video Manager
How Do I Enable USB Debugging Mode On Android?
On modern Android devices, you’ll find USB Debugging in the Developer Options menu, which is hidden by default.
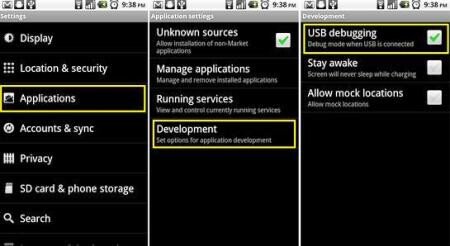
To unlock it, head to ‘Settings’ and scroll down to “About phone.” Scroll down again, and you’ll see a Build number entry at the bottom. Tap this several times, and you’ll see a notification letting you know that you’re now a developer.
Now jump back to Settings and scroll down to the bottom where you accessed “About phone.” Next, you’ll need to open the System entry and expand the Advanced section on Android Pie and later. Here you’ll see a new entry titled Developer options. On older versions of Android, you’ll see the Developer options entry listed next to About phone instead.
Also read: 8 Best Android File Manager Apps For 2022
Regardless, look for USB debugging under the Debugging header once you’re inside. Hit the slider to enable it, and confirm Android’s warning that you understand what this feature is for.
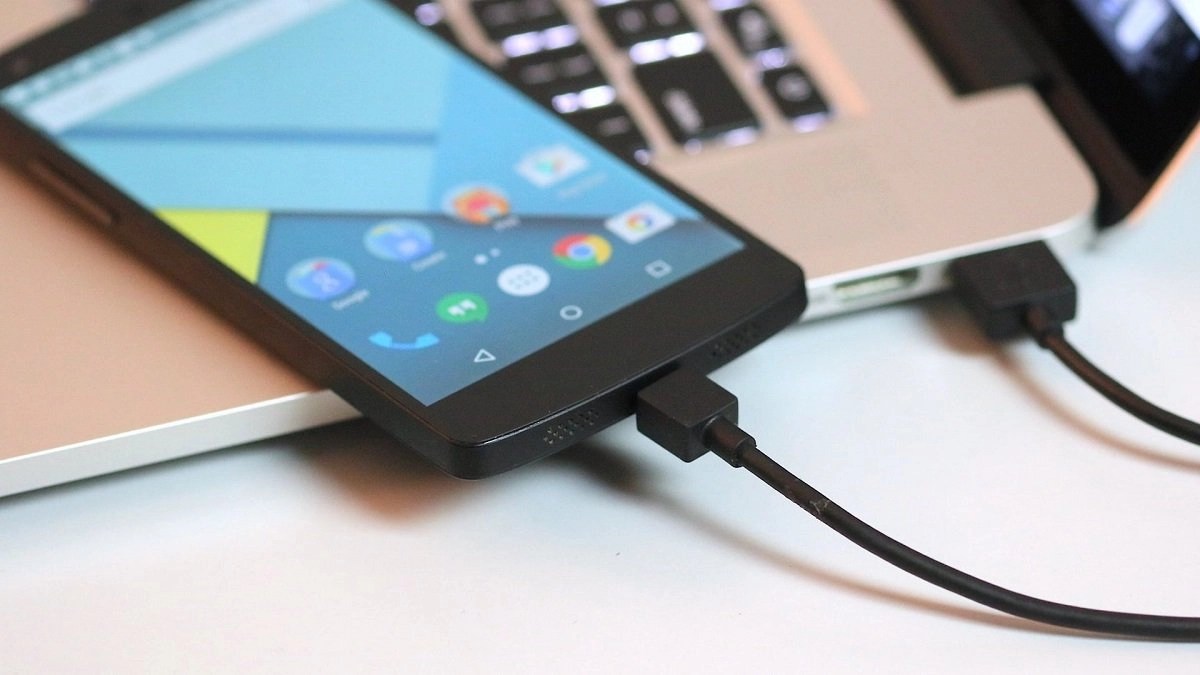
Now you’ve turned on USB Debugging. You just need to plug your phone into a PCusing a USB cable to use it. When you do this, you’ll see a prompt on your phone asking if you want to authorize USB Debugging for that specific computer. This security feature is designed to keep your device safe from attack, so make sure you trust the computer before accepting this.
If you ever accept a prompt for a device by mistake, select “Revoke USB debugging authorizations” to reset all trusted computers.
What Does Android USB Debugging Do?
Without USB Debugging, you can’t send any advanced commands via a USB cable to your phone. Thus, developers need to enable USB debugging so they can push apps to their devices to test and interact with.
When you create a new app built in Android Studio and want to test it, you can push it to your connected device with just a few clicks. Then, after building, it will run and pop up on your device right away. This is way faster than manually sideloading APK files.
Non-developers commonly enable USB debugging to root their phones. Rooting varies by device, but most methods involve some program that you run from your desktop. Once you enable USB debugging and connect your phone, you can use a tool to send the root instructions to your device without even touching it. Installing a custom ROM involves a similar process.
You also need USB Debugging turned on to use Android Debug Bridge (ADB) commands. You can install APK files stored on your PC onto your phone, move files back and forth, and view device logs for debugging errors. ADB commands and Fastboot can save your bricked device even when you can’t turn it on normally.
Downsides Of USB Debugging
Of course, everything has a downside, and for USB Debugging, it’s security. For example, plugging your phone into a public charging port could cause problems with USB Debugging enabled. If someone had access to the port, they could potentially steal information from your device or push malicious apps.
This is why Android displays a confirmation prompt, so you don’t connect to a PC you don’t trust. However, an unsuspecting user could accept the prompt without realizing what it’s for.
Additionally, leaving USB Debugging enabled makes your device open to attack if you lose it. Someone who knew what they were doing could connect your device to their computer and issue its commands via ADB without knowing your PIN. That’s scary and a good reason you should have Android Device Manager set up so you can remotely locate or erase your device and leave USB Debugging enabled all the time. Enable it when you need to use it, then disable it when you’re finished. That’s the safest way to handle it. Sure, it’s slightly inconvenient, but it’s worth the trade-off.
Honestly, unless you’re a developer, you probably don’t need to leave USB Debugging enabled all the time. Instead, enable it when you need to use it, then disable it when you’re finished. That’s the safest way to handle it. Sure, it’s slightly inconvenient, but it’s worth the trade-off.
Editor’s picks:

Daniel Barrett
Author
Daniel Barrett is a tech writer focusing on IoT, gadgets, software, and cryptocurrencies. With a keen interest in emerging technologies, Daniel offers expert analysis and commentary on industry trends. Follow him for authoritative insights into the latest tech innovations.
Latest Articles
Popular Articles