How to Fix an IPv6 No Network Access Error
In this troubleshooting guide, we will walk you through serval methods to fix the IPv6 no network access error. Click to read the full guide.
Author:Daniel BarrettMay 29, 2022100.3K Shares1.5M Views

How to Fix an IPv6 No Network Access Error– Many PCusers are facing issues trying to connect to the internet, getting the IPv6 no network access error. If you’re one such user, this guide will help you.
With the invention of the internet comes protocols and technology to enhance exchange and protection over the web. However, sometimes even the most experienced internet users can face the smallest connectivity issue.
This troubleshooting guide will walk you through serval methods to fix the IPv6 no network access error.
Solution 1: Update Your Network Drivers
The best way to update your network drivers is to go online to your computer or device manufacturer and download then install your drivers manually.
Here’s how:
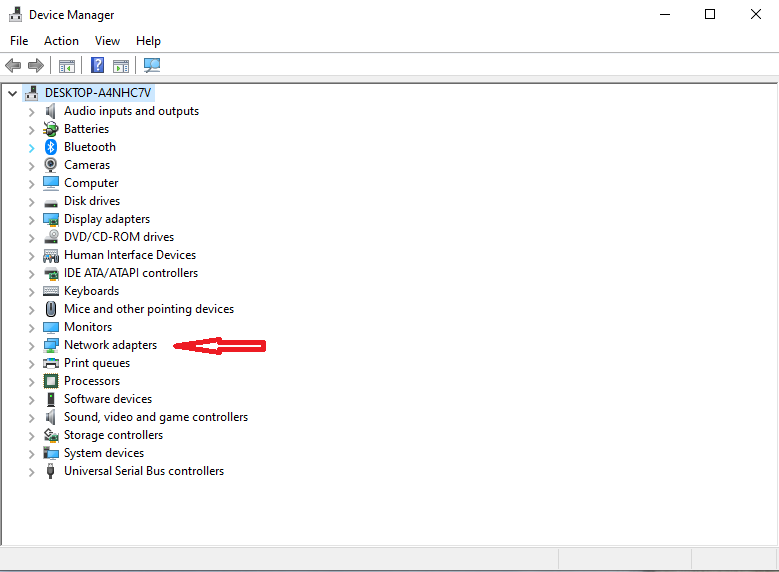
- Right-click the Start button and select Device Manager from the list.
- Expand the Network adapters, right-click the networking device, and select Update Driver Software from the submenu.
- Then you will find two options to update the drivers: automatically or manually. You can choose one based on your needs and follow the on-screen instructions to complete the operation.
Solution 2: Change HT (High Throughput) Mode
HT Mode is a helpful feature, but you should change its settings to resolve the problem.
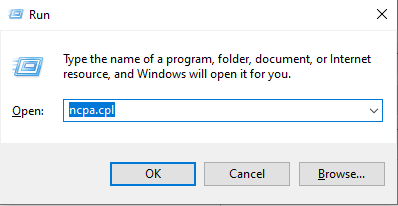
- Press Windows Key + R on the keyboard to open the Run dialog box
- Type ‘ncpa.cpl’ in the bar and click OK to open the Internet Connection settings item in Control Panel.
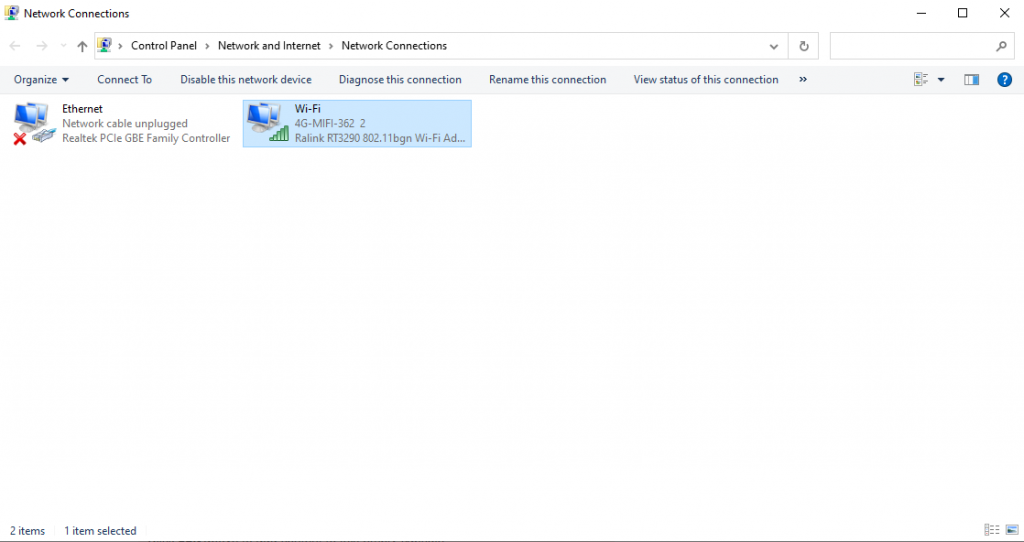
- When the Internet Connection window opens, double-click on your active Network Adapter.
- Click Properties and then click the Configure button at the top of the window.
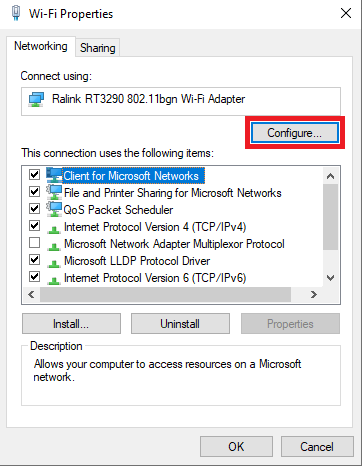
- Navigate to the Advanced tab in the new window, opening and locating the HT Mode option in the list.
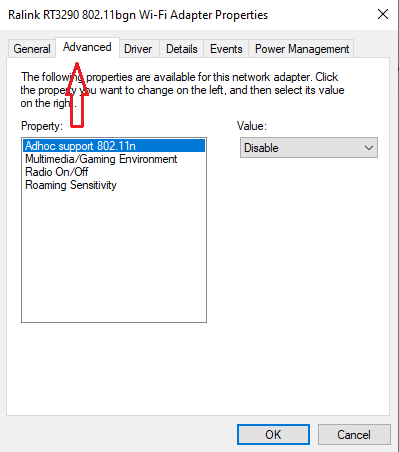
- Please change it to HT Mode 20/40 or a similar-looking option. Restart your computer to confirm the changes and check to see if the problem persists.
Solution 3: Restart the Winsock and TCP/IP Stack
Resetting Winsock is an effective way to resolve the IPv6 no Internet access problem. This method requires you to use the Windows command prompt. Here’s how:
- Type the command prompt in the search box, right-click it, and select the Run as administrator option from the submenu.
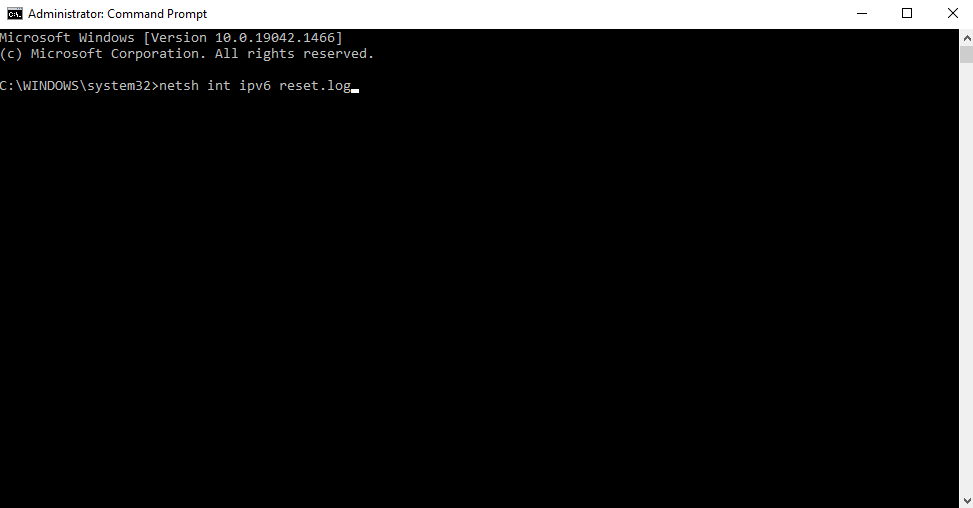
- Type netsh winsock reset catalogcommand in the command prompt and hit Enter.

- Type netsh int ipv6 reset reset.logcommand and hit Enter.
Restart your computer and see if the IPv6 no network access Windows 10 error is resolved.
Solution 4: Release and Renew Your IP Configuration
Releasing and renewing the current IP address can fix the IPv6 no network access error. Here’s how to do it:
- Press Windows Key + R to open Run
- Type cmd and hit enter to open the command prompt
- Type ‘ipconfig /release’ in the command prompt window and press ENTER.
- Once the prompt returns, type ‘ipconfig /renew’ and then hit Enter.
- Type Exit and press ENTER to close the window.
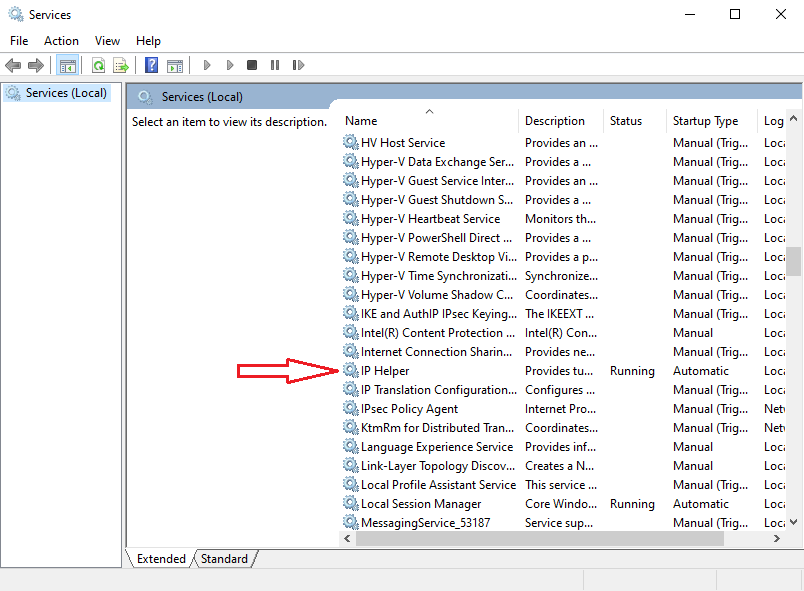
Solution 5: Disable IP Helper Service
IP Helper is a built-in Windows service that provides tunnel connectivity for your computer using IPv6 transition technologies. Disabling the IP Helper service can help you fix the problem. Here’s how:
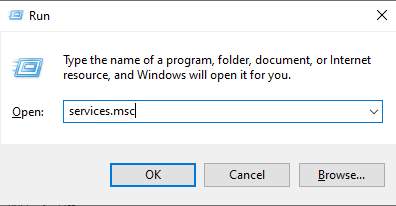
- Press the Win + R keys to open the Run box, and then type services.msc in the box and hit Enter.
- Go to the IP Helper service in the Windows services list and double-click it to open its Properties. You may have to scroll down a bit before you find it.
- Change the Startup type to disabled in the pop-up window and click the Stop button. After that, click Apply to execute the change and exit the service.
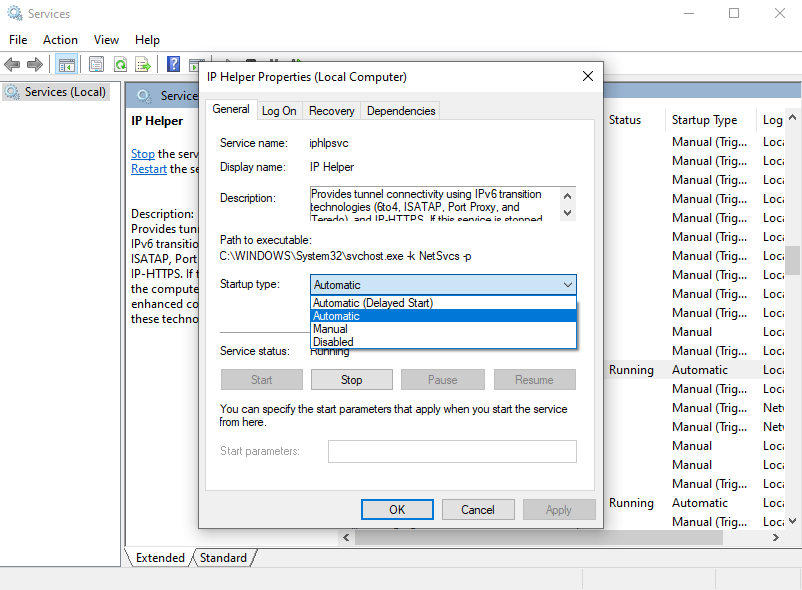
After disabling the service, you can check if the IPv6 no connectivity is fixed or not.
Solution 6: Disable IPv6 to Force Your PC to Use IPv4
IPv6 is not likely to be essential for the next few years. Your internet problem might, therefore, not be about IPv6. Unless you need IPV6 for something, you can try forcing windows to use IPv4 instead.
Here’s how:
- Press Windows Key + R to open Run
- Type ncpa.cpl and hit enter to open the networks connections window
- Right-click on your connection and select “properties.”
- Scroll down to ‘Internet Protocol Version 6 (TCP/IPv6) on the networking tab.’
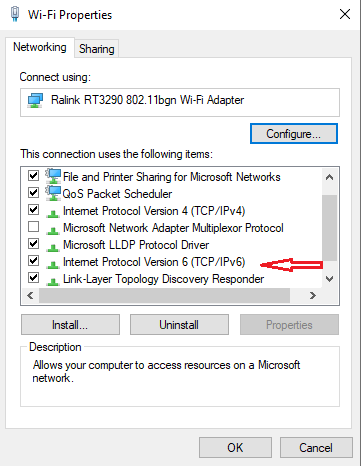
- Uncheck the checkbox on the left of this property, and then click OK.
You might need to restart your computer.
You can use the Microsoft tool to automate this step. Go to this page and download the ‘Prefer IPv4 over IPv6 in prefix policies’ utility and run it. This will make IPv4 default over IPv6. To disable IPv6 altogether, use the ‘Disable IPv6’ utility. You can reverse these actions by using more utilities from the same page.
Solution 7: Disable Firewall and Antivirus Software Temporarily
Firewall and antivirus programs may block your device from accessing the Internet and lead to “IPv6 no network access”. You can try disabling them temporarily and check if it is helpful.
- Right-click the Start menu and select Programs and Features from the list.
- Find the Antivirus software you have installed, and then right-click on it and select Uninstall. Then you can follow the on-screen prompts to complete the uninstallation.
If this method doesn’t resolve your problem, you can reinstall them.
Now, let’s see how to disable the Windows Firewall service temporarily.
- Press the Win + R keys to open the Run box, and then type services.msc in the box and hit Enter.
- Go to Windows Firewall service and double-click it to open the properties.
- Change the Startup type to Disabled, and then click the Stop button. Click Apply to save the change.
Then you can check if it resolves your problem.
Editor’s picks:
Jump to
Solution 1: Update Your Network Drivers
Solution 2: Change HT (High Throughput) Mode
Solution 3: Restart the Winsock and TCP/IP Stack
Solution 4: Release and Renew Your IP Configuration
Solution 5: Disable IP Helper Service
Solution 6: Disable IPv6 to Force Your PC to Use IPv4
Solution 7: Disable Firewall and Antivirus Software Temporarily

Daniel Barrett
Author
Daniel Barrett is a tech writer focusing on IoT, gadgets, software, and cryptocurrencies. With a keen interest in emerging technologies, Daniel offers expert analysis and commentary on industry trends. Follow him for authoritative insights into the latest tech innovations.
Latest Articles
Popular Articles