How to Change a Wi-Fi Network from Public to Private
This article explains how to change a network from public to private on Windows 10. Click on the link to read full guide...
Author:Daniel BarrettMay 16, 20221.5K Shares196.9K Views

How to Change a Wi-Fi Network from Public to Private– You might want to switch a network from Public to Private, the main reason being securing your home or office network from being accessed by unauthorized devices. Given the abundance of Wi-Fi-capable devices, changing your network settings is an easy process.
This article explains how to change a network from public to private on Windows 10. Designating a connection as private makes it discoverable to other devices, so only do this for networks you trust.
Switch From Public to Private Network Using Wi-Fi Settings
To change your network from public to private using the Wi-Fi settings:
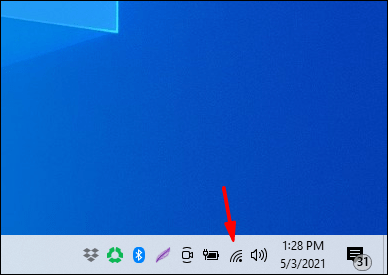
- Then, click on the Wi-Fi network icon found towards the far right of the taskbar.
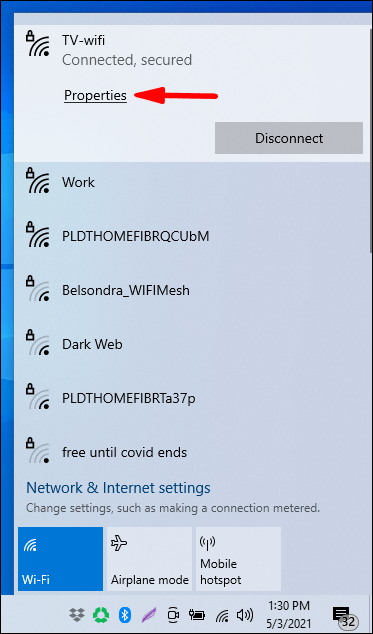
- Select Properties under the Wi-Fi network that you’re connected to.
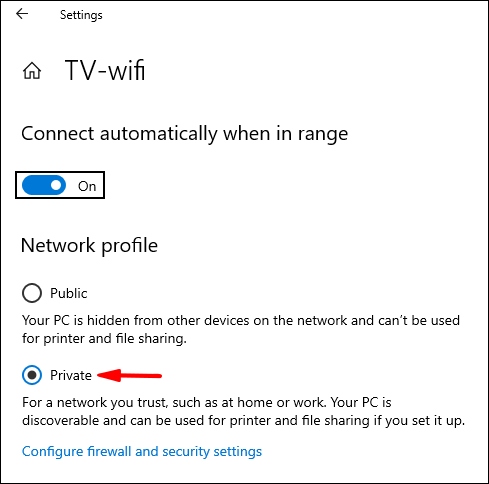
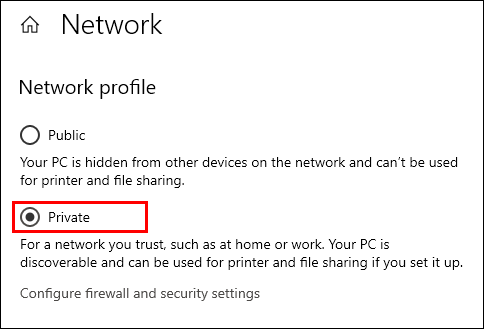
- From the Network profile, select Private.
Using Ethernet Lan Settings
The process is slightly different when you connect to a network through an Ethernet cable. You can also use this alternative method when connected via Wi-Fi.
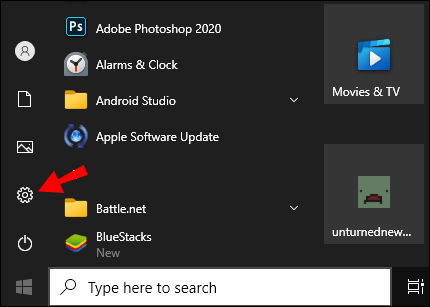
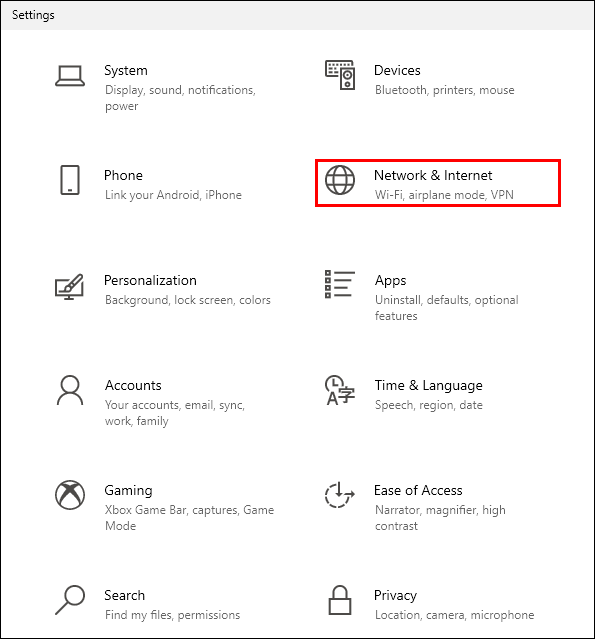
- Select the Windows Start Menu and choose Settings.
- Select Network & Internet in Windows Settings.
- Now, select Properties under Ethernet.

- Next, choose Private under Network Profile.
- Close the Settings window. The change will take effect immediately.
Switch From Public Network to Private Using the Registry
Note:A single mistake in Registry Editor has the potential to break an entire system, so consider creating a backup in advance. Once you’ve opened the Registry Editor, click on File > Export to save the backup in a secure location. If anything goes wrong, you can import the backup.
To change your network location from public to private using the Registry Editor:
- To launch a Run box, press Windows + R.
- Type “regedit’ then Enter.

- From the left pane of Registry Editor, navigate to the following key:
HKEY_LOCAL_MACHINE\SOFTWARE\Microsoft\Windows NT\CurrentVersion\NetworkList\Profiles
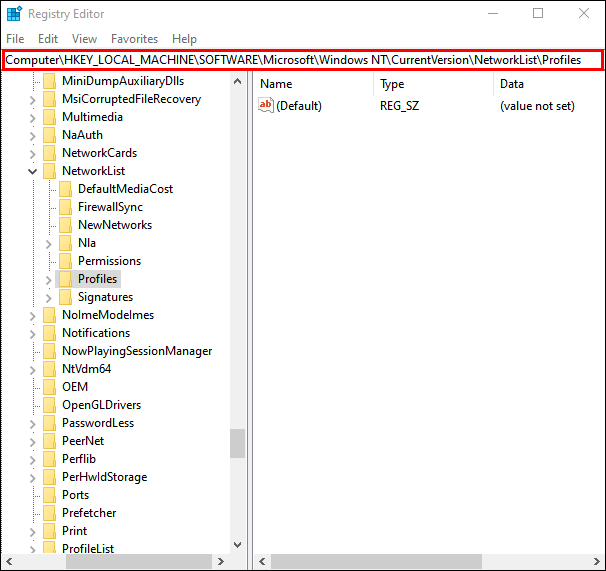
- From the left pane, expand the Profiles key.
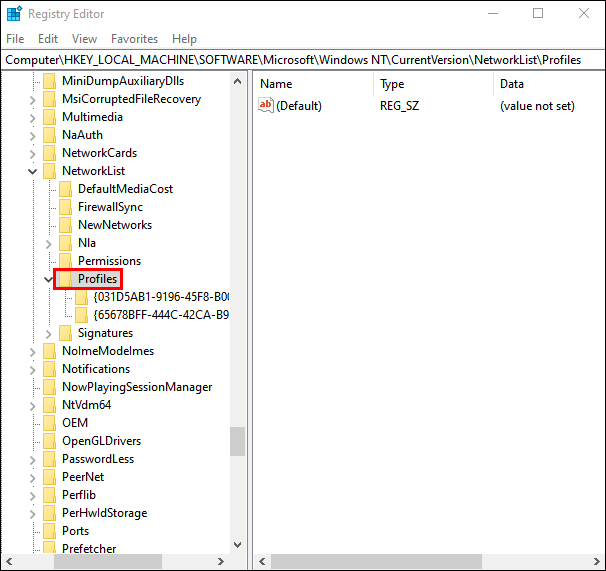
- Click on the subkeys to find the “ProfileName” that matches your current network connection’s name.
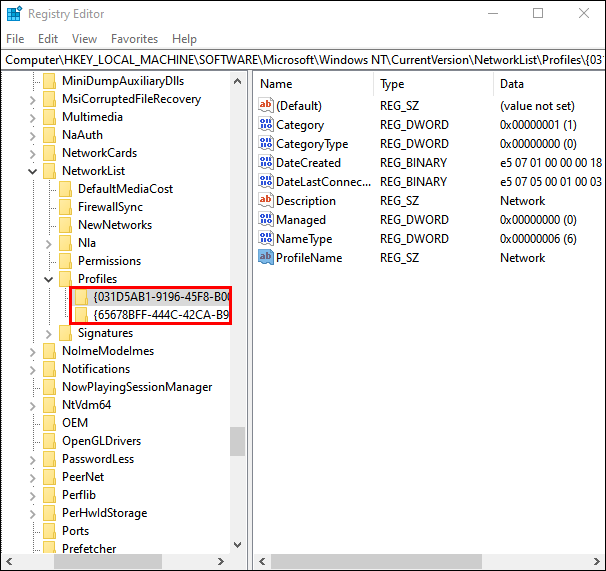
- Once you’ve found the right subkey, in the right pane, double-click Category and edit the DWORD to the following:
Public: 0, Private: 1, Domain: 2.
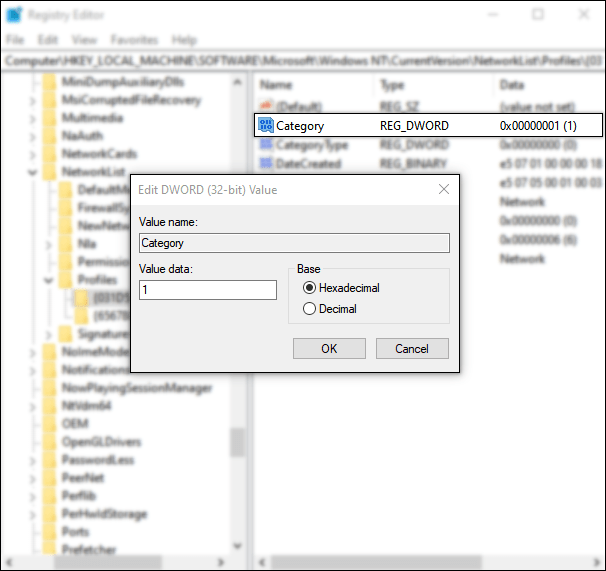
- To apply the new network location, reboot your computer.
How to Change My Network from Public to Private in Windows 8.1?
If you’re using Windows 8.1, open the Charms Bar and select Change PCSettings. Next, click Network to see your active connections, then enable Find Devices and Content. Doing this changes the network from public to private because the option isn’t available for public networks.
How to Change My Network from Public to Private in Windows 7?
If you’re running Windows 7, right-click on the network icon in the Taskbar, then select Open Network and Sharing Center. Next, under View Active Networks, click the network you’re using. You’ll have three options: Public Network, Home Network, and Work Network. Select Home Network or Work Network for a private connection.
Bottom Line
Setting a network connection to private doesn’t protect your privacy. The opposite is true: changing a network to private makes it discoverable to other devices on the network. If you don’t want your computer vulnerable to hackers, leave the connection public.
Editor’s picks:

Daniel Barrett
Author
Daniel Barrett is a tech writer focusing on IoT, gadgets, software, and cryptocurrencies. With a keen interest in emerging technologies, Daniel offers expert analysis and commentary on industry trends. Follow him for authoritative insights into the latest tech innovations.
Latest Articles
Popular Articles