How To Easily Install Mac OS X On An External Drive
In this article, I’ll walk you through the requirements and steps to install Mac OS X onto an external hard drive. Click to read full guide.
Author:Daniel BarrettMay 30, 202252K Shares800.7K Views
In this article, I’ll walk you through the requirements and steps to install Mac OS X onto an external hard drive.
If you’re worried about updating your Mac to macOS Catalina, or if you are testing the beta version of macOS Big Sur and don’t want to risk messing up your system, you don’t have to install the update on your Mac at all – you can install it on an external hard drive instead.
This can be useful for a couple of different reasons. Firstly, it allows you to run another copy of OS X without needing any additional Mac computer.
Also, since you can run a full copy of OS X on the external drive, it can be used for troubleshooting purposes on other Macs or it can be as a kind of virtual OS X. Using an external drive, you can save space on your Mac, though it might be a bit slower if you are using USB 2.0.
Installing the Mac operating systemon an external drive is the safest way to get a good look at a new OS without changing anything on your Mac. It’ll leave your current configuration intact and allow you to play around with Catalina or try out the beta of macOS Big Sur.
Before you start
Before you make a bootable copy of Catalina, make sure you have an external hard drive with at least 15GB of storage, or a spare external hard drive (one that you don’t use with anything else).
You’ll also need to download macOS Catalina from the Mac App Store.
Note:After macOS Catalina has downloaded, it will automatically begin the installation process. Close the installer instead.
Please, Please, Please, back up your Mac before you do anything.
Also read: How To Easily Format an SD Card on Mac
Format External Hard Disk
In order for your external device to function as a startup disk, it must be formatted as Mac OS Extended and employ a GUID partition map. To check what format your drive is using (and change it), you’ll need to launch your Mac’s Disk Utility. Disk Utility can be found in the Applications > Utilities folder or by searching for it using Spotlight.
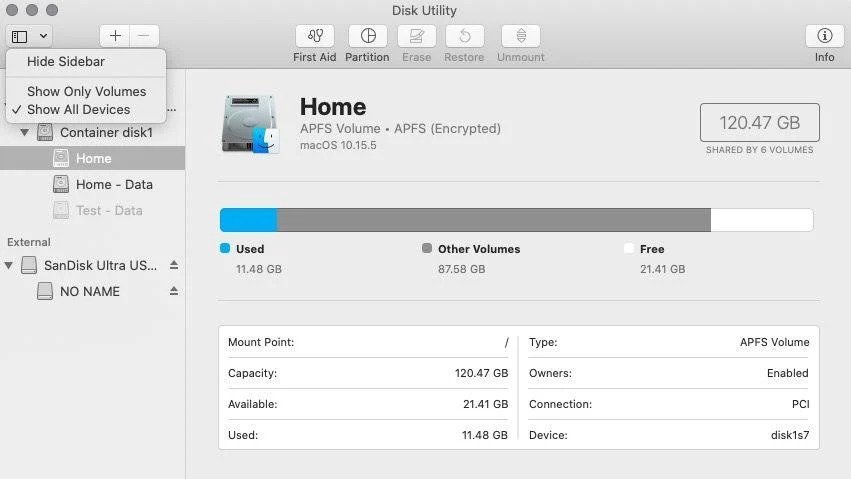
Once Disk Utility is running, click on your external device in the left-hand pane and check the partition map. In our case, our drive is partitioned using Master Boot Record rather than GUID. So, we definitely need to format it.
WARNING:Before proceeding, understand that formatting will obviously erase everything on your device. If there is anything you want to save, make sure you back it up first!
- First, unmount the device.
- Once the drive is unmounted, select the full disk in the left sidebar (labeled “UFD 3.0 Silicon” here)—not the sub-disk(s) under it (labeled “Untitled” here)—and click “Erase” in the top row of buttons.
- From the resulting dialog, format your device as “Mac OS Extended (Journaled)” and use the scheme “GUID Partition Map”. You can also give your device an appropriate name, if you want. Then click “Erase”.
- When the operation is complete, you will see the following message. Click “Done” to continue.
Now, you’re ready to install mac OS X on your external device.
Install OS X
There are two ways you can install OS X on to your external hard disk: by reinstalling OS X from the OS X Utilities repair screen or by downloading OS X from the App Store and running the installer. I’ll show you both methods in case one isn’t working for you.
The easiest way is to download OS X from the App Store. Once you open the App Store, you’ll see a link on the right for the latest version of OS X (El Capitan as of this writing).
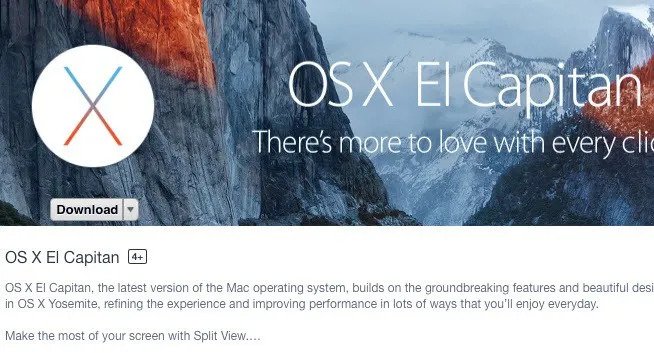
Go ahead and click the Download button to start downloading the installer. Note that if you already have that version of OS X installed, you’ll see a popup message appear asking if you still want to continue or not. Just click Continue.
Once it has been downloaded, just double-click the installer, which will be located in the Applications folder.
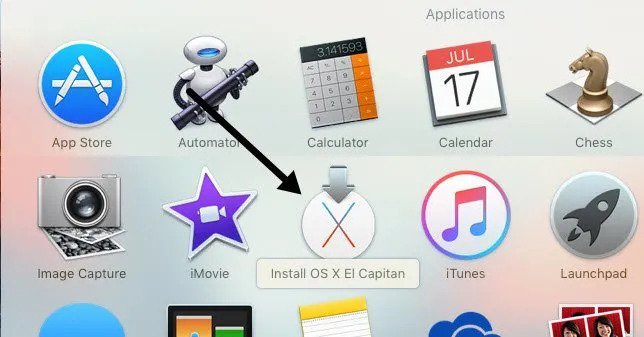
Keep clicking past the license agreement, etc., until you get to the screen that asks you which disk to install OS X on. By default, it is set to MacBook.
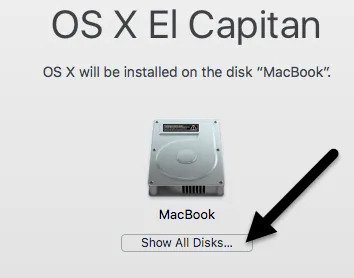
Click on the Show All Disks button and you’ll see an icon for the different disks and partitions on the Mac. I named my external hard drive OS X and that shows up in the middle.
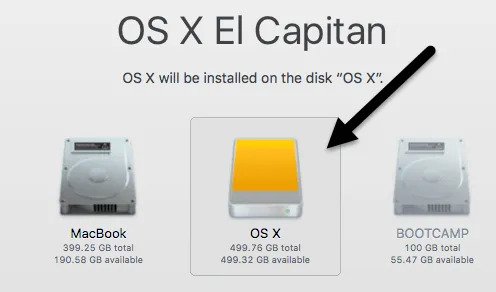
You can also tell it’s an external hard disk because it uses the icon with the orange hard drive. Click Continue and then follow the instructions to complete the installation. Note that your computer may restart during the install and you don’t have to do anything. OS X will automatically continue installing onto the external hard drive rather than booting up to your internal version of OS X.
At the end of this article, I’ll show you how to boot up to the external hard drive, so skip down if you ended up using the App Store method. Note that by default, the Mac will start booting up directly to the external hard drive until you change it.
Install Mac OS X On An External Drive
The second method to install OS X is to restart the Mac and press and hold the COMMAND + R keys. This will load up OS X Recovery.
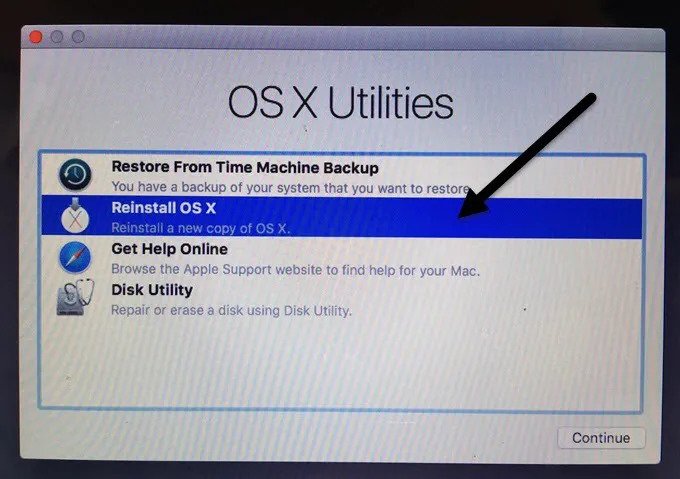
The OS X Utilities screen will appear and here you want to click on Reinstall OS X. Again, you’ll go through some basic screens, but when you get to the hard disk screen, click on Show All Disks again.
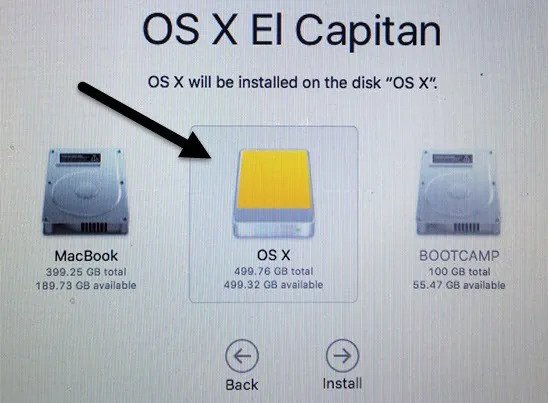
Using this method, you’ll have to login using your Apple ID and password so that the entire OS X installer can be downloaded off of Apple’s servers. Whichever method you choose, it will take anywhere from 15 to 30+ minutes to install OS X onto your external hard drive.
While OS X is installing, your computer will restart a couple of times. Note that when it finally boots into OS X, that is the version running off your external drive. To switch back and forth between the internal and external drive, you have to restart your computer and hold down the OPTION key.
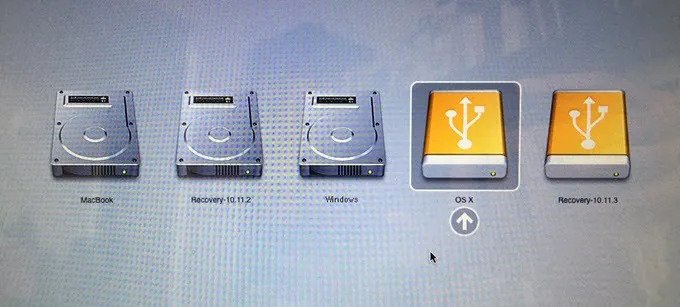
When you do that, you should see at least four icons. In my case, I have five because I have Windows installed using Boot Camp. Anyway, the grey MacBook and Recovery 10.11.2 icons are for my internal OS X and the orange OS X and Recovery 10.11.3 are for the version installed on my external drive.
Install Mac OS X On An External Drive
Use the arrow keys to select which drive to boot from and then simply press Enter. If you have a newer Mac and a USB drive that supports USB 3.0, everything should run fairly fast. Overall, it’s a fairly straight-forward process and took me less than an hour to get everything working. If you have any questions, feel free to comment. Enjoy!
Editor’s picks:

Daniel Barrett
Author
Daniel Barrett is a tech writer focusing on IoT, gadgets, software, and cryptocurrencies. With a keen interest in emerging technologies, Daniel offers expert analysis and commentary on industry trends. Follow him for authoritative insights into the latest tech innovations.
Latest Articles
Popular Articles