2 Easy ways to save an iMovie project on your Mac computer
On your Mac computer, you can work on multiple iMovie projects simutaneously, and easily save them once you're finished. Visit our website to read more.
Author:Daniel BarrettMay 30, 2022256.4K Shares3.4M Views

On your Mac computer, you can work on multiple iMovie projects simutaneously, and easily save them once you’re finished. In this guide, we’ll discuss two easy methods you can use to save iMovie project on your Mac.
With iMovie, you can create a project from the pre-downloaded trailer templates, or make a new movie to compile videos from a family vacation or birthday party. Once a project is complete, you can save it to your files, whether it’s a specific folder or directly to your desktop.
Here’s how to save an iMovie project to your Mac.
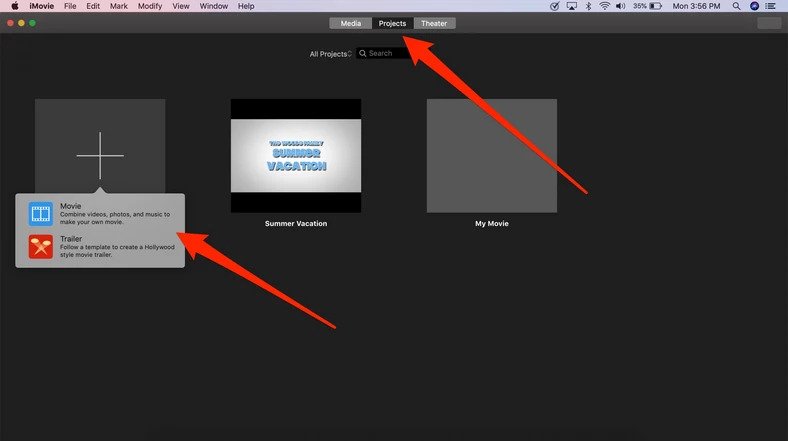
Method 1: Saving a Project Via iMovie
Step 1: Open iMovie on your Mac.
Step 2: Select an ongoing project from the “Projects” tab. You can also start a new project by clicking the plus (+) option and selecting a trailer template or starting a new freeform movie.
Step 3: Click on the three dots to the right of its name and select “Share Project” from the pop-up list.
Step 4: Select “File” from the bottom of the list. The other options allow you to share the project directly through email or social media, but sharing to “File” will directly save a copy to your Mac.
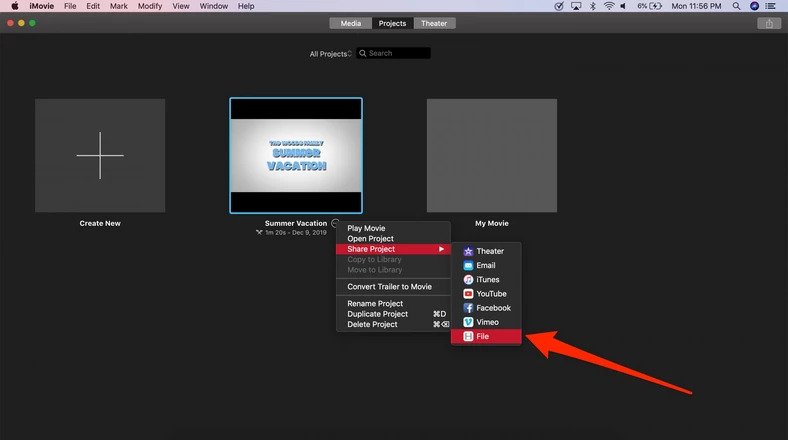
Sharing to “Theater” will only save the project to iMovie, and you won’t be able to access it anywhere else on your computer.
Step 5: This will open a pop-up with options to customize your saved video. You can add a description and tags, along with adjusting the resolution and quality, then click “Next”


Step 6: iMovie will then prompt you to choose a file name and location. Enter a file name next to “Save As” and choose a location next to “Where” a specific folder or your desktop.
Step 7: Click “Save” to complete the process.
Method 2: Saving a iMovie Project Via File Menu
Step 1: Click to open a project or create a new one.
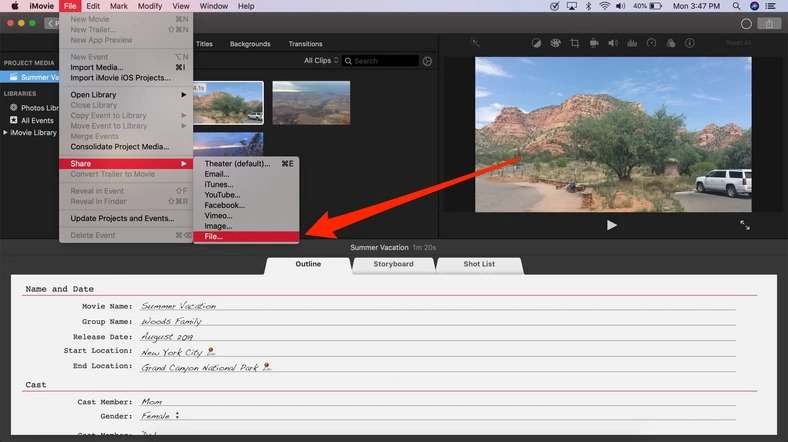
Step 2: Once the project is completed, navigate to the “File” tab in the toolbar at the top of the app. This will be the first option to the right of the Apple icon and bolded “iMovie” settings.
Step 3: Select “Share” from the drop-down menu.
Step 4: Select “File.” This will open the pop-up to save the project on your Mac computer.
Don’t miss:

Daniel Barrett
Author
Daniel Barrett is a tech writer focusing on IoT, gadgets, software, and cryptocurrencies. With a keen interest in emerging technologies, Daniel offers expert analysis and commentary on industry trends. Follow him for authoritative insights into the latest tech innovations.
Latest Articles
Popular Articles