Google Photos Archive – Everything You Need To Know
In this article, we will be explaining everything you need to know on Google photos archive. Click the link to read full guide.
Author:Daniel BarrettJun 06, 202277.1K Shares1.2M Views
Google Photos is one of the best apps to take backups and store photos in the cloud. It comes with many features like unlimited backup, link sharing permissions, and Archive. But, first, let’s take a look at the Archive feature. In this article, we will be explaining everything you need to know about the Google photos archive.
Google Photos Archive Feature
Initially, the archive feature was released to help users declutter their Photos home screen because, for every photo that you take, there’s a backup. And that can clutter the stream, making it difficult to find photos that are important to you.
The Archive feature improves photo organization on a device and enables images to be removed from sight.
Google Photos Archive
To use it, you’ll need Google Photos installed on your device. You’ll also need to be signed in to your Google account. Archiving is not the same as deleting, although you won’t see the pictures in the main photos tab. You will still see them in search results and albums, but they will never be used to create collages, animations, or movies.
Also read: How To Make Chrome Your Default Browser
How To Archive On Android, iPhone, And iPad
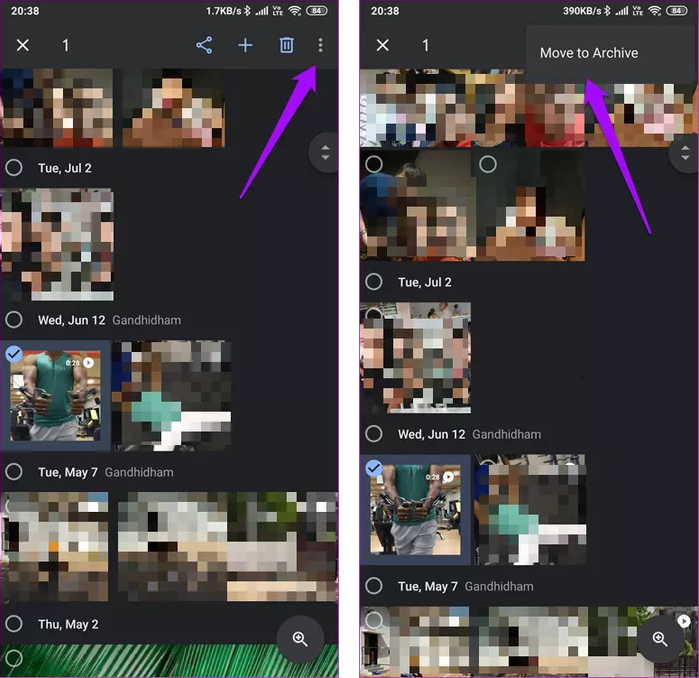
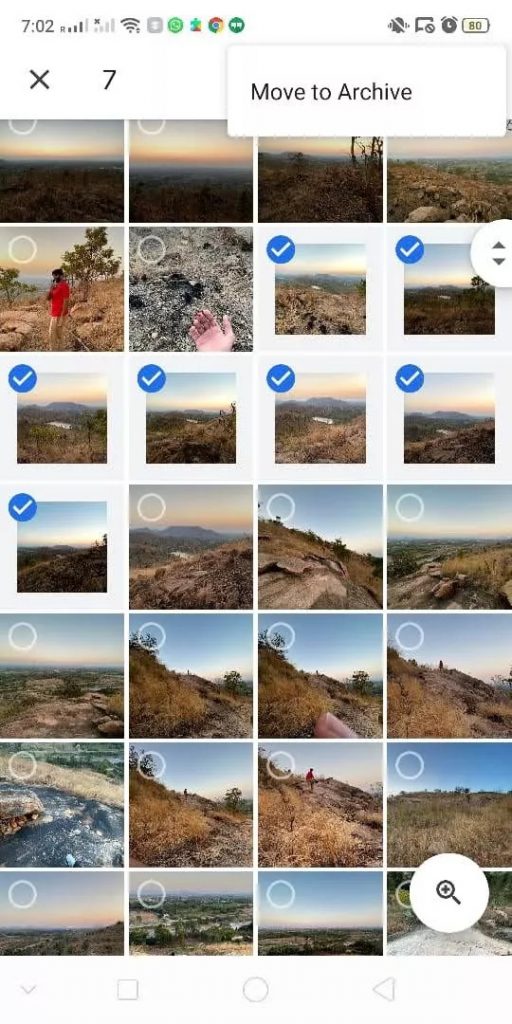
Step 1: Select the image you want to archive by long-pressing it.
Step 2: Tap the icon with three vertical dots in the top right corner.
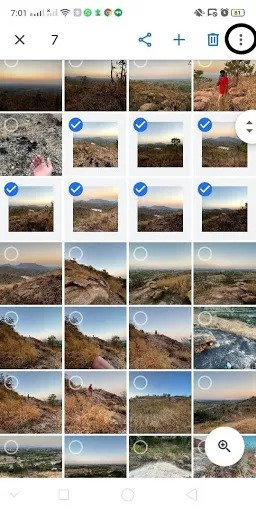
Step 3: Clicking “Move to archive.”
Google Photos Archive
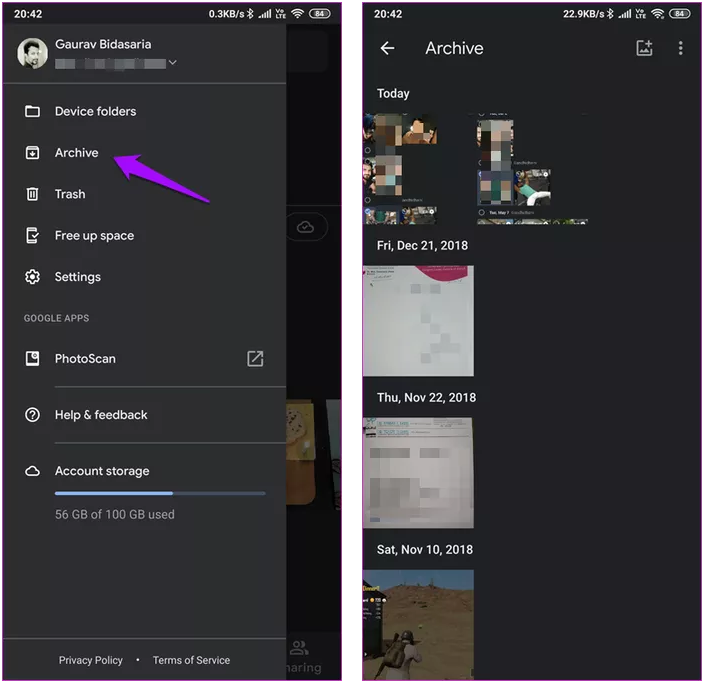
To unarchive the image, you’ll first have to open the Archive folder and select the image. After selecting it, click the icon in the top right corner and choose the Unarchive option. This will move your photos back to their original places on the Photos view.
How To Archive On Desktop
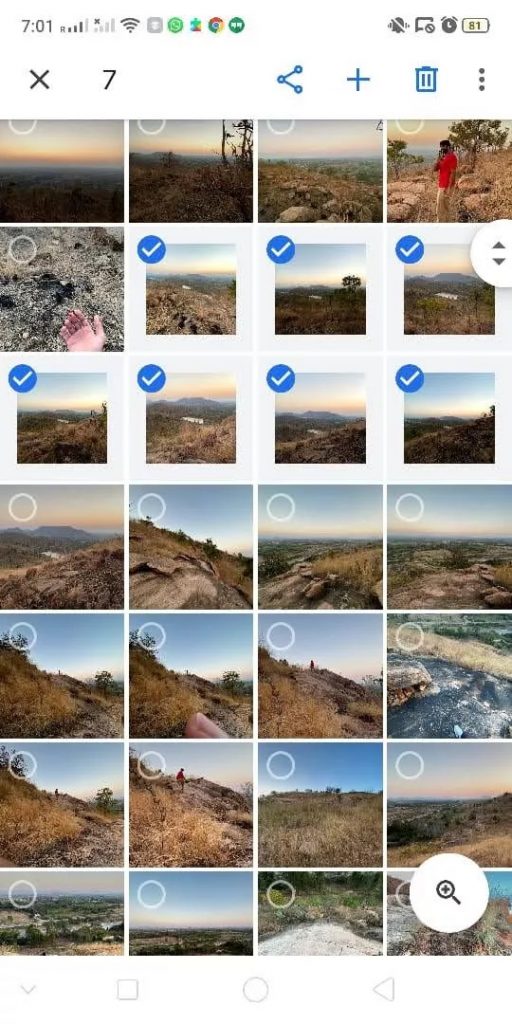
- Select the image you want to archive by clicking the top left corner of the image. A blue tick will appear to let you know it’s selected.
- You’ll find an icon with three vertical dots in the top right corner. Click on it.
- From the multiple options, click on “Archive” to send your selected photos to the Archive folder. Alternatively, you could use the shortcut keys Shift+A to archive the images.
Google Photos Archive
To unarchive the image, go to the Archive folder and select the photos you want to unarchive. Once you’ve selected, you could either hit Shift+A or click on the More icon in the top right corner to unarchive the images. This will move the images to their original place in your Photos view.
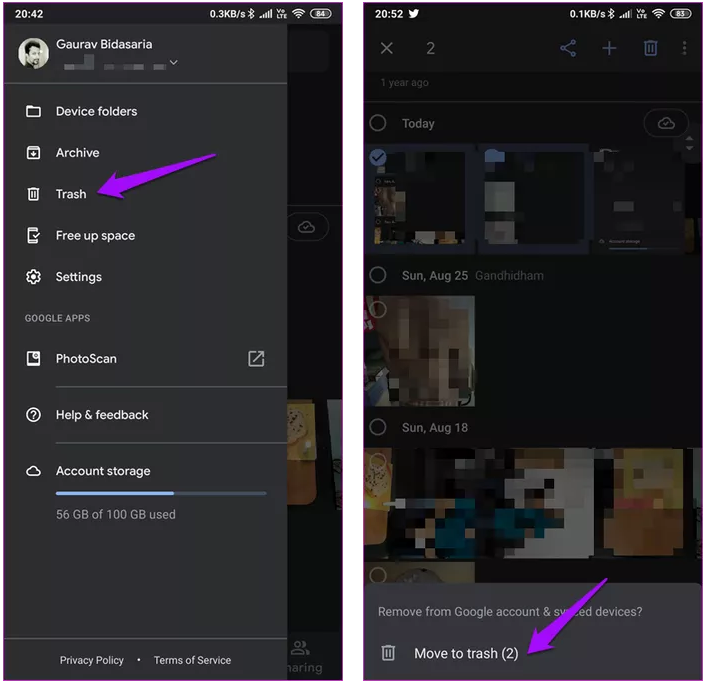
Google Photos Archive Vs. Delete
As mentioned earlier, to archive is not the same as deleting. When you archive a photo, it moves to the Archive section, but when you delete it, it moves to the trash folder, which cannot be recovered. The process remains the same, though. You select one or more photos and select either delete or archive. However, the result is different.
Don’t miss: How To Change Your TikTok Username
Inside Archive
After archiving some photos, you can still add them to an album. That won’t move the images from the archive; instead, they will save in two places. You can do that by tapping to open the image and scrolling a little to find some new options. For example, you can save the image to a device or create a slideshow. Some handy meta details are available here like location, pixel, shutter info, size, aperture, and more.
Google Photos Archive
However, archived photos consume a lot of space. If you own a Pixel phone, you can store photos in Original Quality for free forever. You will need to upgrade your Google Drive plan to save photos in Original Quality for other smartphone owners. Images saved in High Quality are free for all smartphone users.
Editor’s picks:

Daniel Barrett
Author
Daniel Barrett is a tech writer focusing on IoT, gadgets, software, and cryptocurrencies. With a keen interest in emerging technologies, Daniel offers expert analysis and commentary on industry trends. Follow him for authoritative insights into the latest tech innovations.
Latest Articles
Popular Articles