How To Install An M.2 SSD: A Step-By-Step Guide
In this guide, we'll explain step-by-step how to install an M.2 SSD on your PC. Click on the link to read full article...
Author:Daniel BarrettMay 23, 202222600 Shares706239 Views

How To Install An M.2 SSD– Adding a solid-state drive (SSD) is the best way to improve a computer’s performance. The rising popularity and falling prices of a new style of SSD have everyone trying to jump on the bandwagon. But don’t act too hastily as not all computers can accept this latest generation of blazing-fast storage.
The M.2 SSD is a thing of beauty. Although the traditional SSDs still require lots of wires and physical space, an M.2 SSD is a tiny device that fits in the palm of your hand and attaches directly to your motherboard. While these efficient little components don’t come cheap, they can help keep the inside of your desktop nice and neat. That means less clutter, more efficient airflow, and better performance. Or, at the very least, fewer ways to cut your fingers when you install new hardware.
The even better newsis that M.2 SSDs are ridiculously easy to install — provided you have the right tools and a little bit of patience. If you can afford one of these sleek storage units, your computer will load up files almost instantaneously for a long time to come.
Before we begin
Before you rush to buy an M.2 SSD, first make sure your PCis compatible with this type of storage. Only the latest generation of motherboards can accept this new style of SSD, which was initially used primarily in laptops.
Look for an M.2 connector on the motherboard — it’s a horizontal slot about an inch wide, usually labeled with “PCIe” or “SATA” or both. Take note of what’s on the label because you’ll need to buy a matching M.2 SSD; a PCIe device won’t work on a SATA connection.
Every manufacturer places the M2 connection in a slightly different area, so look carefully in the motherboard’s middle and lower right section. If you don’t see a connection like this, your motherboard does not support the M.2 form-factor, and you should stick with 2.5-inch SSDs.
Buy the Correct Type of M.2 SSD
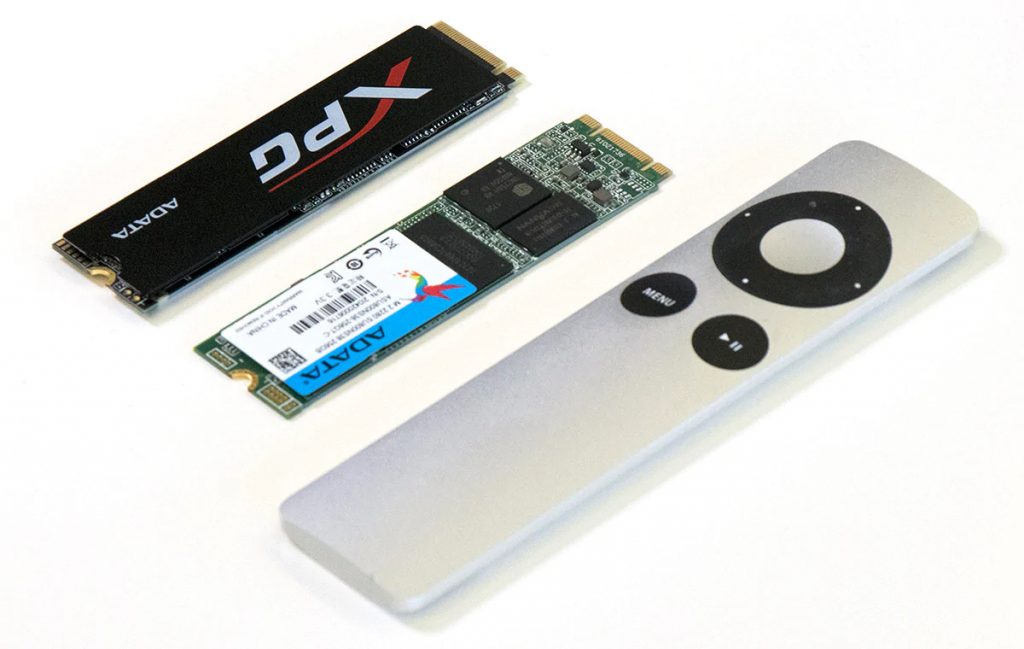
What’s not immediately apparent when shopping for these new SSDs is that “M.2” refers to a form factor — in this case, it looks like a stick of Wrigley’s chewing gum.
And the way an M.2 SSD communicates with the computer, along with its maximum read/write speed, is identified by technology standards called “PCIe” and “SATA.” Of course, PCIe is faster than SATA, but both are great upgrades for any computer, and Slickdeals often features deals for both PCIe M.2 SSDs and SATA M.2 SSDs.
Remember how you identified the type of M.2 slot on your motherboard? Next, you’ll want to buy a matching SSD (PCIe or SATA) for that connection.
If you’ve already purchased an M.2 SSD and aren’t sure which version you have, the quickest way to find out is to look at the notches on the connector.

A PCIe M.2 SSD has a single notch on the right side, while a SATA M.2 SSD features two notches.
Step 1: Crack open your PC
The first thing you want to do is unscrew or unhitch the side of your case, and make sure you can access the motherboard.
Step 2: Figure out your heatsink situation
Some M.2 SSDs come with heatsinks, while some don’t. That’s pretty much the case with motherboards too. If you don’t have any heatsinks, consider buying some third-party models. Depending on what you do with your SSD, a heatsink may not be strictly necessary, but you can get an excellent model for $25 or less, and that’s an awful lot cheaper than a new SSD.
If your motherboard has heatsinks built in, you’ll need to remove one before adding an M.2 SSD. Just unscrew one and put it off to the side for now.
Step 3: Remove the mounting screw from the M.2 slot.
Step 4: Carefully insert the M.2 SSD
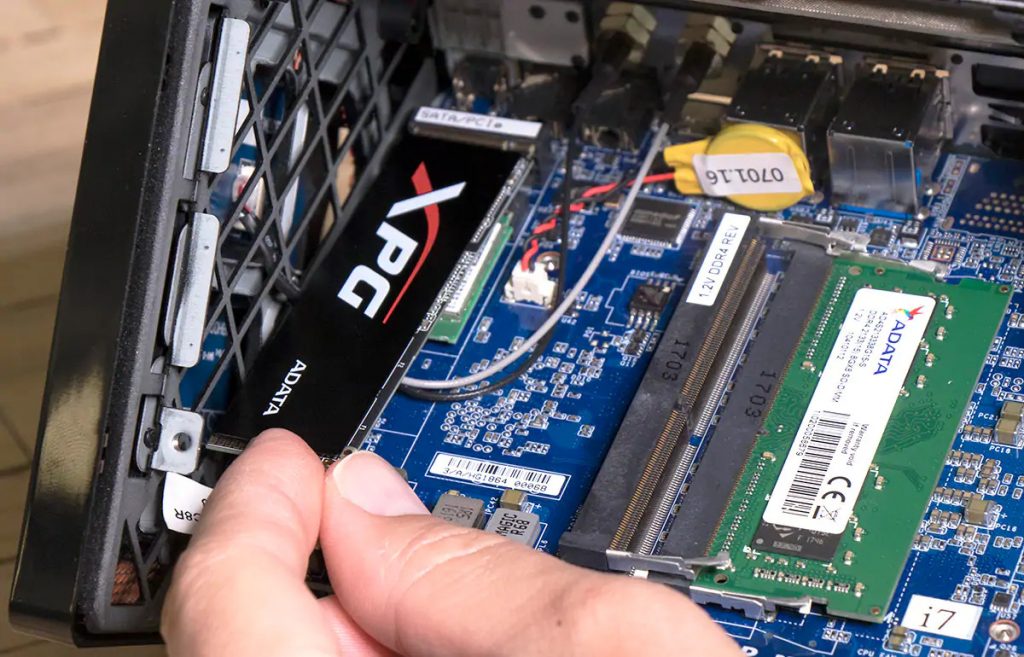
Gently push the M.2 SSD into its slot, paying attention to the notch. The SSD will naturally stand at an angle when inserted — this is normal.
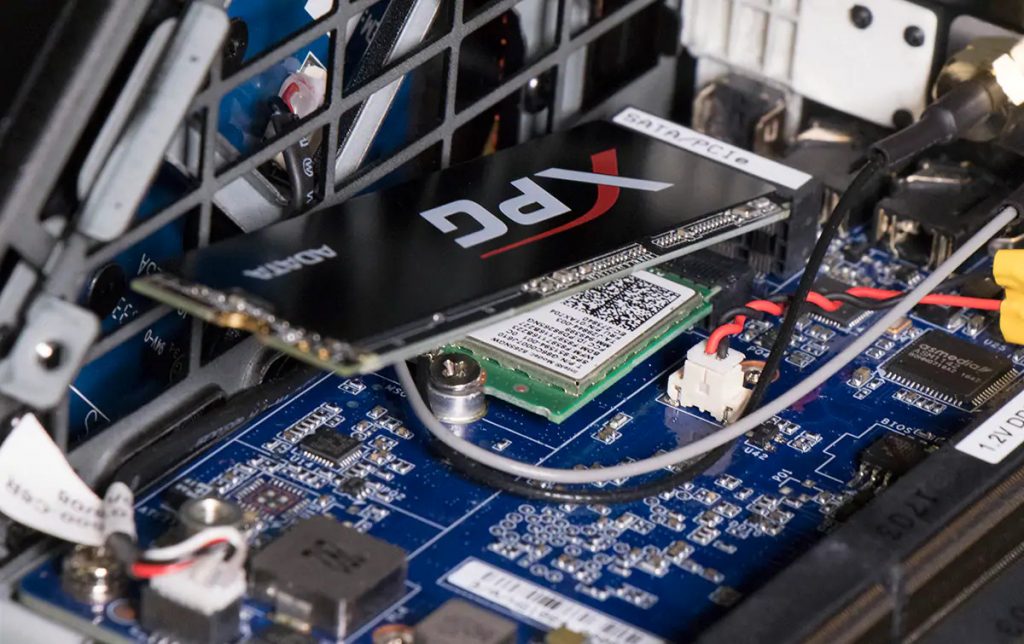
Step 5: Secure the M.2 SSD using the mounting screw
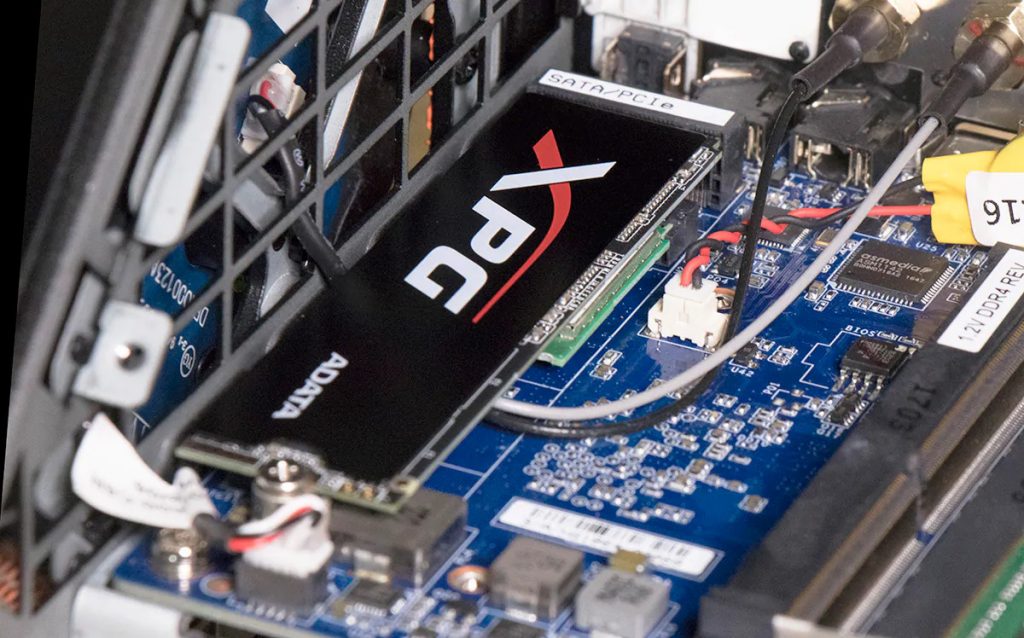
Press down and hold the M.2 SSD while you replace the mounting screw that you removed in Step 3. This will secure the SDD in place. That’s it! Your new M.2 SSD is now installed.
You don’t necessarily want to close your computer at this point in case you need to tinker with the hardware while troubleshooting. But you do need to get it up and running; the physical installation is now done.
Next Step: Install Windows 10 on an M.2 SSD
Make Sure Your Computer recognizes the M.2 SSD
After you’ve installed the M.2 SSD, the final step is making sure your computer recognizes it as a new storage device. Some motherboards will automatically detect an M.2 SSD, but when that doesn’t happen, you’ll need to tell BIOS that an M.2 device is connected manually.
During the boot-up process, hold “Delete” to enter BIOS. Each manufacturer’s BIOS menu is a little different, so I’ll generally explain what you need to do, and then you can look for similar wording in your system menus.
In BIOS, go to Advanced settings, then go to Onboard Devices Configuration.
Look for the PCI Express X4_3 Slot Bandwidth section and set the option to “M.2 Mode“.
And that’s all you have to do! Your computer is now running off of an M.2 SSD, one of the fastest, most reliable forms of storage. The difference in load speeds is particularly noticeable in high-end video games, so feel free to give those a try if your GPU is up to it.
Editor’s picks:
Jump to
Before we begin
Buy the Correct Type of M.2 SSD
Step 1: Crack open your PC
Step 2: Figure out your heatsink situation
Step 3: Remove the mounting screw from the M.2 slot.
Step 4: Carefully insert the M.2 SSD
Step 5: Secure the M.2 SSD using the mounting screw
Next Step: Install Windows 10 on an M.2 SSD
Make Sure Your Computer recognizes the M.2 SSD

Daniel Barrett
Author
Latest Articles
Popular Articles