How to Fix the Windows Stop Code Memory Management BSOD
This article discusses the causes of Memory Management Error BSoD in Windows 10 and how to fix the issue. Click to read more.
Author:Daniel BarrettJun 24, 202210599 Shares353292 Views
Unlike older versions of Windows, Windows 10 is remarkably stable. Long gone are the old Blue Screen of Death (BSOD) errors, but that doesn’t mean they’re gone for good. Windows will still throw a BSOD error your way when it detects problems, such as a Windows stop code memory management error.
Windows 10 throws up a dazzling array of error messages and stop codes when things go wrong. When a bluescreen of death (BSOD) error hits, you can use the Windows 10 stop code to pinpoint and fix the issue.
What Causes the Windows Stop Code Memory Management BSOD?
The Memory Management error hints at a severe problem with your PC’s system and memory. The system-side problem is usually hardwarerelated, but may sometimes be a software-related problem. In rare cases, the error may indicate firmware issues.
So, your computer has a memory problem. This could either be a one-off occurrence, or a severe memory management issue. The possible causes specific to the MEMORY_MANAGEMENT stop code are:
A one-time memory error
- Software issues, including corrupted files in the system directory
- Software or hardware conflict
- RAM errors, faulty physical memory sticks
- Issues with new hardware, for example, a graphics card
- Outdated hardware or hardware failure
- Faulty drivers, missing or outdated
- Disk errors
- Firmware, virus, or malware infection
- Outdated Windows 10 OS
These are some of the known possible causes of the memory management BSoD error, but they are not the only possible ones. You could encounter the error due to a different reason within your system. Even if you’re reading with a unique case, our methods aim to help you restore your computer at all cost.
Restart Your Computer
Have you tried switching your computer off and turning it back on again? This simple fix can fix all manner of Windows 10 issues, including the Windows 10 memory management stop code.
Scan Your PC for Possible Virus or Malware Infection
One of the leading causes of computer problems is malware infection. Malicious scripts and applications are capable of causing irreversible harm to one’s device. Although a rare occurrence, the memory management error may be a result of a virus operating in your system.
Scan your system with a quality antivirus program. If you don’t have a third-party antivirus program installed on your PC, use the built-in Windows Defender.
- Open the search bar in your taskbar by clicking on the magnifying glass icon. You can also bring it up with the Windows+ Skeyboard shortcut.
- Type in Windows Securityand launch it from the search results.
- Switch to the Virus & Threat Protectiontab using the home screen or the menu in the left-side pane. Click on the Scan Optionslink.
- Select the Full scanoption. This is going to check every single file on all of your drives to ensure no threats can hide. Take note that this scan may last over 1-2 hours, depending on how many files you have on your system.
- Click on the Scan nowbutton to begin the scan. If a threat is detected, Windows 10 will automatically quarantine or remove it entirely. You can review the scan results afterward to see what infected files were removed.
Update Windows 10
The first thing to do is to check that Windows 10 is completely up to date. Outdated system files can cause unexpected errors. Checking for a pending update is a quick and easy way to figure out if that is causing your issue.
Hit Windows key + Ito open the Settings panel. Now, head to Update & Security, then check under Windows Updatefor any pending updates. If there is an update, save any important files, then press Restart now. Your system will reboot during the process.
Check for Corrupted System Files
If your PC is up-to-date, then consider whether corrupt system files are causing problems with memory management on your PC. You can quickly check your PC for corrupted system files using the sfc command, which you can run from an elevated command line or PowerShell terminal.
- Start by right-clicking the Windows start menu and clicking PowerShell (Admin). In the open PowerShell window, type sfc /scannowand hit enter.
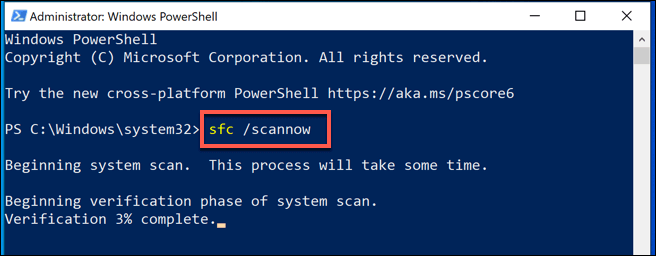
- Wait for the process to finish—this may take a few minutes, or longer, depending on your PC. If any errors are detected, these will be fixed (where it’s possible to do so).
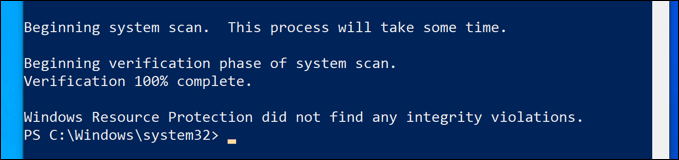
If there are no issues with your Windows installation detected, you can verify that your drive has no file system errors using the Check Disk utility (chkdsk).
- In the open PowerShell window, type chkdsk /rand hit enter. You’ll be asked if you want to run this check when you next reboot—press Yon your keyboard to confirm, then restart your PC.
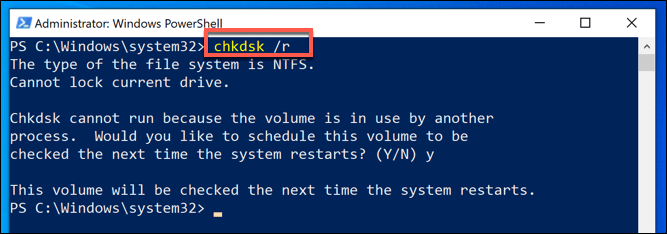
Once restarted, your PC should begin the check of your hard drive, repairing any issues it detects.
Run The Windows Memory Diagnostic Tool
The Windows Memory Diagnostic tool is a Windows built-in tool to help find and resolve system errors related to Windows memory. It will test your RAM and inform you if there are any issues that are affecting its functionality.
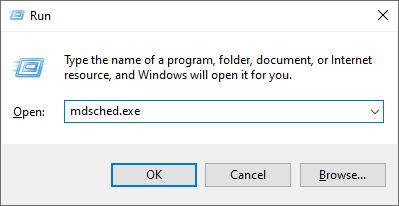
- Press the Windows+ Rkeys on your keyboard to bring up the Run utility. Here, simply type in “mdsched.exe” and press the OK button.
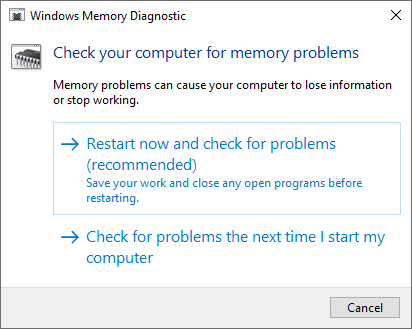
- Choose “Restart now and check for problems (recommended)” to instantly begin a memory scan. Make sure to save any files and close all open applications before clicking on this option.
- Alternatively, choose “Check for problems the next time I start my computer” and restart the device at a more convenient time.
- The Windows Memory Diagnostics Tool interface will then show up and automatically start testing your PC’s memory problems. The process may take a few minutes, so you should be patient and let it run till completion and display the test results.
If the Windows diagnostic tool doesn’t find or display any errors now or the next time you log on), chances are your PC’s memory is fine. In this case, proceed to the methods below to continue investigating the error.
Run MemTest86
Windows Memory Diagnostic doesn’t show any errors. But you’re sure the issue relates to your system RAM. If that’s the case, you can use MemTest86to perform an in-depth memory test.
MemTest86 is a free, standalone memory testing tool for x86 machines. You boot MemTest86 from a USB flash drive (or bootable disc) and leave it to check your system RAM. Now, a MemTest86 RAM check takes a long time to complete; a single pass takes hours, depending on the amount of RAM you have installed.
Update Your Drivers
Another quick and handy potential fix is to update your system drivers. New software or hardware may come with new drivers, and your system might not have got the message. Driver faults are less common than in the days of computingyore, especially as Windows 10 now handles driver updates, by and large. But that’s not to say they don’t happen.
- Press Windows Key + Ito open the Settings panel, then select Update & Security > View update history. You can find any driver updates here.
- Now, type device managerin the Start menu search bar and select the Best match. Go down the list and check for an error symbol. If there is nothing, your driver status is likely not the source of the issue.
That said, you can use a third-party tool to update all of your system drivers simultaneously. Check out this list of free tools you can use to fix the majority of Windows problems. The first two options—IOBit’s Driver Boosterand Snappy Driver Installer—do exactly this.
Scan and Repair Disk Errors
To scan and repair a disk error, run the Check Disk (chkdsk) command. Disk errors can be caused by hardware issues, such as bad disk sectors or corruption in the NTFS volume. All of these can result in the MEMORY_MANAGEMENT blue screen error. The chkdsktool will identify and repair these errors, fixing the Blue Screen of Death.
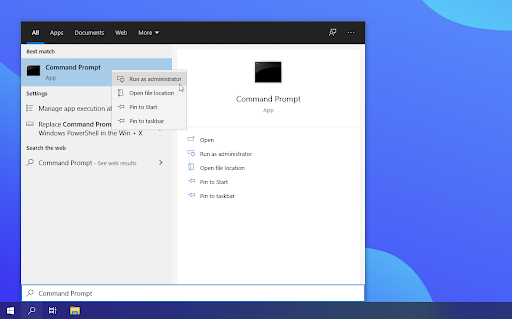
- Open the search bar in your taskbar by clicking on the magnifying glass icon. You can also bring it up with the Windows+ Skeyboard shortcut.
- Type Command Promptin the search box. When you see it in the results, right-click on it and choose Run as Administrator.
- When prompted by the User Account Control (UAC), click Yesto allow the app to launch with administrative permissions.
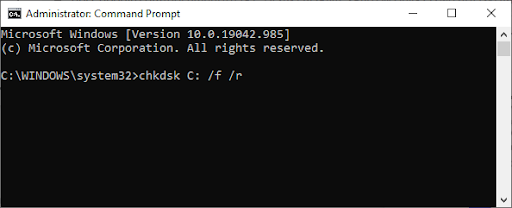
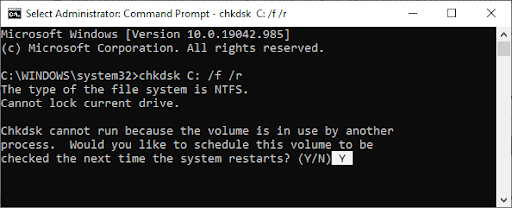
- Type chkdsk C: /f /rand press Enter. This command scans and repairs any errors in the C: drive. To check other disks, you will need to replace the C: with the other disks’ entry letter.
- You may see the “Chkdsk cannot run because another process uses the drive” error message. In this case, press Y, and then press Enter. Chkdsk will automatically scan and repair bad sectors the next time you boot the system.
- Chkdsk cannot run because the volume is in use by another process
- Restart your device. Wait for the Check Disk command to finish analyzing your system. It’ll attempt to fix issues with the drive and recover any readable information.
Update Your GPU Drivers
A common theme throughout Memory Management BSOD threads and forum posts is that, at times, outdated or brand-new GPU drivers can cause the BSOD. Although the focus is on the memory management stop code, there is a video memory management-specific stop code too. The video memory management internal stop code is 0x0000010E and may indicate a faulty GPU driver.
To update your GPU drivers, you need to head to the manufacturer’s website and download the latest update. For the majority of users, that’s either Nvidia or AMD.
If you’re unsure what GPU you are using, type dxdiagin your Start Menu search bar and select the Best Match. When the DirectX Diagnostic Tool opens, select the Display tab. You’ll find your GPU listed here.
Reset Windows 10
Software checks aside, a corrupted PC can sometimes only be resolved by resetting or reinstalling Windows to return it to a blank slate, where any unknown software issues are wiped away. This is the last resort, but it may be your last option before you consider replacing your hardware completely.
Thankfully, Windows offers a built-in reset facility as an alternative to a full reinstallation, although you can reinstall Windows entirely using a USB drive or DVD if you’d prefer.
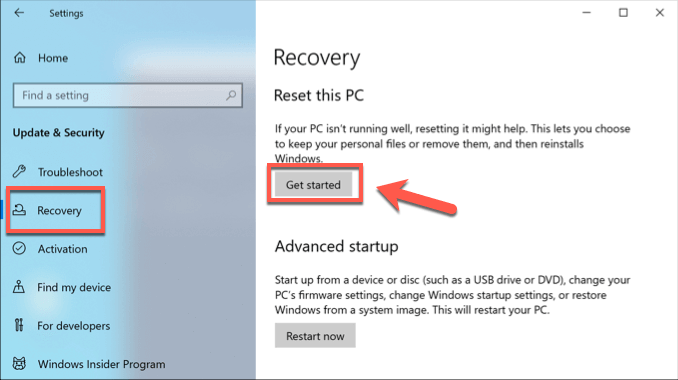
- To reset Windows, right-click the Start menu and press Settings. From here, press Update & Security > Recovery > Get startedto begin the reset procedure.
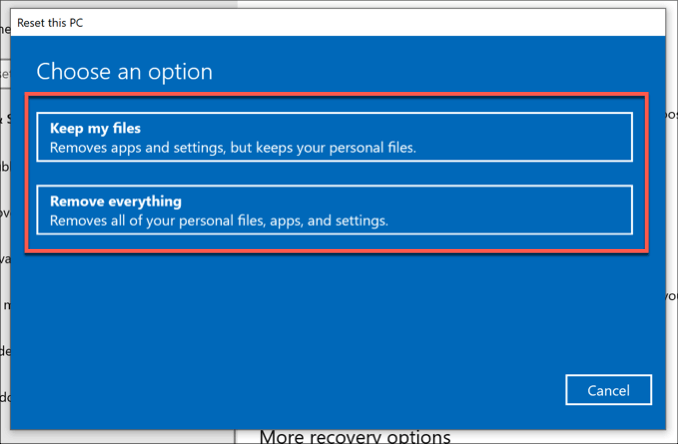
- At the next stage, click Keep my filesto keep your documents and desktop files safe, or press Remove everythingto wipe your Windows installation completely and reset it to a factory default.
Editor’s picks:
Jump to
What Causes the Windows Stop Code Memory Management BSOD?
Restart Your Computer
Scan Your PC for Possible Virus or Malware Infection
Update Windows 10
Check for Corrupted System Files
Run The Windows Memory Diagnostic Tool
Run MemTest86
Update Your Drivers
Scan and Repair Disk Errors
Update Your GPU Drivers
Reset Windows 10

Daniel Barrett
Author
Latest Articles
Popular Articles